
This easy Sourdough Bread Recipe will turn you into an instant kitchen superstar! With just 3 ingredients and 20 minutes of hands-on time you can create a gorgeous, handcrafted loaf of fresh sourdough bread! Perfect for beginners to pros, THIS is the recipe that will make you famous!


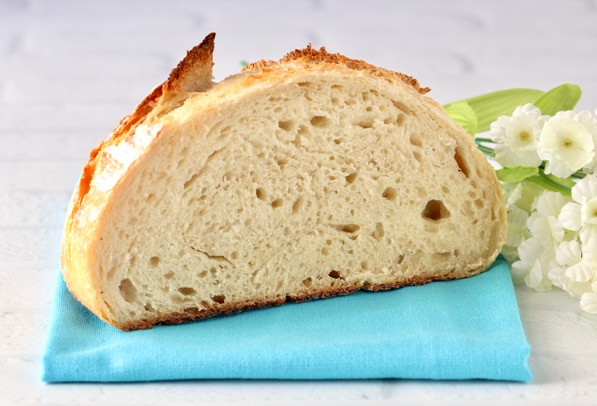
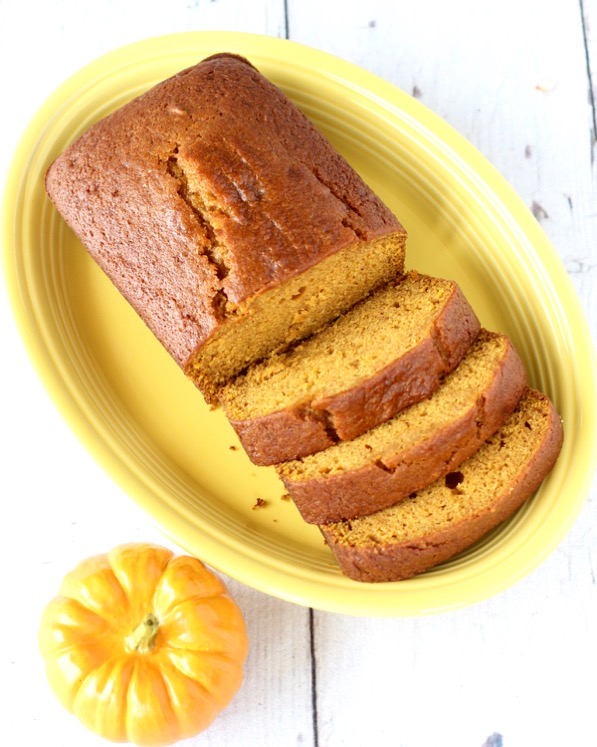
There’s nothing quite as glorious as a fresh-baked, golden crusty loaf of artisan sourdough bread, right?
And with this simple sourdough bread recipe, I will show you step-by-step just what you need to do to become an AMAZING sourdough bread baker!
Molly writes: "Love how easy this recipe is."
I like to think of baking sourdough bread as an art. Sure it might take a bit of practice, but it’s SO worth it!
To make the sourdough bread making process as simple as possible, I’ve tried to included all the best hints, shortcuts and tricks to save you time and work! For instance, I will show you how to easily create own Sourdough Starter from scratch!

Now the entire process of baking a loaf of sourdough bread does take a bit of time, but don’t worry… most of the time is just allowing the dough to rise.
In fact, the actual hands-on time for working with the dough is actually quite minimal.
So my suggestion to you is… if you’re an early riser, start the process early in the morning.
Or if you’re a night owl (like I am), start the process with feeding your starter in the late afternoon, starting the dough in the late evening, and letting the dough do its extended rise overnight.
Plus, as if you needed any more reason to learn how to make your own sourdough bread at home, let me just say… your home will smell glorious as your sourdough masterpiece bakes!
Just like when you bake up a loaf of this fabulous Artisan Bread Recipe, wonderful Honey Wheat Bread, and lovely Cranberry Walnut Bread, too.
Seriously ~ the amazing smell will make you feel like you’re visiting the most amazing bakery, even though you’re just standing in the kitchen with a huge grin on your face!
Of course once your heavenly loaf finally makes its grand entrance… there’s still one last thing you need to do!
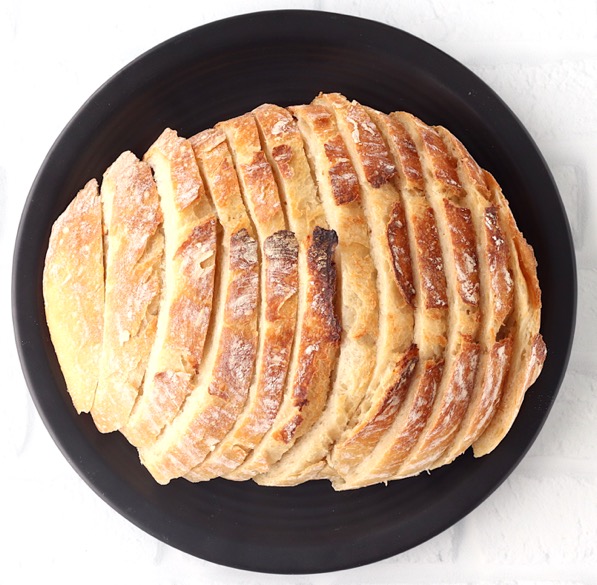
You need to slice it up into the most scrumptious sourdough sandwich bread imaginable. But of course you don’t stop there… oh no! Because you then proceed to make the World’s BEST Sourdough French Toast or Sourdough Grilled Cheese Sandwich EVER! Trust me, sourdough is the ultimate upgrade for French toast and grilled cheese sandwiches!
So do yourself a massive flavor favor today… get your sourdough baking ASAP!
You can get it started with these simple ingredients…

Ingredients
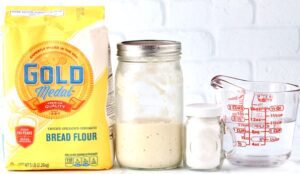
You’ll just need these 4 simple ingredients to bake up the BEST sourdough bread recipe…
- Bread Flour
- Active Sourdough Starter (I recommend using my quick and easy homemade Sourdough Starter Recipe)
- Sea Salt
- Warm Water
Like with all of my Dutch Oven Bread Recipes, you’ll also need a 5 – 6 qt Round Enameled Dutch Oven to bake up this dutch oven sourdough bread recipe.
What Kind of Flour is Best for Sourdough Bread?
When it comes to baking this sourdough bread recipe, I highly recommend using Bread Flour.
It will give you a much better rise on your loaf. And if you don’t have any bread flour, I’ll show you below how to make it yourself!
How do you Make a Loaf of Bread Taller?
With this sourdough bread recipe, making your loaf of sourdough bread taller is simple! Here’s what you need to remember…
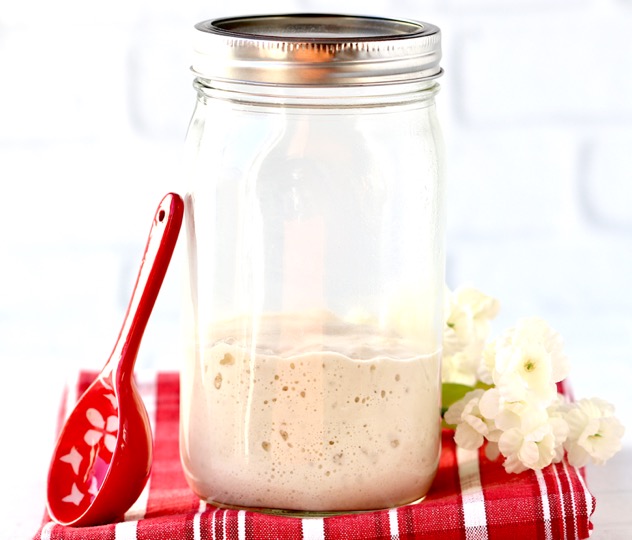
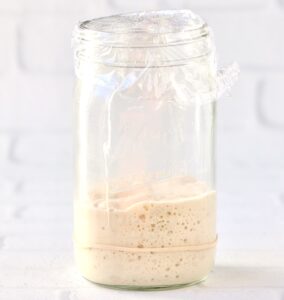
1. Start with a happy, bubbly Starter Dough for Sourdough.
2. Always Use Bread Flour.
3. Be Patient, and let that dough rise.
4. Stretch and fold your dough to add more volume.
It’s a long process to create a gorgeous tall loaf of genuine sour sourdough bread, but most of it is just waiting for the rise.
Then my two other tricks are to always use bread flour, and to give the dough several stretch and fold motions to add height and more glorious air pockets.
Can you Make a Bread Flour Substitute?
You sure can, and it’s SO easy!
Bread flour can be expensive, so here is a simple substitute for bread flour…

How to Make Bread Flour with All Purpose Flour
To make your own bread flour for this sourdough bread recipe, you’ll just need the following two ingredients…
- 3 Cups All Purpose Flour
- 1.5 tbsp. Vital Wheat Gluten
Then, in a large mixing bowl, just whisk together the all purpose flour and vital wheat gluten, and you’ve got the bread flour you’ll need for this sourdough bread recipe!
Talk about EASY!!!
So are you ready to make your perfect loaf of sourdough bread?
Here’s what you need to do…
How to Make Sourdough Bread
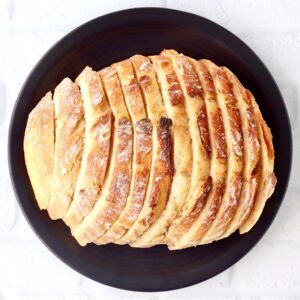
Nothing beats a perfect loaf of sourdough bread with a golden, crispy crust… and it’s actually SO simple!
Just follow these simple step-by-step instructions to make this simple sourdough bread beginner recipe…
1. Make the Dough per the instructions in the recipe card below.

2. Then simply wait while your dough rests.
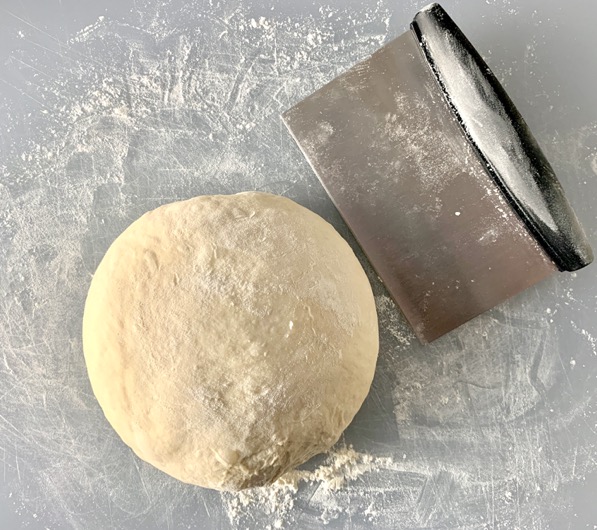
3. After the dough has rested for 1 hour, form your dough into a round ball.
4. Then cover the dough and let it rise.
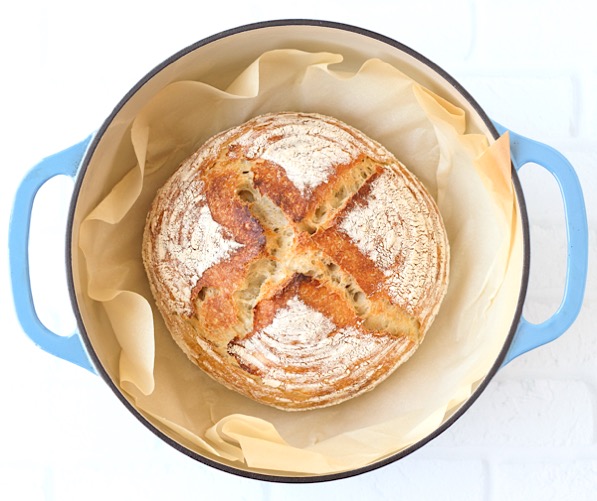
5. Transfer the dough to a banneton basket to finish rising, then place in dutch oven and score the top.


6. Finally, use my sourdough bread recipe instructions below for how to bake it in the oven.
7. Once done… cool, slice, serve & ENJOY!
That’s it. So simple. Homemade bread recipes don’t get much EASIER than this!
Scroll down for the printable sourdough bread recipe card with detailed, step-by-step instructions.
What To Serve With Your Loaf of Sourdough Bread
Trust me, you can actually make this sourdough bread recipe even better when you give your fresh baked sourdough the perfect finishing touch. So consider slicing it up and dunking it in this Dipping Bread Oil as a lovely dinner side.
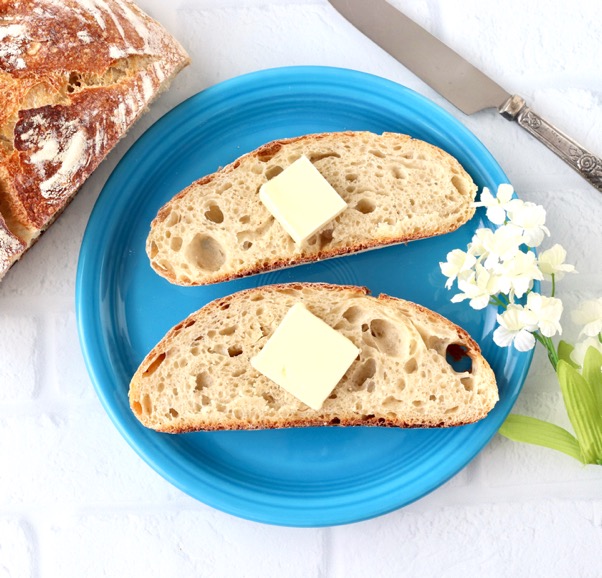
You also owe it to yourself to slather it with some Honey Cinnamon Butter, Cinnamon Brown Sugar Butter or lovely Maple Butter. These flavored butters will make your sourdough EXTRA amazing!
But that’s not all… oh no! Because then you need to take your sliced sourdough sandwich bread… and pile it high with some Strawberry Freezer Jam and Homemade Peanut Butter to create the most incredible peanut butter and jelly sandwiches ever!
Sourdough Bread Recipe Reviews
Here’s what your frugal friends are saying about baking up the easiest sourdough bread recipe for beginners…
One reader writes: “Perfect crust, I definitely love this recipe, and you have made it so easy!”
Christie writes: “Incredible texture”
Jenna writes: “The perfect, most delicious beginner sourdough recipe! Thank you!”
Sandy writes: “Fresh sourdough bread is worth every bit of effort!”
Sherri writes: “Perfect for lunch sandwiches for school and so much better than store-bought.”
Kim writes: “So delish!”
Rebecca writes: “I love that I can make my own. I had no idea it was this easy. This is so much cheaper than buying it, and so much better than store bought! Thanks for the great recipe.”
Easy Bread Recipes for Beginners


Did You Enjoy This Recipe? ⭐️⭐️⭐️⭐️⭐️ Leave a comment & review below!
Sourdough Bread Recipe
Doubling Recipe Tip
If doubling or tripling recipe with buttons below, ingredient notes found after comma will not adjust. Increase ingredients as needed.
Ingredients
- ½ cup Active Sourdough Starter*
- 2 tsp. Sea Salt
- 1 ¼ cup Warm Water
- 3 cups Bread Flour**
- 1/2 tsp. Cornmeal
Instructions
- Gather your sourdough bread recipe ingredients.

- When you're ready to bake your bread, the first step is to feed your sourdough starter. If starter has been stored in the refrigerator, remove from fridge and let it come to room temperature on the counter after feeding for 4 – 6 hours.
- Once starter has come to room temperature, and ‘woken up’ a bit, it’s time to start!

- Add Active Starter and Water to large mixing bowl, and stir with wooden spoon.
- Then add Bread Flour and Sea Salt to bowl, and stir into a shaggy dough. After stirring well with a wooden spoon, get your hands in there to finish combining the dough.
- After mixing all ingredients, cover bowl with plastic wrap, and let dough rest for 1 hour.
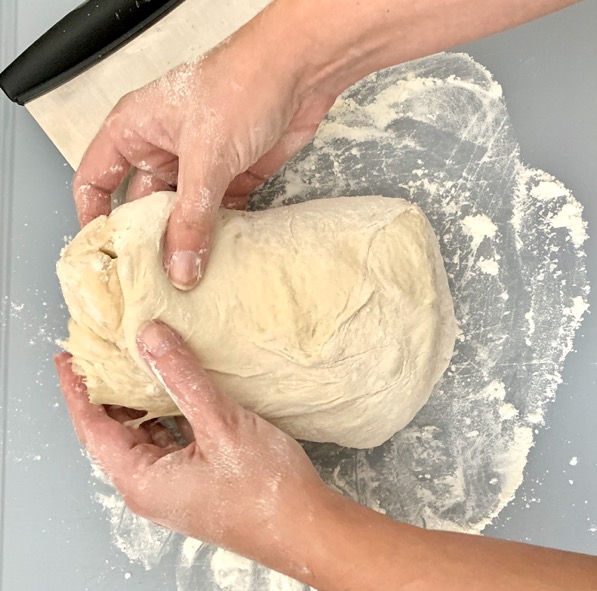
- After 1 hour of resting, remove plastic wrap. To add height and gorgeous air pockets to your finished loaf, it’s time to stretch and fold your dough four times. To “stretch & fold” grab one corner of the dough, pull it up, then fold it over. Rotate the bowl ¼ turn and repeat for a total of 4 times (once on each corner of the dough ball).
- Then cover bowl with a light tea towel or flour sack cloth and let it rise for 8 – 10 hours in a warm area of your home, or until it doubles in size. Keep out of direct sunlight. (If it’s chilly inside, I like to place it in the oven with just the oven light on to add a little warmth, just like we did with our Sourdough Starter.)
- After 8 – 10 hours, lightly flour cutting board or counter and transfer dough to the floured surface by carefully using dough scraper around edges to preserve as many air pockets as possible while removing it from the bowl.
- Brush or spray inside of proofing basket (banneton bowl) with cool water, then sprinkle hefty amount of flour on top, shake it around, and let it dry. Then sprinkle a little more flour in proofing basket and shake again, to make sure it’s well floured.
- Sprinkle top of dough with a little flour, then with well-floured hands carefully shape dough into ball, adding a bit more flour where it’s too sticky to handle. To shape dough, I like to do 4 more stretch & fold motions (1 on each side), then 4 more stretch & fold motions (1 from each corner), then flip dough over (seam side down), and shape into a ball using my hands and stainless bench scraper (dough cutter) to tuck any extra dough on the sides underneath.
- Then, using your bench scraper, carefully place dough ball in proofing basket, seam side UP for the final rise.
- Gently drape towel over proofing basket, and let it rest for 1 – 2 more hours in a warm spot of your home. When dough is puffy and growing, it’s ready to bake!
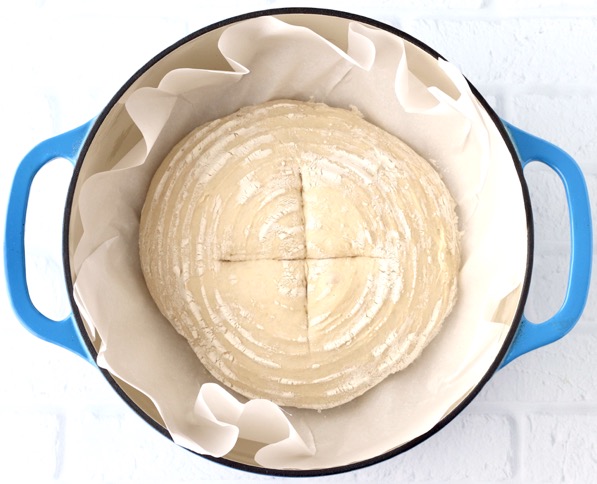
- Now cut out a large rectangular piece of parchment paper to fit inside bottom and sides of 5.5 quart – 6 quart dutch oven, place paper in dutch oven, and firmly press creases along the sides. (This will help the paper not indent into your bread while baking.) Then trim tall edges around the rim so the lid will fit on nicely. Set parchment paper aside for later.
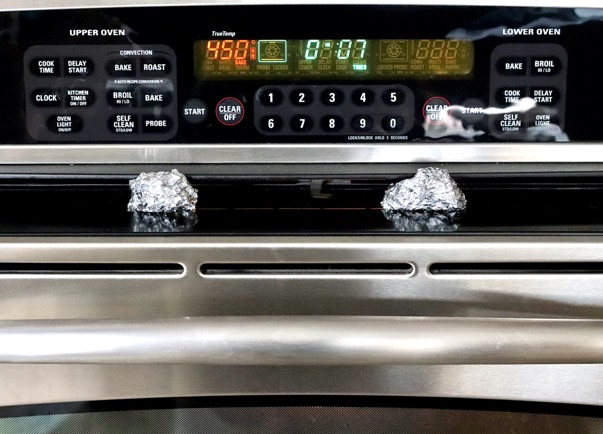
- When dough is ready to bake, preheat oven to 450 degrees.
- Sprinkle top of dough in the proofing basket (which is the seam side up) with cornmeal.
- Then place cut piece of parchment paper over top of proofing basket, and carefully & quickly, flip dough over out onto paper.
- Use a sharp serrated knife to cut two 4″ intersecting lines in the top of the dough, like a plus sign. This will give the finished crust a beautiful and dramatic look, and allow the bread to expand when baking.

- Then transfer to dutch oven and flatten parchment paper creases again.
- Place lid on dutch oven, and bake on center rack for 25 minutes.
- After 25 minutes, remove lid and bake for 25 – 30 more minutes, or until bread is a deep golden brown color. IMPORTANT: For the last 10 minutes of baking, prop the oven door open a crack using two small balls of tinfoil. This will allow some moisture to escape, and help develop a gorgeous crispier crust on your loaf.

- Once it’s done, transfer to wire rack to cool for 1 – 2 hours. (Even though it's hard to wait, allowing it to cool will make sure it finishes the baking process and prevents you from ending up with a gummy loaf.)

- After it has cooled, slice, slather with Maple Butter, build a sandwich, or dip in Bread Dipping Oil… and ENJOY!


Notes
- *Starter: Make sure to feed your starter after you use it, to replace whatever you took out.
- **Bread Flour: If you don’t have bread flour, just whisk or sift together 3 cups All Purpose Flour with 1.5 tbsp. Vital Wheat Gluten.
- FRESHNESS TIP: With this sourdough bread recipe, your bread is best eaten fresh within 48 hours. If storing for use within the next two days, allow to cool completely, slice (or leave the loaf whole and slice as you go), wrap in a flour sack cloth, and place in an old plastic bread bag in the pantry. It’s excellent up to 2 days later and makes AMAZING toast, paninis and grilled cheese. 🙂
- FREEZING TIP: If you’d like to freeze your loaf for later, you can either leave your loaf whole or slice it up now so you can just grab a few slices here and there as you need them. Wrap your cooled loaf in 2 – 3 layers of plastic wrap, then wrap in foil and place in a gallon freezer ziploc bag for up to 2 months. When ready to use your bread, just remove the bag from the freezer and allow to come to room temperature on the counter.
- FAQ’s: For answers to Frequently Asked Questions or tips for common substitutions and variations, please refer to the detailed information above this recipe card.
 Like this recipe? Rate & comment below!


I can’t begin to telly you how helpful this has been for someone who loves making homemade breads, but had failed on the sourdough process. I can’t wait to start, follow all the techniques, start my own sourdough starter and start making this sourdough bread. Also, I never knew about bread flour, wow. So much good information, I am excited to try this!
I can’t wait for you to pop that first gorgeous loaf of sourdough bread out of your oven! It really is quite easy once you know the steps to take!
Can you use a silicone bread sling in place of the parchment paper?
Hi Tammy… I honestly haven’t tested using a silicone bread sling in place of parchment paper in this recipe. The bread bakes at 450 degrees, and I know some bread slings can tolerate that temperature while others can’t. I actually personally prefer the parchment paper for the perfect crust, as bread slings can heat up the bottom crust making it thicker, harder, and sometimes even burning it. Hope that helps! If you do give a bread sling a try with this recipe, let us know how it goes!
I’ve always been intimidated on making sourdough bread but not anymore that I have this easy recipe! The explanation plus the step-by-step instructions give me the confidence to finally make it! Thank you!
It really is easy when you know what to do. I know you’ll love having this fresh sourdough bread baking in your oven!
This recipe sounds amazing with just a few ingredients and fairly easy to make. Nothing beats homemade bread especially out of the oven in the winter.
I totally agree Judee! Nothing beats fresh homemade bread!
I’m hoping to make this recipe this afternoon, do I need to refrigerate my dough at all? Also, how many grams of starter should I use?
Hi Rachael ~ you’ll use 1/2 cup of Sourdough Starter when making the dough. Also, you won’t need to refrigerate your dough, as the dough rises best at room temperature in a warm area of your home. Hope that helps!
I’ve been meaning to try out making sourdough bread!! But first, I need to make the starter haha. I buy a loaf every week, so might as well know how to make what I am buying. I like that it is easy to bake in that pot as well. Love how it turned out!! Thanks for sharing the recipe!
Nancy ✨
You’re very welcome, Nancy! You will LOVE knowing how to make it yourself… we used to buy a loaf every week too, but love having it freshly made at home now. Plus, it saves so much money! 🙂
Love how easy this recipe is. Your bread turned out so amazing! Love the color and the bubbles in there! When I move back from France, I’ll have to make this all the time because I’ll miss the bread here so much.
Aww… thank you, Molly! And yes, you’ll definitely have to make some when you move back. In the meantime, enjoy your time in France! What an incredible opportunity! 🙂
This looks so good! I miss gluten bread so much . I’d love to be able to eat that x
Aww… I’m sorry you can’t, but hope you’ve found some yummy new gluten free treats you love!
My family loves bread, Heidi, so I am super excited to try this recipe. I’ve never been able to get the outside crusty without burning it but that doesn’t stop me from trying. Can’t wait to make this for everyone! Hugs and thank you for the recipe, CoCo
You’re very welcome, CoCo! Hopefully the trick to prop the oven open for the last 10 minutes or so will help. 🙂
J’adore faire mon pain maison, merci pour tes recettes
Belle soirée
De rien… Belle soirée 🙂