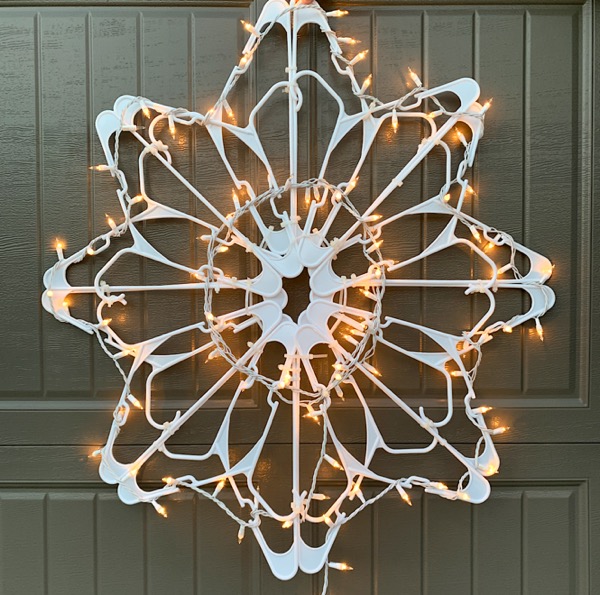
Go grab your extra coat hangers! Today I am going to show you how to make a beautiful DIY Plastic Hanger Snowflake with Lights!
Then… load up on even more creative decorating inspiration with these fabulous budget-friendly Christmas Decorating Ideas!


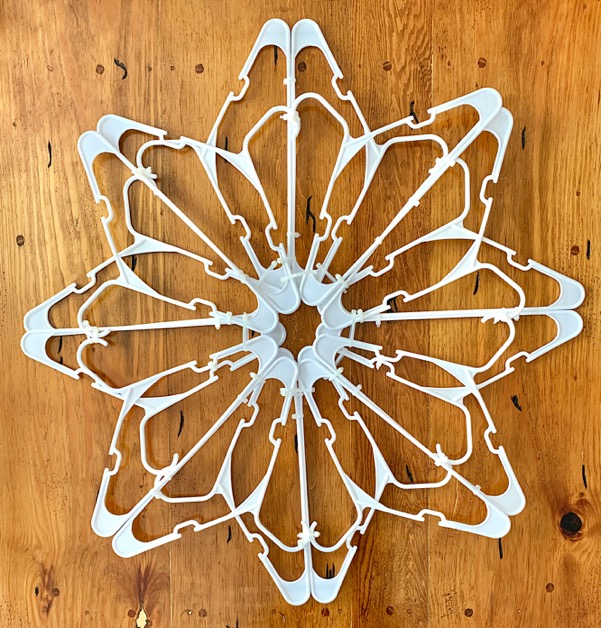
DIY Plastic Hanger Snowflake with Lights
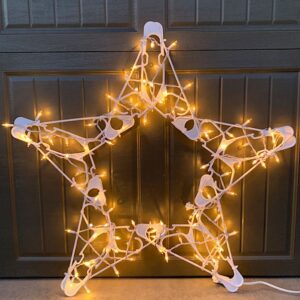
I love how DIY plastic hanger crafts help you transform something ordinary into something beautiful! Previously, I shared with you how to create a DIY Plastic Hanger Star with Lights.
Isn’t it gorgeous?
Now today, this DIY Plastic Hanger Snowflake with Lights is your solution for creating even more fantastic, budget friendly Christmas Decorations.
These beautiful hanger snowflakes are inexpensive to make and create a great looking statement piece for your front yard Christmas light show.
To make your own, all you’ll need are 16 plastic hangers, 30 zip ties, and a string of Christmas lights. Using the large white hangers, this 16 hanger snowflake will measure a generous 3 ft wide x 3 ft wide.
So go ahead and give your outdoor holiday decor a festive, unique upgrade today!
Just follow my easy step-by-step tutorial below to create your very own fabulous large hanging snowflake with lights…
Related: DIY Christmas Decorating Ideas
How Many Plastic Hangers Does it Take to Make a Snowflake?
You’ll just need 16 white plastic hangers to make your light up snowflakes.
You can use regular sized hangers for a large snowflake, or child sized hangers for a small snowflake.
How Do You Make a Snowflake Out of Plastic Hangers?
So how do you make hanger snowflakes with lights? It’s actually SO easy!
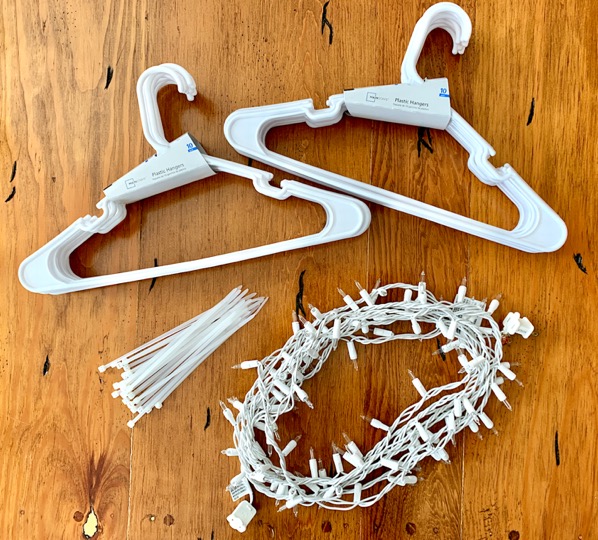
What You’ll Need to Make a DIY Hanger Snowflake with Lights
- 16 White Plastic Hangers
- 30+ Clear 8″ Zip Ties
- 100 strand White Wire Christmas String Along Lights
How to Make Plastic Hanger Snowflakes
Here’s what you’ll do…
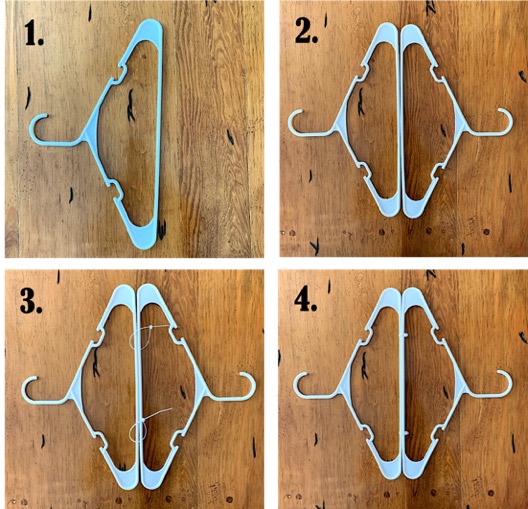
1. First, lay one hanger out in front of you on a flat surface or table.
2. Then, lay a second hanger next to it, mirroring the first hanger’s position. Make sure that the hanger hooks of the hangers are pointed in the same direction.
3. Then, place two zip ties around where the hangers meet.
4. Pull the zip ties tight, and snip off the remaining plastic with sharp scissors or snips.
5. Continue the process until you have made 8 pairs of zip tied hangers.
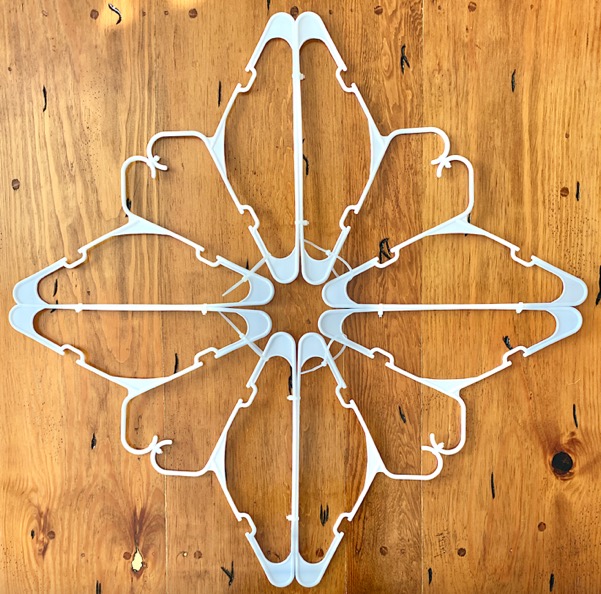
6. Take 4 of your hanger pairs and lay them out in the pattern below…
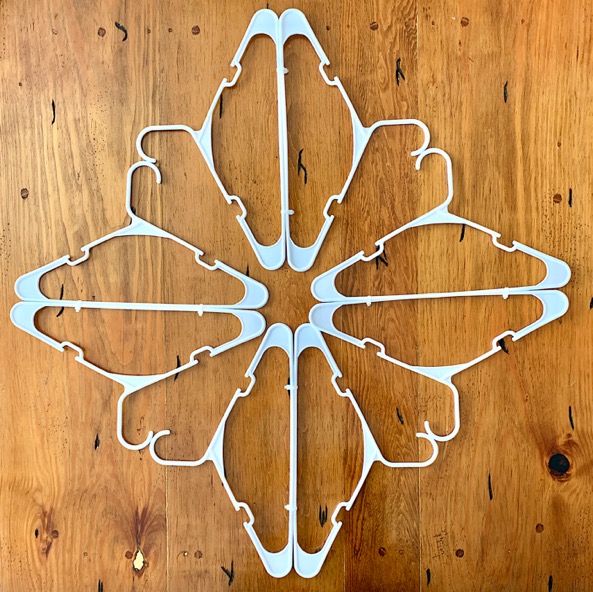
7. Now secure the 4 pairs together where each section meets, using zip ties – first near the hanger hooks, and then again near the center…
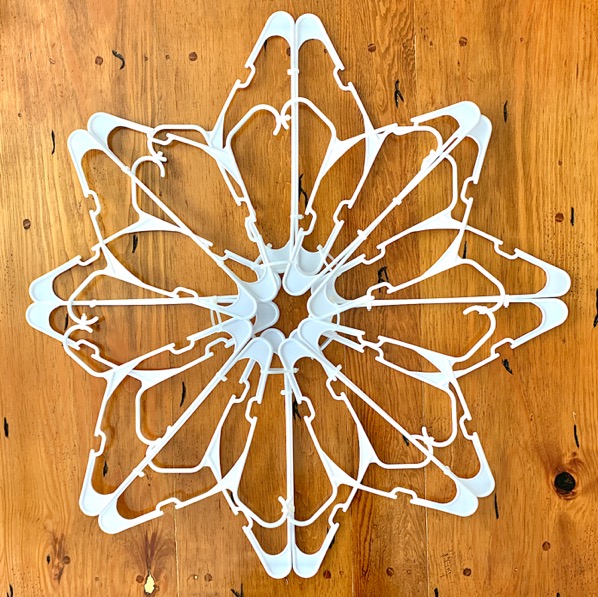
8. Once you’ve tightened your zip ties and snipped off the remaining plastic from the zip ties, repeat the process again with the next set of four hangers.
9. Now that you have two sets of eight secured hangers, it’s time to lay them on top of each other, overlapping the sets slightly to create your snowflake, like this…
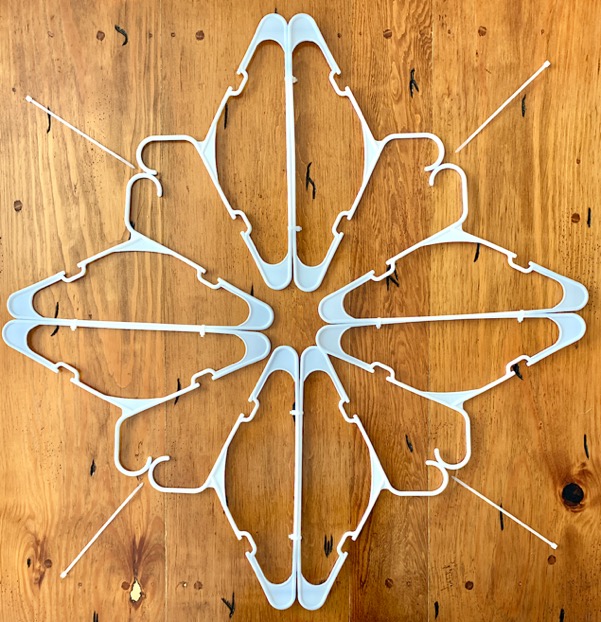
10. Zip tie your complete snowflake together at any loose points to secure the two larger pieces together.
I zip tied at the hanger hooks, and then again in the center of the snowflake…
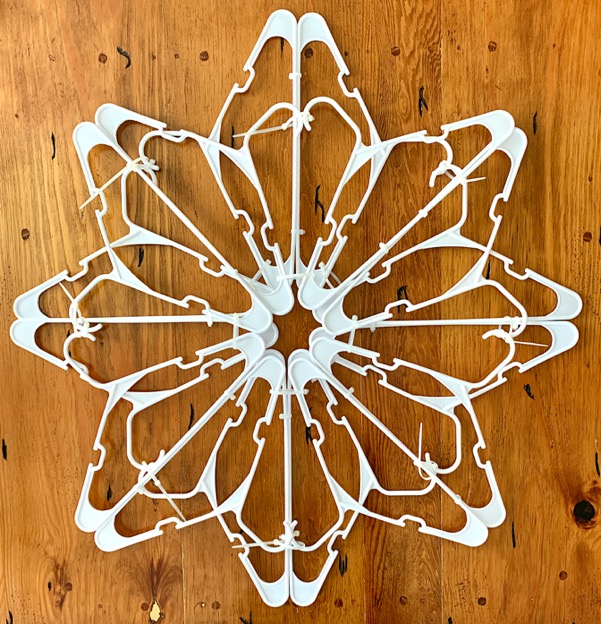
11. If any sections of your snowflake are too loose, simply add more zip ties to secure the loose sections to make your snowflake sturdier.
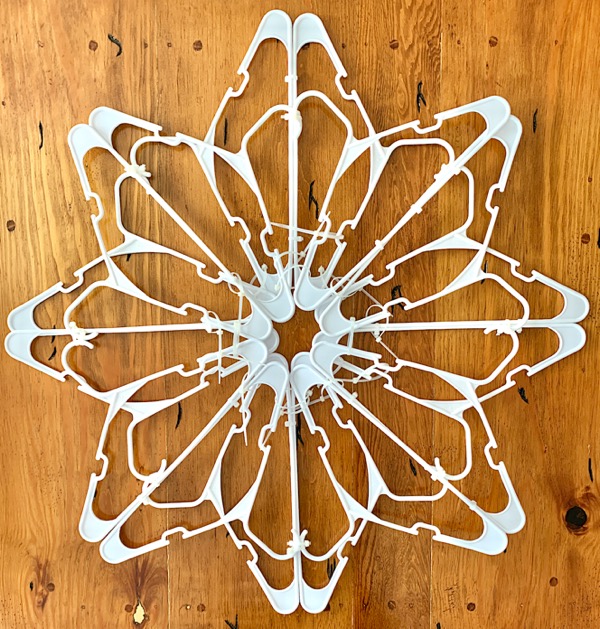
12. Once you’re done adding zip ties, it’s time to string on your lights! Begin with the prong end of the light strand (the end you plug into an outlet), and make sure to leave about 12″+ excess cord at the end so you can easily plug it in later.
13. I started by wrapping my lights around the perimeter of the snowflake first, and then finished by wrapping the remaining lights around the middle portion of the snowflake.
14. Now that you’re done, go display it to your yard, light it up at night, and enjoy your beautiful twinkling snowflake all season long!
More Christmas Decor Craft Ideas
So are you in the mood for more crafting and decorating?
Get ready to load up on even more fun DIY Christmas Decorating Ideas that are easy on your budget too…
DIY Plastic Hanger Star with Lights
Give your front yard Christmas decor a frugal upgrade this year when you make this fabulous plaster hanger star strung with lights!
DIY Tomato Cage Christmas Tree
This year, upgrade your yard decor with a pretty DIY Tomato Cage Christmas Tree!
DIY Wooden Christmas Tree with Lights
Add more Christmas cheer to your front yard when you create some of these festive Wooden Christmas Trees!

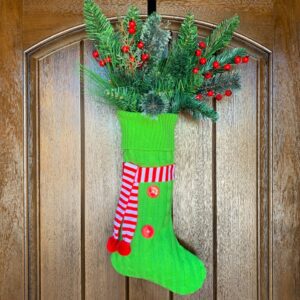
DIY Stocking Wreath
This cheerful Christmas DIY stocking wreath will make such a fun statement on your front door!
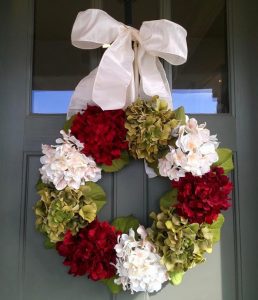
DIY Hydrangea Wreath for Front Door
Check out this EASY step-by-step tutorial to make a gorgeous hydrangea wreath for your front door!
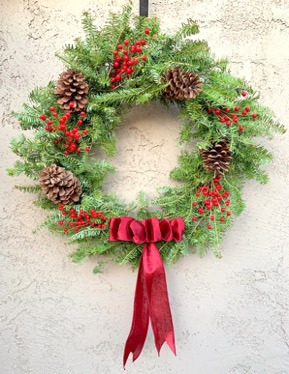
DIY Fresh Christmas Wreaths and Garlands
Learn how to make your own DIY fresh Christmas Wreaths and Garlands with these simple tips and tricks! They’re SO easy to make!!
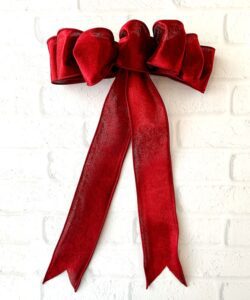
How to Make a Bow for a Wreath with Wired Ribbon
Wondering how to make a bow for a wreath with wired ribbon? This simple step by step tutorial will show you just how fast and EASY it can be!
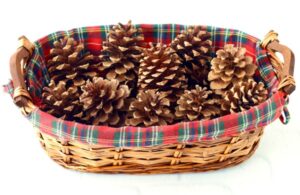
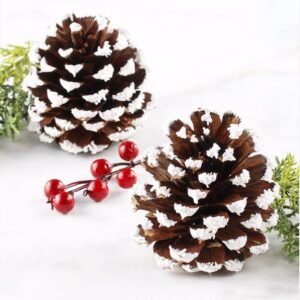
DIY Snowy Winter Wonderland Pine Cones
Snowy Pine Cones are so EASY to make, and make the perfect addition to festive floral bouquets.

DIY Cinnamon Pine Cones
You won’t believe how EASY it is to create your own Cinnamon Pine Cones, and they smell AMAZING!!
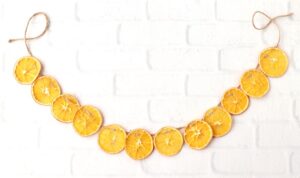
Orange Slice Garland
This pretty garland is so simple to make, and will add such a pretty pop of color to your Christmas decor!
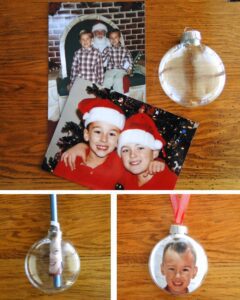
DIY Photo Ornaments
Deck the halls and trim the trees this Christmas with more fun photo ornaments!
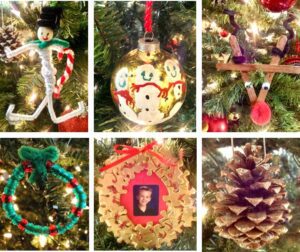
10 Easy Christmas Ornament Crafts for Kids
Nothing beats homemade ornaments by the kids. These are my favorite ornaments that I’ll treasure forever!
27 Elf on the Shelf Ideas
Don’t Forget to include your Elf! Have a blast trying some of these funny Elf on the Shelf Ideas this Christmas!

How to Keep Your Christmas Tree Alive Longer (6 Easy Tricks)
Keep your live tree looking gorgeous all season long with these easy tips and tricks for how to keep your Christmas tree alive longer!

50 Easy Christmas Crafts to Make at Home
So do you have the itch to craft? These craft ideas for kids adults will keep you busy all throughout the holiday season!
45 Christmas Decorating Ideas on a Budget!
Let me help you turn your home into a cozy Christmas Cottage and gorgeous Winter Wonderland with these inexpensive and frugal Christmas Decorating Ideas!
55 Fun Christmas Activities for Families, Couples, Kids & Adults
So whether you’re looking for festive new Christmas traditions for families, December date nights for couples, holiday party ideas for adults, exciting activities for friends, or magical ideas for kids… I’ve got you covered!
So have you tried making this DIY Plastic Hanger Snowflake with Lights yet?
Leave a comment & share!


What a marvelous idea, Heidi!
It really is a brilliant way to use those extra hangers.
Hugs and blessings
Thank you so much, Veronica… you’re so sweet! I hope you have a lovely week!
What a great idea!
Aww… thank you so much!
You always come up with the best ideas, Heidi! I can’t believe this is made out of coat hangers. That is so cool and it definitely has me excited about crafting for the upcoming season. Hugs, CoCo
Thanks so much, CoCo! Have fun working on your upcoming Christmas DIY Projects!!
Great idea, thanks for sharing.
We have much plastic at home that we can utilize for beautiful decorations and useful stuff.
That’s wonderful… I’m so glad you liked the idea!
So creative. If you would not have mentioned it had plastic hangars in the title – one would have never known. Love this frugal holiday decorating idea.
That’s so sweet… thank you! Who knew plastic hangers could be so pretty?? 🙂
What a fun and inventive DIY! I would love to put this in one of our windows!
That sounds like a great idea, Kathrine… this would look so pretty in a big window!
I had to look and look again as I couldn’t believe this fabulous star was made from coat hangers! What a genius idea, Heidi, it looks fab. And I also like the look of the Cinnamon Pine Cones as well, so festive!
Aww… thank you, Lisa! You’re so sweet, and I’m so glad to hear you’re enjoying the Christmas decor ideas!
C’est magnifique
Merci beaucoup
Merci beaucoup, Delphine 🙂
This is such a great idea, Heidi! I have tons of plastic hangers in storage and this will be a great way to put them to use this Christmas. The lights add such a wonderful touch!
That’s a wonderful way to use those extra hangers… have fun making your snowflake! 🙂
What a beautiful craft to make for the holidays! Thanks for the visual step by steps, very helpful!
You’re very welcome, Michelle! These hanger snowflakes really are so fun to make!