Add some unique homemade decor to your yard this year with this fun DIY Wooden Christmas Tree with Lights project!
Then… be sure to also try making this fabulous DIY Tomato Cage Christmas Tree, too!

DIY Wooden Christmas Tree with Lights
So are you wanting to upgrade your outdoor Christmas light display this year? Or maybe you just want to add some fresh new pieces to your Christmas yard display that are actually budget friendly… and that won’t cost you a small fortune?
You’ll love this DIY Wooden Christmas Tree with Lights!
Lisa writes: "These are so cute (and way more budget friendly than what you get in the stores)"
This easy outdoor Christmas Tree idea will add such a warm and festive touch to your home, and will be completely unique, too!
This simple DIY Wooden Christmas Tree with Lights was such a fun DIY project to build together with my hubby.
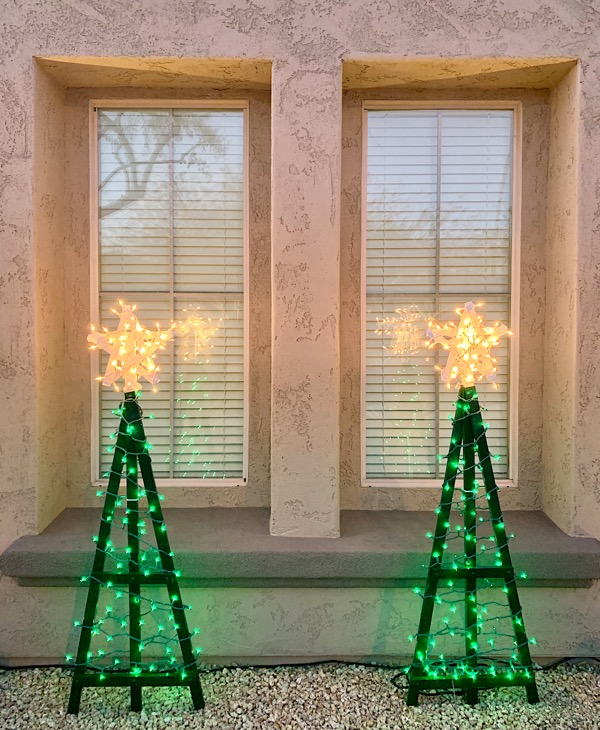
In fact, we liked these DIY Wood Christmas Trees so much we actually built three in total!
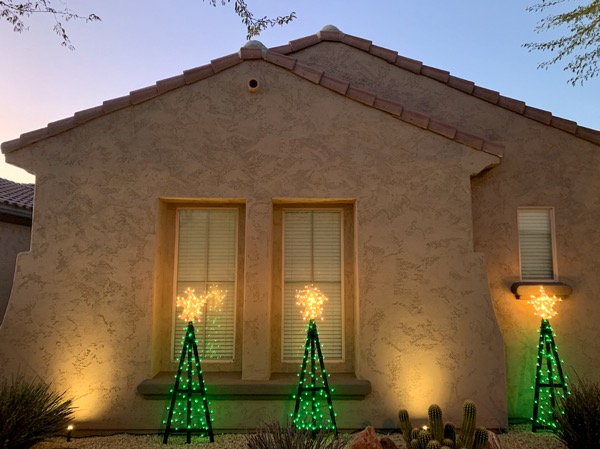
Building three of these trees together was a great way to save time, while adding even more fun new lights to our front yard display.
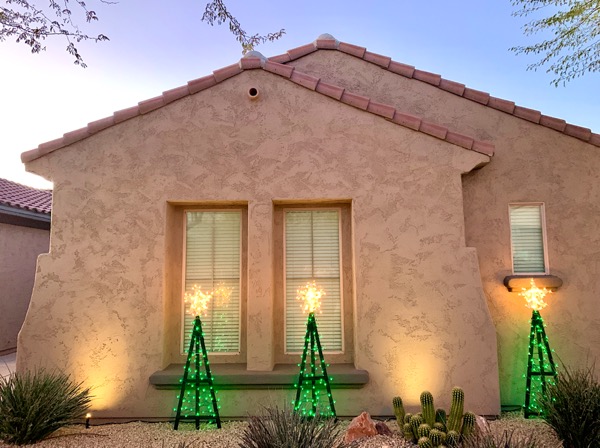
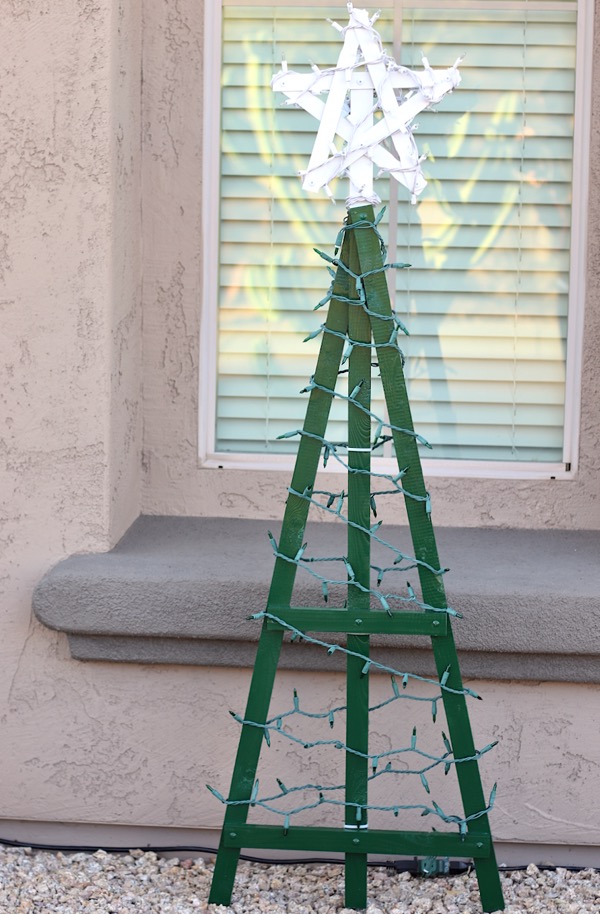
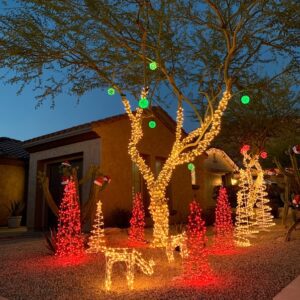
These homemade Christmas Trees and Stars look so cute during the daytime… and they look absolutely fabulous with the lights on in the dark!
Just follow these instructions to build a tree or three for yourself…
Related: DIY Christmas Decorating Ideas
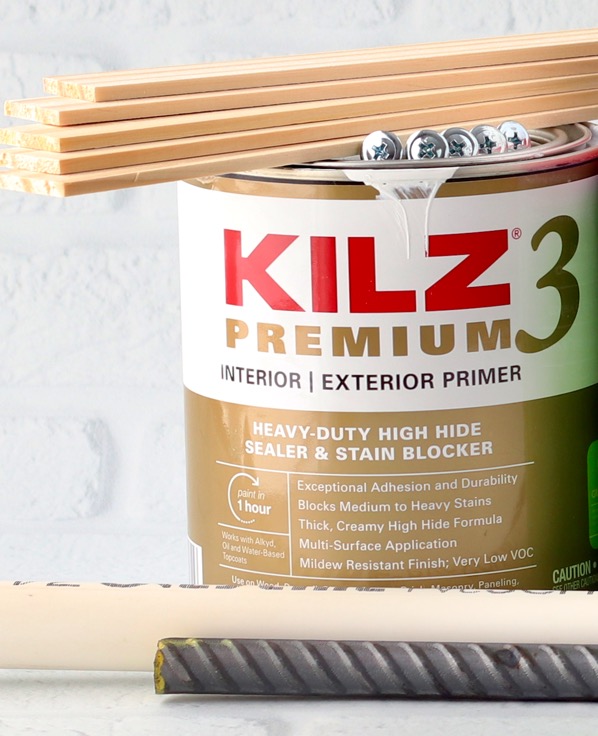
Time Saver Tip: Prime the 1″ x 2″ x 8′ Boards and 12″ Paint Sticks before you cut and assemble the tree and star.
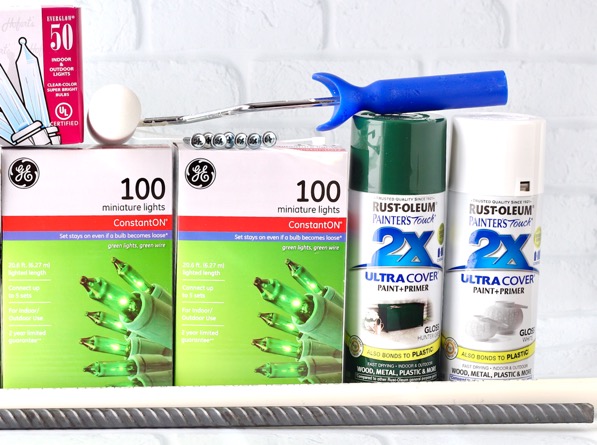
DIY Wooden Christmas Tree Materials
Here’s what you’ll need to round up before you get started…
- 5 – 1/2 inch Screws
- 2 – 1 inch Screws
- 8 – 1 1/4 inch Screws
- 1 – 1 1/2 inch Galvanized Screw
- 3 – 8 inch Clear Zip Ties
- 2 foot length of 1/2 inch steel Rebar
- 2 foot length of 1/2 inch plastic PVC Pipe
- 5 – 12 inch Paint Stir Sticks
- Two – 1 inch x 2 inch x 8 foot Board
- 1 box 100 count outdoor Green Christmas Lights, Green String
- 1 box 50 count outdoor Clear Christmas Lights, White String
- One quart White Exterior Primer Paint
- 12 ounce can Gloss White Spray Paint (I used Rust-Oleum Gloss White)
- 12 ounce can Gloss Green Spray Paint (I used Rust-Oleum Gloss Hunter Green)
Project Tools and Supplies Needed
- 2 inch Paint Brush or Small Paint Roller
- Blue Painters tape
- Painters Plastic or Paint Drop Cloth
- Tape Measure
- Pencil
- Drill with Phillips bit for screws
- Drill Bit for pre-drilling screw holes
- Saw (*Note: We used a miter saw, but a circular saw or jig saw would also work for the small cuts you’ll need to make.)
- Heavy Duty Hammer or Sledge Hammer for pounding Rebar into ground
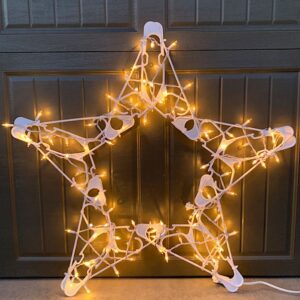
Paint Stick Star Assembly Instructions
1. Arrange the 5 Paint Sticks into the shape of a 5 point star.
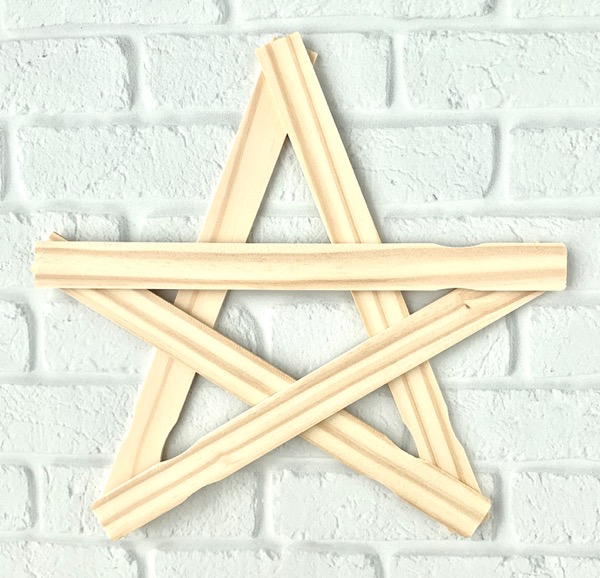
2. Use a 1/2″ screw to attach each point of the star.
If the paint stick wood wants to splinter, pre-drill each hole with a drill bit first, then install the screws.
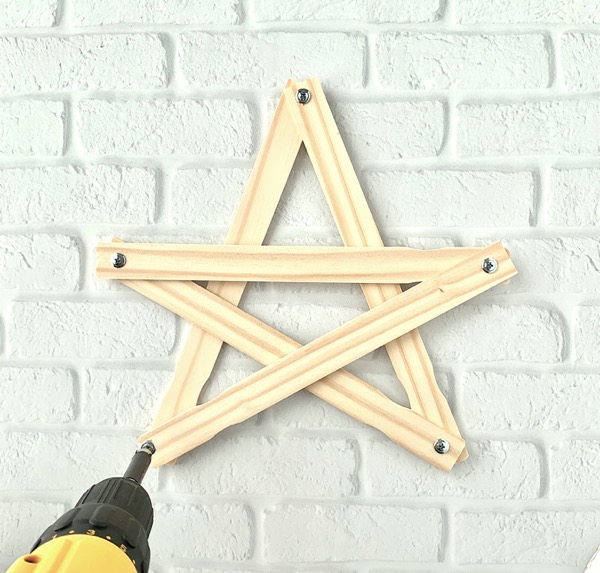
3. After each screw is attached, be sure to re-adjust the shape of the star to ensure the desired star shape is maintained.
Wooden Christmas Tree Instructions
Note: You will need to prime the tree before painting. To save time priming the tree, consider applying primer to both 1 inch x 2 inch x 8 foot boards BEFORE making any cuts.
1. Take your first 1 inch x 2 inch x 8 foot Board. Cut it in half, leaving you two equal length 4′ Boards.
2. Take your second 1 inch x 2 inch x 8 foot Board, and cut it into the following lengths: a 56″ Board, an 18″ Board, and a 12″ length Board. This will leave you with a short leftover length of unused board.
3. Take your 56″ Board and make a pencil mark on the front and back of the board at 47″. This is where you will attach the two 4′ Boards to the 56″ Board.
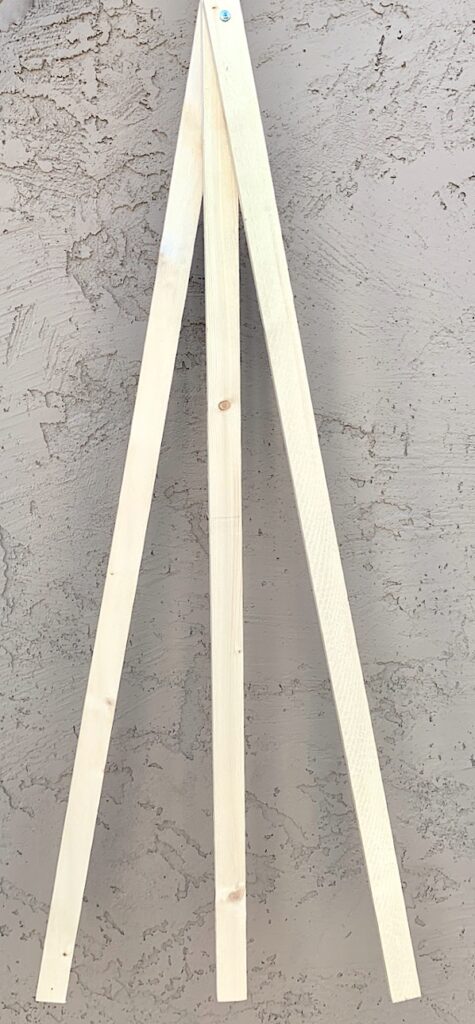
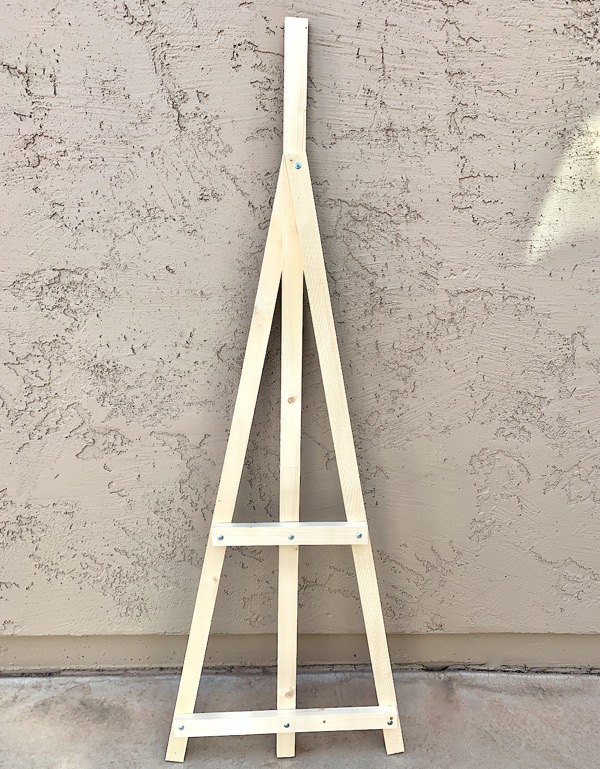
4. Now it’s time to layout your tree. Stand your 56″ Board vertically on the ground. At the 47″ marking, hold one 4′ Board to the front and one 4′ Board to the back of the 56″ Board.
Ensure that all 3 boards are ALL touching the ground and ALL held together at the 47″ marking. This will form the shape of your tree. (see photos)
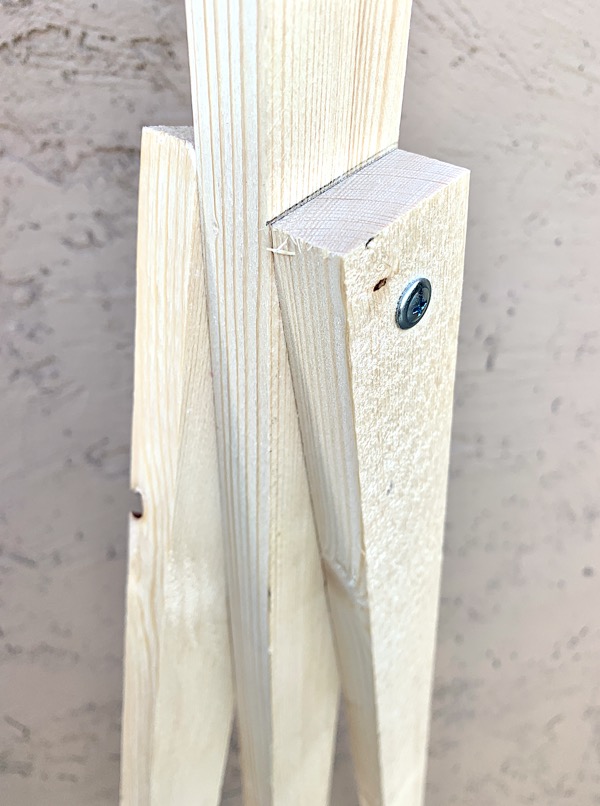
5. As the 4′ Boards rest against the 56″ Board, make pencil markings on your 56″ Board, using the top of each 4′ Board as a guide. (These markings will be very close to the 47″ mark, and the markings will be slightly angled)
6. Fasten each 4′ Board to the 56″ Board. One 4′ Board to the front, the second 4′ Board to the back. Use your pencil markings to ensure the correct location, then pre-drill holes for the screws.
Use one 1 1/4″ screw to fasten a 4′ Board to the front of the 56″ Board, Then use one 1 1/4″ screw to fasten the final 4′ Board to the back of the 56″ Board.
7. Next, lay the tree on its backside. Locate the area towards the bottom of the tree where the 18″ Board can reach all the way from left to right. (see photos)
Holding the 18″ Board level to the ground, pre-drill and fasten it to the tree using three 1 1/4″ screws.
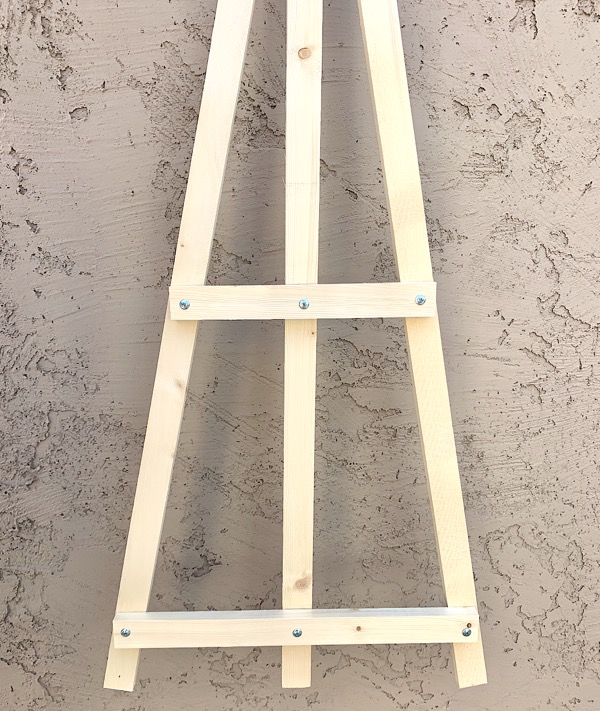
8. After that, locate the area in the middle of the tree where the 12″ Board can reach all the way from left to right. (see photos)
Holding the 12″ Board level to the ground and also level with the 18″ Board, pre-drill and fasten it to the tree using three 1 1/4″ screws.
9. Paint both the star and tree with white exterior primer, using a paint brush or small roller. Allow paint to dry for 3 – 4 hours or overnight. (To save time priming the tree, consider applying primer to both 1 inch x 2 inch x 8 foot boards BEFORE making any cuts.)
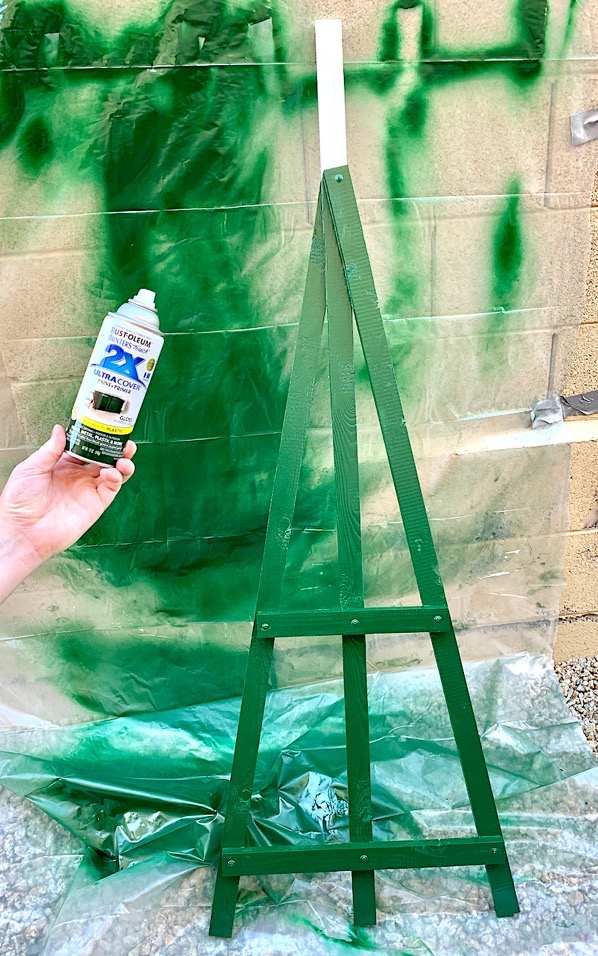
10. Use blue painters tape to tape off the top of the tree at the point the 3 boards are attached. This will create a paint line between the green tree and the white star.
11. Spray paint the lower portion of the tree with your Green Spray Paint, then allow to dry overnight.
12. Pre-drill holes for your screws, then attach the Paint Stick Star to the Tree using your two 1 inch screws.
13. Use blue painters tape to tape off the fresh green paint at the top of the tree at the point the 3 boards connect.
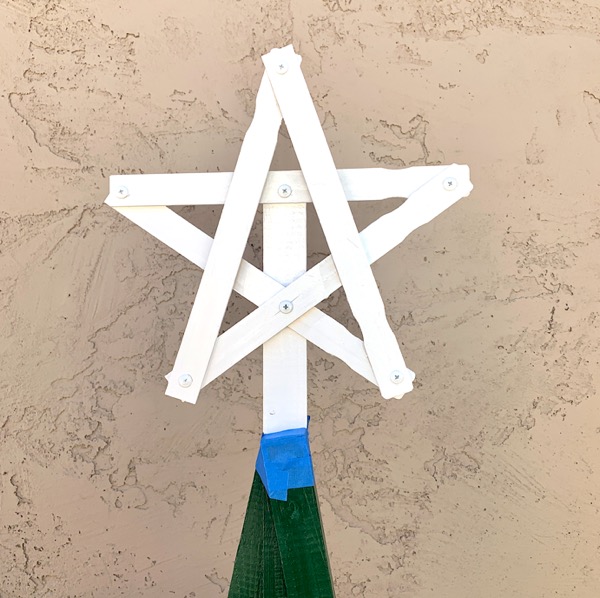
14. Spray paint the top of the tree and attached star with your White Spray Paint, using painters plastic or a fabric drop cloth to shield the green portion of the tree from white paint overspray.
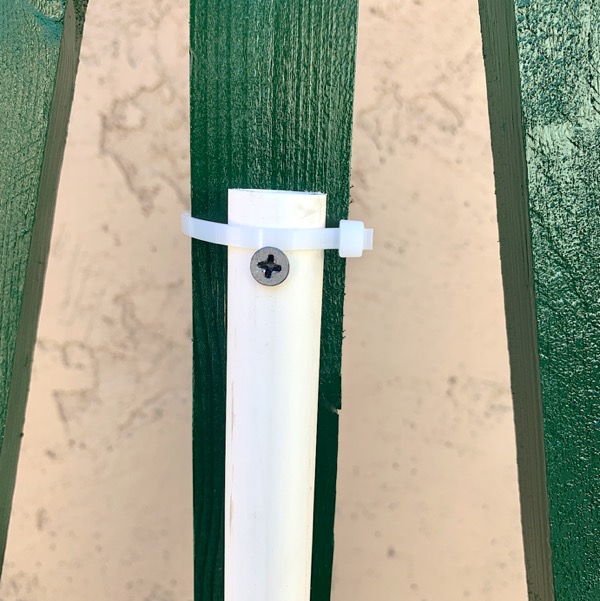
15. Once the paint has dried use 3 clear zip ties to attach the PVC pipe to the back of the middle tree support, at the very bottom of the tree.

I also predrilled a hole, and installed one galvanized screw at the top of the PVC pipe for additional support. (see photos)
16. Wrap the star at the top of the tree with your white strand of 50 clear lights. Connect the green strand of lights to the white strand.
After that, continue wrapping the green portion of the tree with your green strand of 100 green lights.
Make sure that each strand of lights is connected and that the male end of your Christmas light strings is at the bottom of the tree when you finish.
17. Using a heavy hammer or sledge hammer, pound your 2 foot length of Rebar into the ground.
Then slip the PVC attached to the tree over the Rebar.
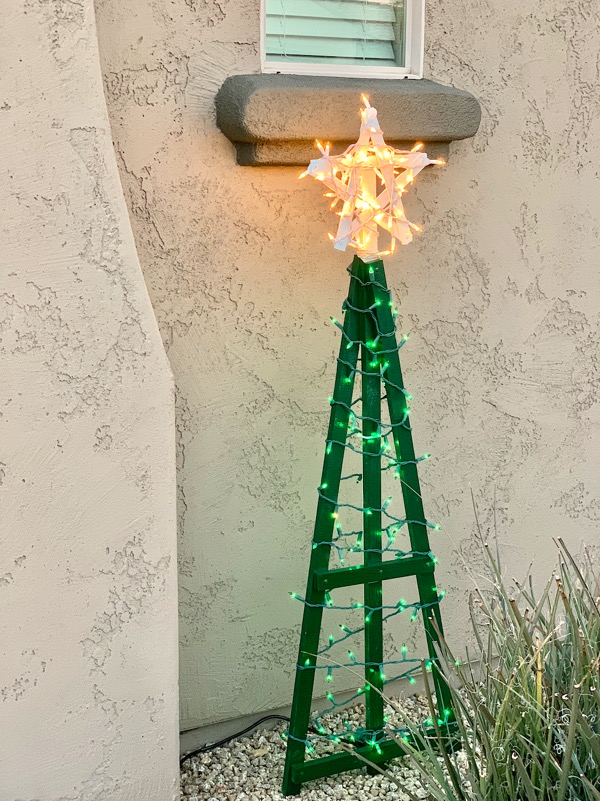
Finally, plug in your lights and it’s show time!
These will look great in your yard during the day, and SO pretty at night!
We even had a neighbor stop and ask us where we bought them. 🙂
More Budget Christmas Decor Projects
So are you in the mood for more Christmas decorating and crafting?
I’ve got even more fun DIY Christmas Decorating Ideas to share that are easy on your budget too…
DIY Tomato Cage Christmas Tree
Give your yard decor a magical upgrade this year with a pretty DIY Tomato Cage Christmas Tree!
DIY Plastic Hanger Star with Lights
Give your front yard Christmas decor a frugal upgrade this year when you make this fabulous plaster hanger star strung with lights!
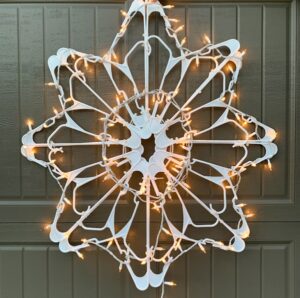
DIY Plastic Hanger Snowflake with Lights
This easy DIY Plastic Hanger Snowflake project is the fabulous, budget friendly Christmas decoration you’ve been looking for!
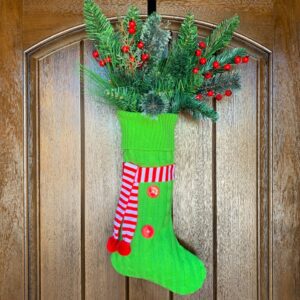
DIY Stocking Wreath
This cheerful Christmas DIY stocking wreath will make such a fun statement on your front door!
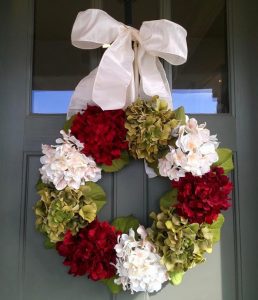
DIY Hydrangea Wreath for Front Door
Check out this EASY step-by-step tutorial to make a gorgeous hydrangea wreath for your front door!
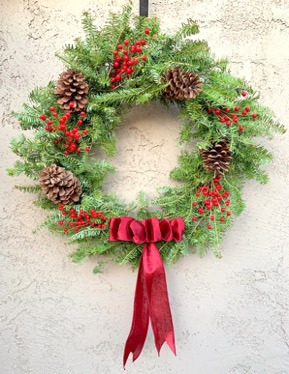
Free DIY Fresh Wreaths & Garlands
You’ll love this tip for how to make a beautiful live wreath… for FREE! When the price is FREE, decorating for Christmas becomes even more fun!
How to Make a Bow for a Wreath with Wired Ribbon
Wondering how to make a bow for a wreath with wired ribbon? This simple step by step tutorial will show you just how fast and EASY it can be!

Elf on the Shelf Ideas
Now don’t Forget to include your Elf! Have a blast trying some of these funny Elf on the Shelf Ideas this Christmas!

How to Keep Your Christmas Tree Alive Longer! (6 Easy Tricks)
Keep your live tree looking gorgeous all season long with these easy tips and tricks for how to keep your Christmas tree alive longer!

50 Easy Christmas Crafts to Make at Home
Got the itch to craft? These craft ideas for kids adults will keep you busy all throughout the holiday season!

45 Christmas Decorating Ideas on a Budget!
Let me help you turn your home into a cozy Christmas Cottage and gorgeous Winter Wonderland with these inexpensive and frugal Christmas Decorating Ideas!

55 Fun Christmas Activities for Families, Couples, Kids & Adults
Whether you’re looking for festive new Christmas traditions for families, December date nights for couples, holiday party ideas for adults, exciting activities for friends, or magical ideas for kids… I’ve got you covered!

So what are your favorite DIY holiday decor pieces you display out in your yard?
Or have you tried making this DIY Wooden Christmas Tree with Lights yet?
Leave a comment & share!


Thank you for this!!
I am really impressed.