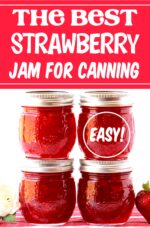
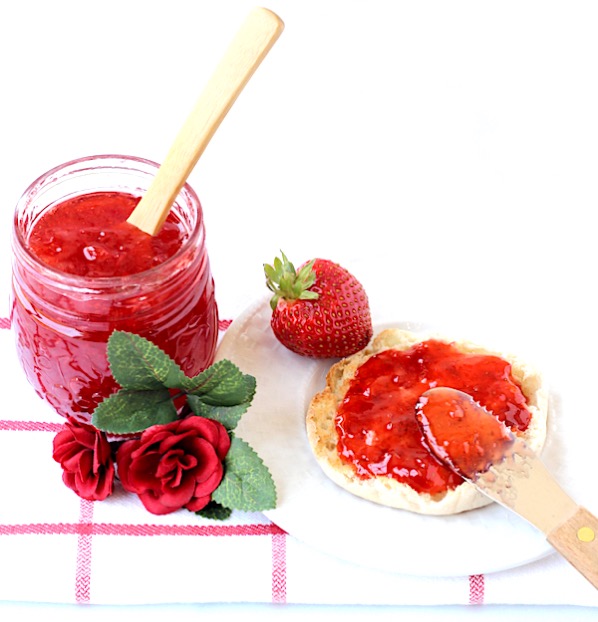
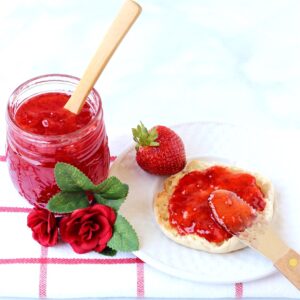
Warning: This fruity, sweet homemade Strawberry Jam Recipe for canning is about to lavish your taste buds with dazzling strawberry excitement! Plus, with just 5 ingredients and some crazy easy canning instructions, you won’t believe how simple it is to make!


Honestly, who wouldn’t want a pantry jam-packed with… jam?
So do yourself a favor and become an instant kitchen superstar when you make this easy strawberry jam recipe for canning!
Carole writes: “Best recipe ever! And I’ve tried loads! Tastes fresh as anything!”
Trust me, when you know how to make strawberry jam at home, you’ll never want to buy it at the grocery store again.
This strawberry jam is nothing less than a berry-licious sensation. You’ll find yourself making up any excuse to have another slice of toast… and laying it on thick!
Just like when you make this fruity Blackberry Jam Recipe and sweet Raspberry Jam Recipe for Canning, too!
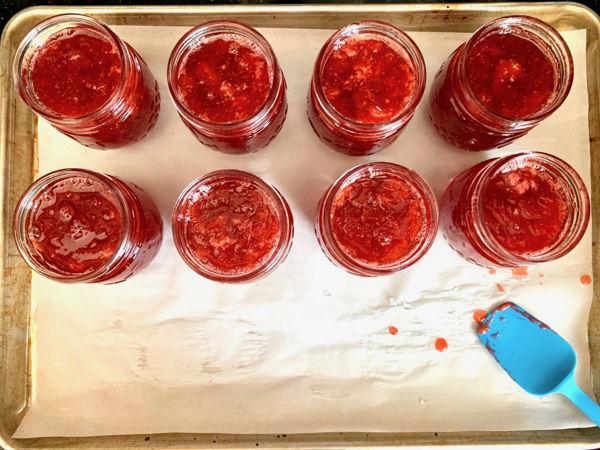
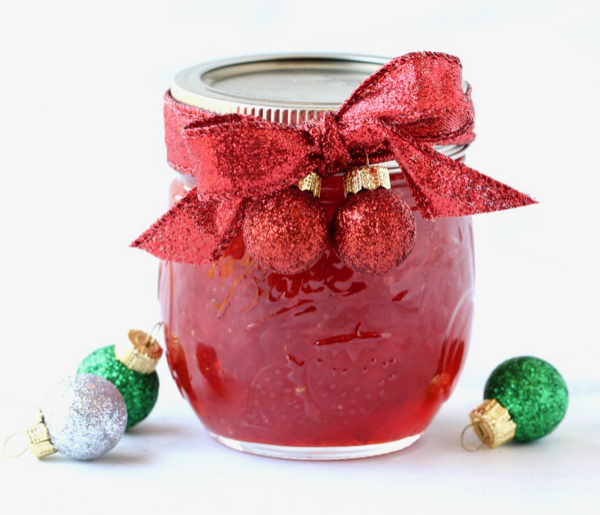
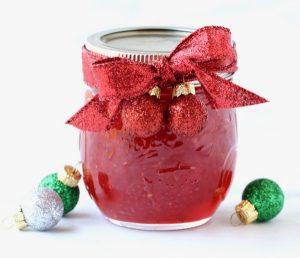
The best part is, you can make around 9 jars at once, so you can stock your pantry and even have some leftovers to give as cute little Gifts in a Jar! I gave some to all of my neighbors last year at Christmas, and they loved it!
Strawberries are my very favorite food group and this strawberry jam is such a fun way to indulge.
It’s effortlessly transforms sweet sun-kissed strawberries, bursting with flavor… into a strawberry jam yum fest!
I also love the simplicity of this recipe, and know you will, too.
So whether you’re new to canning, or just want to find the BEST strawberry jam recipe you’ll want on repeat every year, I’ve got you covered!
Believe me, canning for beginners recipes don’t get much easier than this…
Can Strawberry Jam Be Canned?
Well yes… it sure can!
And once you can it, you’ll have shelf stable jam that won’t take up any space in your refrigerator or freezer!
Plus, canned jam is perfect for food storage and for giving as cute little gifts.
Does Strawberry Jam Need to Be Pressure Canned?
No, this strawberry jam should not be pressure canned. When canning this small batch strawberry jam recipe, you’ll want to use a water bath canner to get the job done.
How Long Do You Water Bath Jam?
Well… that will actually depend somewhat on where you live and your altitude.
The higher your altitude, the longer you’ll need to boil your jars in your water bath canner. With this recipe for making strawberry jam, the range will be somewhere between 10 and 30 minutes.
Do You Have to Water Bath Strawberry Jam?
If you want shelf stable jam, then yes… you’ll need to process your strawberry jam in a water bath.
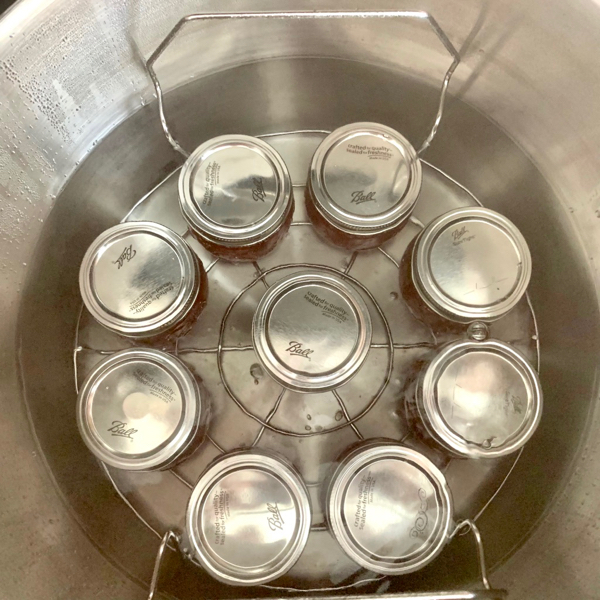
You can either use a water bath canner, or a large 20 quart stock pot with a canning rack.
I’ve read a lot of mixed reviews on the newer water bath canners, so I use a large stock pot and found a canning rack on Amazon that I insert into it. It’s a simple alternative to a water bath canner, and works like a charm!
Alternatively, if you’re looking for a jam you can store in your freezer, be sure to check out this Freezer Strawberry Jam Recipe! It’s SO delicious, too!
Ingredients
It will just take a few simple ingredients to create one of your new favorite brunch recipes…
Check your cupboards, raid your pantry or fridge, or add the following to your next grocery list…
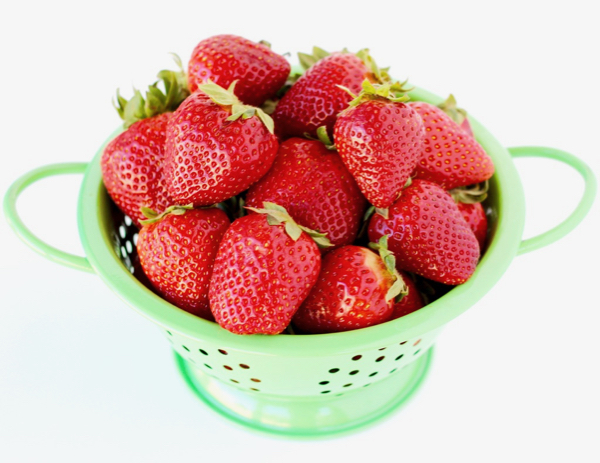
- Fresh Strawberries – The closer they are to ripe perfection, the better your jam will be!
- Granulated Sugar
- Pectin
- Lemon Juice – Fresh squeezed or from the bottle will both work.
- Butter – To reduce the foamy bubbles when cooking jam.
See… I told you this strawberry jam recipe with pectin was going to be EASY!
Strawberry Jam Canning Equipment Required
Don’t forget to make sure you have all of the necessary strawberry jam recipe equipment on hand before starting.
You’ll need the following…
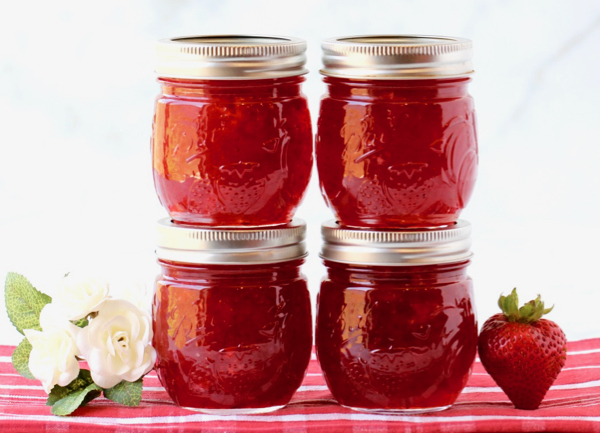
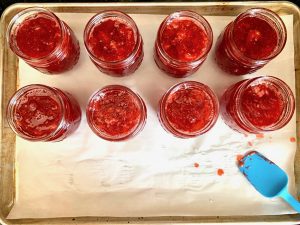
- Nine 8 oz. Mason Jars – Be sure to have 9 bands and new clean lids, too.
- Hand Masher – I use my potato masher to mash the strawberries.
- 8 Quart Stock Pot
- 20 Quart Stock Pot + Canning Rack Insert (or Water Bath Canner)
- Funnel – To cleanly transfer your jam into your jars.
- Jar Lifter – To safely remove the hot jars from their water bath. (mine came with a magnetic jar lifter which comes in handy, too)
Pin this now to find it later
Pin ItHow to Make Strawberry Jam
Trust me, making BEST strawberry jam recipe ever is actually so much easier than you might think!
Like I mentioned above, you’ll just need strawberries, sugar, pectin, lemon juice, and a little bit of butter!
Once you’ve got the ingredients ready to go, and all of the necessary supplies laid out, here’s what you’ll do…
1. Wash and dry your jars.
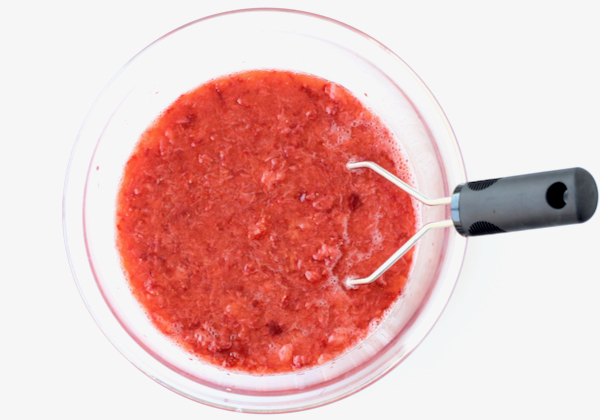
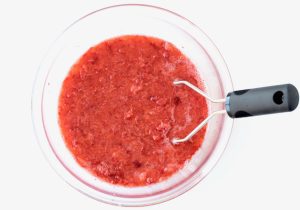
2. Crush your cleaned and hulled strawberries.
3. Boil ingredients on stove.
4. Fill jars with jam mixture.
5. Process jars in your water bath canner (or 20 quart stock pot with canning rack).
6. Remove from canner, dry off, and wait for those lids to pop!
That’s it. So simple. Strawberry jams recipes truly don’t get much simpler or EASIER than this traditional strawberry jam recipe!
Scroll down for the detailed strawberry jam recipe printable instructions. Don’t worry if this is your first time making jam. I’ll walk you through every step of the process.
How Long Does Canned Strawberry Jam Last?
Canned jars of this strawberry jam can be stored in your pantry, or a cool, dry cupboard for up to 1 year, making this strawberry jam canning recipe one of my favorite breakfast meal prep ideas!
I recommend labeling the top of each lid with the type of jam and the date it was made. Then, be sure to remove the bands when storing, and be sure to never stack jars on top of each other.
Also, before using, always inspect each lid to ensure the seals are good. Finally, once you’ve opened a jar, store it in your refrigerator and use within 4 weeks.
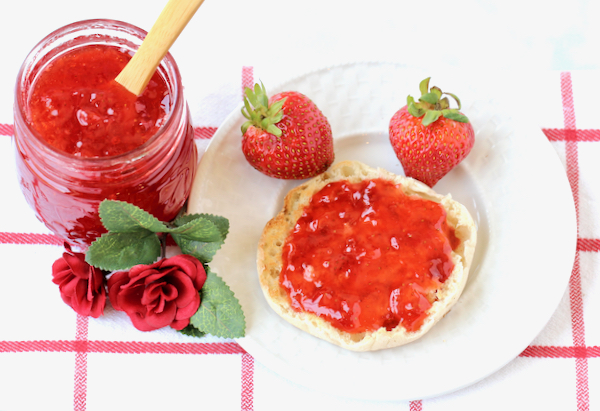
How to Use Strawberry Jam
There are so many delicious ways to put this fresh homemade strawberry jam recipe to use! To start, you’ll love slathering it all over your english muffins, fresh homemade Crusty Bread, and this lovely Sourdough Sandwich Bread, too!
You’ll also loving using it along with this Homemade Peanut Butter and Whole Wheat Honey Bread to build the most outrageous PB&J sandwiches ever!
And don’t forget about dessert! This jam is the perfect lovely topping for your vanilla ice cream. Plus, it’s the perfect yummy upgrade for these Peanut Butter and Jelly Cookies!
Reviews
Here’s what your frugal friends are saying about this canning strawberry jam recipe…
Leigh writes: “First time canning and this was very easy and delicious!”
Eileen writes: “So easy and so good yummy “
Eric writes: “First time to make jam. It came out very good. I made it not my wife, it surprised her. Thanks for the recipe.”
Roslyn writes: “Very easy directions 👌”
Olivia writes: “A million times better than store bought!”
Malina writes: “The flavor is one of the best I’ve had. Secret’s in the butter. Thanks for sharing!”
Shannon writes: “This came out great – I’ve never made jam before but it was so easy”
Shenell writes: “This is an amazing recipe!”
Rebekah writes: “First time making strawberry jam! It turned out SO well! Absolutely love.”
Elena writes: “Best jam ever!!! I’m obsessed!!!”
Jenn writes: “Such a simple recipe! Easy to follow and make. Tastes absolutely delicious! My go to recipe from now on!”
Leighanne writes: “Love this recipe! Tastes great and super easy!!!”
Denise writes: “Tastes delicious!!!”
Mitsy writes: “This is my new favorite recipe for homemade strawberry jam. It is so delicious!! I made two batches this week!”
Cheryl writes: “This was by far the best Strawberry Jam I’ve made.”
Heather writes: “Literally the best jam ever!”
Kathy writes: “Very easy recipe, makes a beautiful jam fit for gift giving.”
Debbie writes: “Such an easy recipe. Absolutely delicious.”
Carole writes: “Best recipe ever! And I’ve tried loads! Tastes fresh as anything!”
Lily writes: “This recipe is definitely my jam – SOoOo delicious! Homemade/Homegrown is definitely best!”
Kathy writes: “This recipe was so easy and delicious! Won’t ever use another recipe… I handpicked fresh strawberries from a farm before making”
More Fruit and Butter Spreads
Breakfast
Peach Butter Recipe
Breakfast
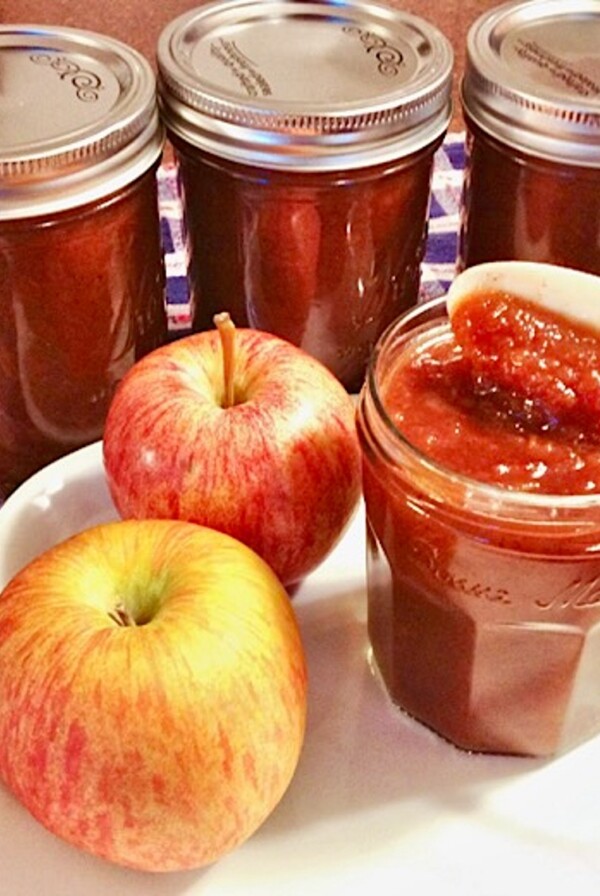
Slow Cooker Apple Butter
Breakfast
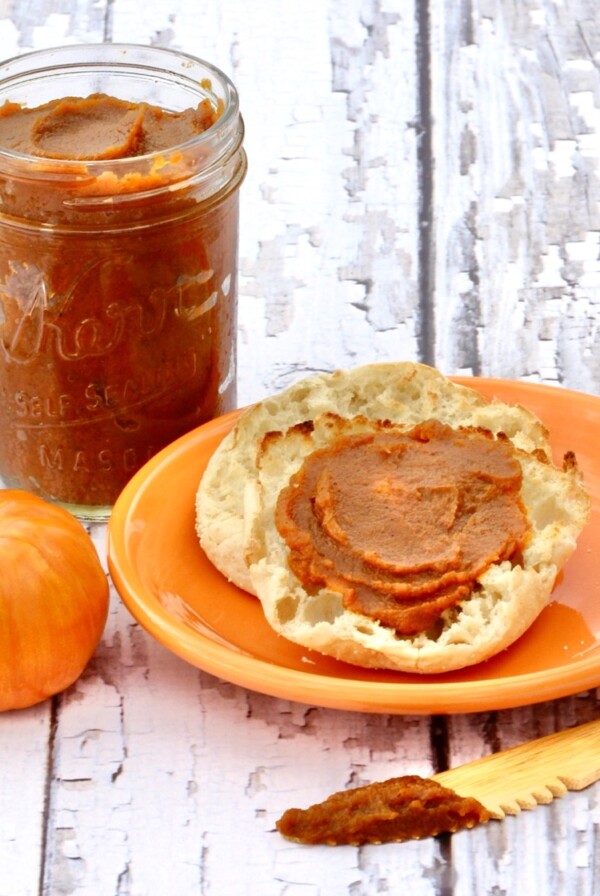
Pumpkin Butter (Just 5 Ingredients!)
Bread
Maple Butter
Did You Enjoy This Recipe? ⭐️⭐️⭐️⭐️⭐️ Leave a comment & review below!
Strawberry Jam Recipe
Doubling Recipe Tip
If doubling or tripling recipe with buttons below, ingredient notes found after comma will not adjust. Increase ingredients as needed.
Ingredients
- 5 cups Crushed Fresh Strawberries (you’ll need approx. 8 cups Fresh Strawberries or approx. 4 sixteen oz. containers)
- 7 cups Granulated (White) Sugar
- 1 packet Original Sure-Jell Premium Fruit Pectin Powder (1.75 oz.)
- 2 tbsp Lemon Juice
- 1/2 tsp. Butter
Instructions
- Wash jars, lids, and bands in hot soapy water, dry completely, and set bands aside.
- Simmer lids in warm water in saucepan until ready to place them on jars.
- Keep jars warm by simmering in hot water until ready to use. Do not boil.
- Fill 20 quart stock pot or water bath canner with hot water, and place on stove over medium-high heat. (You'll need enough water to later cover your jars with at least 1 inch of water.)

- Crush strawberries in large mixing bowl or shallow glass baking dish using hand masher until nice, smooth consistency. (small chunks are okay)

- Transfer crushed strawberries to 8 quart stock pot. Add pectin, lemon juice and butter to pot, and stir constantly with wooden spoon over high heat, while bringing to a rolling boil.
- Once boiling, add sugar, return to rolling boil, then boil for 1 minute while stirring constantly.
- After 1 minute, remove foam from top of jam by skimming it off with a metal spoon.
- Then… one by one, remove a jar from hot water, transfer to a cookie sheet (this will catch any spills), place regular mouth canning funnel on jar, and ladle in strawberry jam mixture leaving 1/4 inch empty head space at top of the jar. Then wipe off rim of lid and threads of jar with damp cloth.

- Continue until all jars have been filled.
- Remove warm lids from saucepan (a magnetic lid lifter works like a charm), and place one lid on each jar.
- Then screw one band on each jar just until snug (not overly tight).
- Place filled jars on rack in 20 quart stock pot or water bath canner, then lower down into hot water. Make sure there is enough water in pot that there is at least 1 inch of water above the jars. If necessary, add more HOT water.

- Place lid on your pot, and bring to a gentle boil.
- Once water is boiling, set your timer for processing. Boiling time will vary depending on where you live… for altitude 0 – 1,000 feet boil 10 minutes, for 1,001 – 3,000 boil 15 minutes, for 3,001 – 6,000 boil 20 minutes, for 6,001 – 8,000 boil 25 minutes, and for 8,001+ boil 30 minutes.
- Once jars have finished boiling, turn off heat, remove the lid from the pot and let jars sit for 5 minutes before removing. After 5 minutes, lift up rack to elevated resting position, then carefully remove jars one by one using a jar lifter, and transfer to a folded towel to cool.
- The lids on the jars will begin to ‘pop’ into the sealed position, signifying the jam has been preserved. If any lids do not pop within the first 12 – 24 hours, transfer those to the refrigerator and use those up first.

- It may take jam up to 24 – 48 hours to finish setting.


Notes
- Strawberry Jam Recipe Shelf Life: Jars of can be stored in your pantry, or a cool, dry cupboard for up to 1 year.
- Strawberry Jam Recipe Storage Tips: Label the top of each lid with the type of jam and the date it was made. Remove bands when storing, and be sure to never stack jars on top of each other. Always inspect lids to ensure the seals are good before using. When ready to use, transfer a jar to your refrigerator, and use within 1 month.
- FAQ’s: For answers to Frequently Asked Questions or tips for common substitutions and variations, please refer to the detailed information above this recipe card.
 Like this recipe? Rate & comment below!
Recipe adapted from Sure-Jell.


This was my first hand at making jelly and I must say it is perfect! It was much easier than I imagined and the taste is outstanding. Sent my first jar to my Daddy and it looks as if I will be making a batch just for him. That is the best review ever.
Thank you so much for this recipe. It is most definitely a winner.
Angie
Oh I’m so glad you love it, Angie!! That’s so sweet that you’ll be sending your Daddy an entire batch! He’s one lucky guy!
Hi Heidi,
I just made this today,there setting now and I can’t wait.
Iv been going through the internet and reading different recipes..So I added 1 apple shredded and 1 jalapeno pepper.
I’ll let ya no tomorrow how it came out.Thanks so much for the receipt.
It don’t say what size jar that I read, but by the looks of the picture it may be 1/2 pint jar. 25 minutes seems like a long time for canning that small of a jar no matter what altitude. I just want to make sure it a 1/2 punt for this recipe. Thanks
Hi Connie,
You’ll need approx. Nine 8 oz. jars.
As far as processing times go, the times will vary depending on your altitude. Once water is boiling, for altitude 0 – 1,000 feet boil 10 minutes, for 1,001 – 3,000 boil 15 minutes, for 3,001 – 6,000 boil 20 minutes, for 6,001 – 8,000 boil 25 minutes, and for 8,001+ boil 30 minutes. Once jars have finished boiling, turn off heat, remove the lid from the pot and let jars sit for 5 minutes before removing. Hope that helps!
Looks great – what is the yield for this recipe? (2lbs of strawberries)
Hi Jennifer ~ This recipe yields about 72 ounces {Nine 8 oz. jars} when using 5 cups Crushed Fresh Strawberries {you’ll need approx. 8 cups Fresh Strawberries or approx. 4 sixteen oz. containers}
Can you make this with sugar substitute?
Can you place the jars in the hot water without a canning rack? I assume getting them out might be a pain but I don’t own a rack.
Hi Jill ~ for safe and proper canning procedures, you will need to use a rack to keep the jars off of the direct heat source and ensure the water can get around to all sides of the jars during the water bath process. Hope that helps!
I have used silverware scattered in the bottom of the pot to keep the jars off the surface.
Hi, You can always fold a dish towel and place it on the bottom of the pot. I do canning for a living and sometimes have more than one large pot going and only ONE rack. The towel works perfectly. The reason for a rack/towel/silverware is to keep the jars from cracking because they will come into direct contact with your heat source.
Do you have to remove the bands before storing? Sorry if that sounds like a silly question but I usually don’t on other things.
Hi Kristi ~ that’s a great question. You don’t technically have to, but for best practice I always choose to remove the canning bands before storing. This will help prevent rust and mold. It’s also easier to make sure you’ve got a proper seal without the band holding the lid down tightly. Hope that helps! 🙂
Hello,
Is it safe to double this recipe or is it better to do two separate batches?
Hi Kendra ~ if doubling the recipe, you’ll want to do 2 separate batches. 🙂
Have you ever used pint jars for these? Would you know the processing times for those?
Do you use salted or unsalted butter? Thank you.
Hi Victoria… it’s such a small amount that either will work. 🙂
I love this jam!! Making the second batch now. I made a batch 2 months ago and I’m already out. Gave my sister a jar and she loved it so much she ate it with a spoon right out of the jar while watching a movie. I’m pretty sure the movie lasted longer, lol.
Haha… I’m so glad to hear you and your sister have been loving the jam, Pam! 🙂 Eating it out of the jar with a spoon for moving night sounds like a brilliant idea to me!