Load up on fun and frugal Christmas Decorating Ideas on a Budget with this BIG list of creative ideas and hacks!
Then… load up on even more fabulous Christmas inspiration with these creative Christmas Craft Project Ideas!

Christmas Decorating Ideas on a Budget
So are you ready to deck your halls on a budget? I’ve got you covered!
From Creative DIY Projects to Festive Decorations on a Dime, your house is going to look AMAZING this year!!
It’s never too early to start thinking about Christmas… or decorating for Christmas, right?
Let me help you turn your home into a cozy Christmas Cottage and gorgeous Winter Wonderland with these inexpensive and frugal Christmas Decorating Ideas!
That’s right… it’s time to transform every inch of your home into a festive fairytale! Baby it’s cold outside, so let’s start going to town inside!
Here’s what you need to do to get started…
Related: Frugal Gift Ideas for Everyone on Your List!
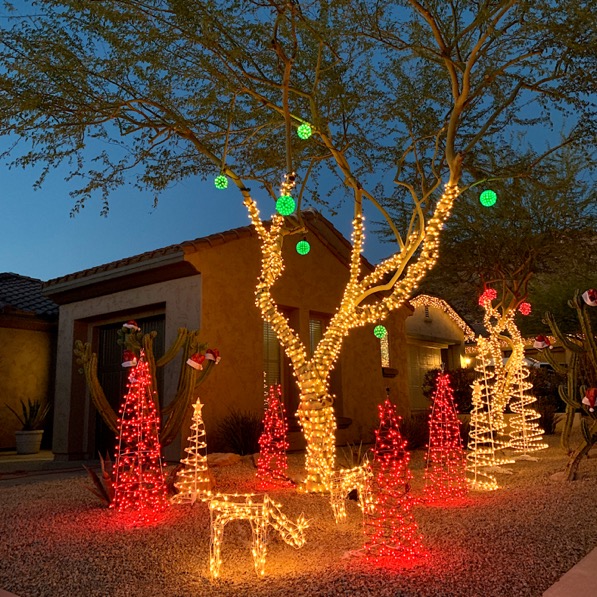
Outdoor Christmas Decorating Ideas
Before you deck the halls inside… let’s transform the exterior of your home into a beautiful Winter Wonderland!
These budget-friendly tips and tricks will have your front yard looking festive in no time!
DIY Wooden Christmas Tree with Lights
Add more Christmas cheer to your front yard when you create some of these festive Wooden Christmas Trees!

DIY Tomato Cage Christmas Tree
Give your Christmas yard decor a beautiful upgrade with this easy to make tomato cage tree tutorial!
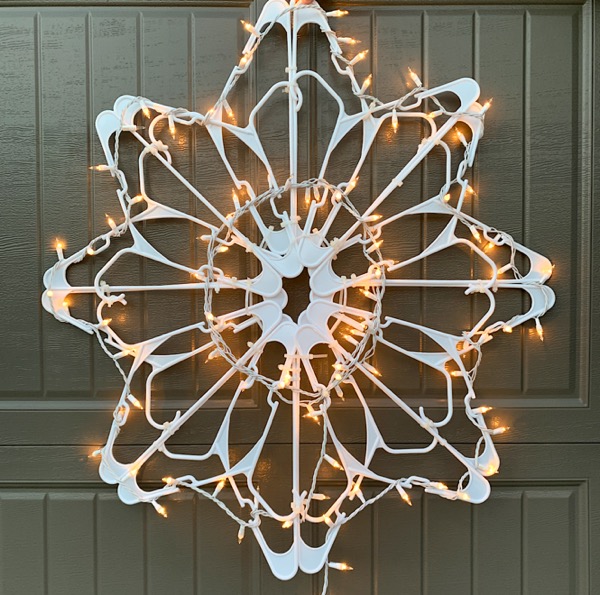
DIY Plastic Hanger Snowflake with Lights
This easy DIY Plastic Hanger Snowflake project is the fabulous, budget friendly Christmas decoration you’ve been looking for!
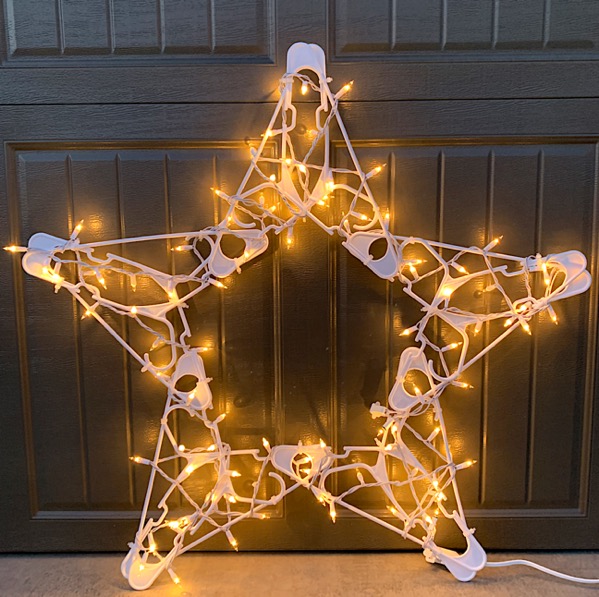
DIY Plastic Hanger Star with Lights
Give your front yard Christmas decor a frugal upgrade this year when you make this fabulous plaster hanger star strung with lights!
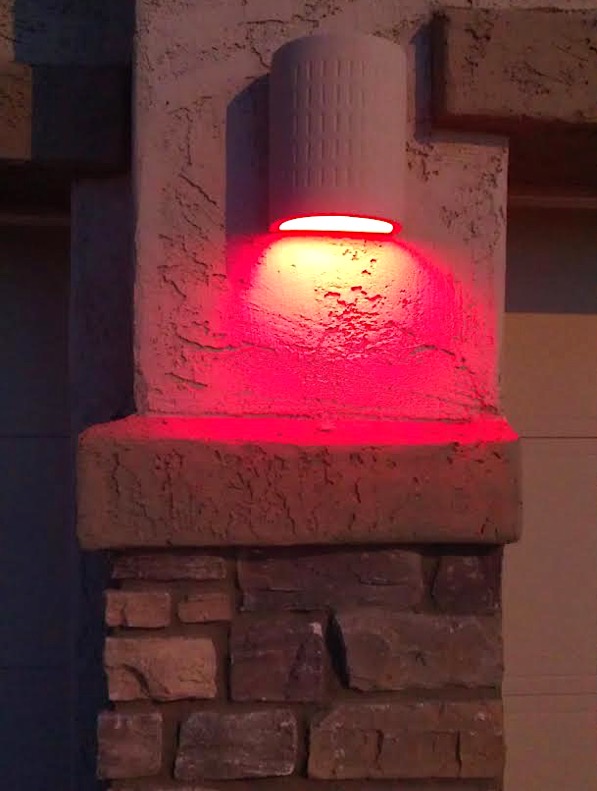
Swap out Outside Lights with Green or Red Light Bulbs
Another easy trick is to simply swap your exterior house light bulbs with festive red or green bulbs. It takes just a few minutes and adds such a fun pop of color!
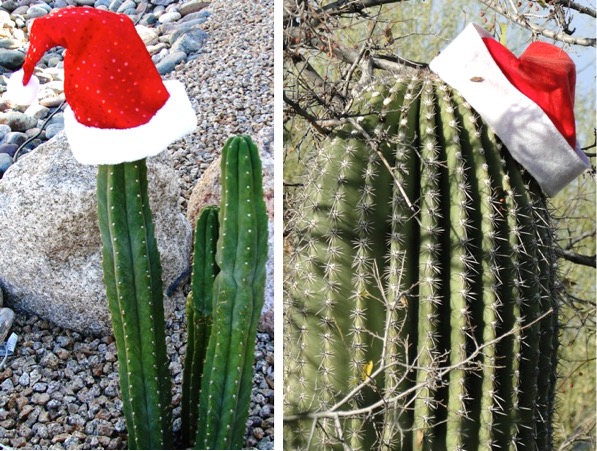
Add Santa Hats to Your Plants
Plants, Bushes, and yes… even Cactus look adorable wearing Santa hats! Grab some Santa hats, and go top some plants in your front yard! In addition to your night-time lights… your yard now will look super-cute in the daylight, too!
I’ve even had neighbors stop and tell me how much they’ve enjoyed the Santa hats on my plants… and how it’s so fun to pass by on their daily walks. 🙂
Now that you’ve created a magical Christmas display in your yard, let’s move on inside and get to decking those halls!
Here are some of my favorite indoor Christmas Decorating Ideas on a Budget…
Faux Fireplace Ideas:
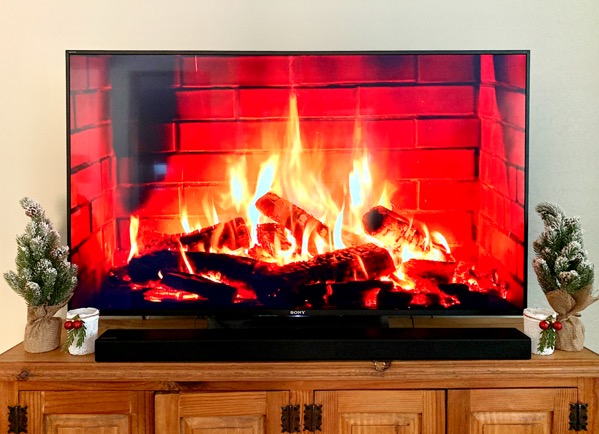
No fireplace? No problem!
There are so many easy ways to create a cozy crackling fireplace vibe in your home on a budget!
Consider one of these three options…
Add a Wall Mount Electric Fireplace to the wall, and hang a mantel above it.
Or, Install a mantel / fireplace surround on an empty wall in your living room or bedroom, and fill the center in with faux vintage brick or wood slices.
Or… simply head to Youtube and search ‘Crackling Fireplace’ for some lovely ambience right on your TV!
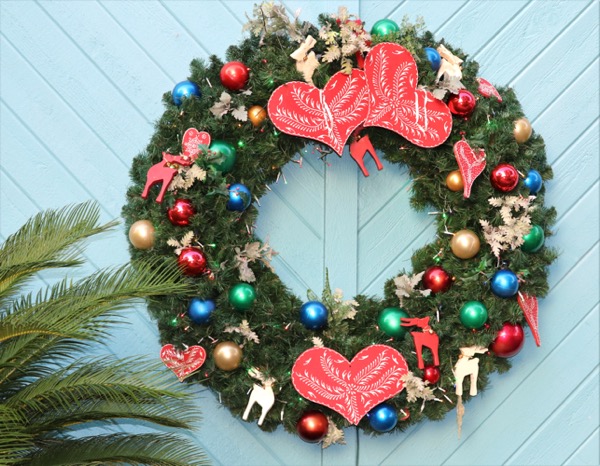
Homemade Christmas Wreaths
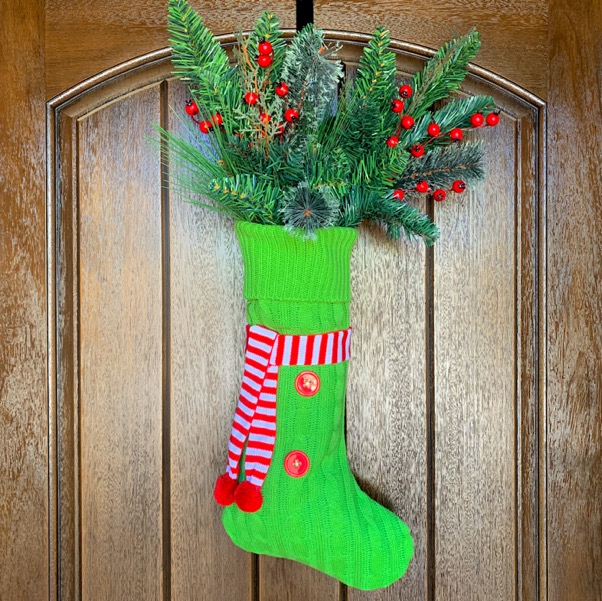
DIY Stocking Wreath
This cheerful Christmas DIY stocking wreath will make such a fun statement on your front door!
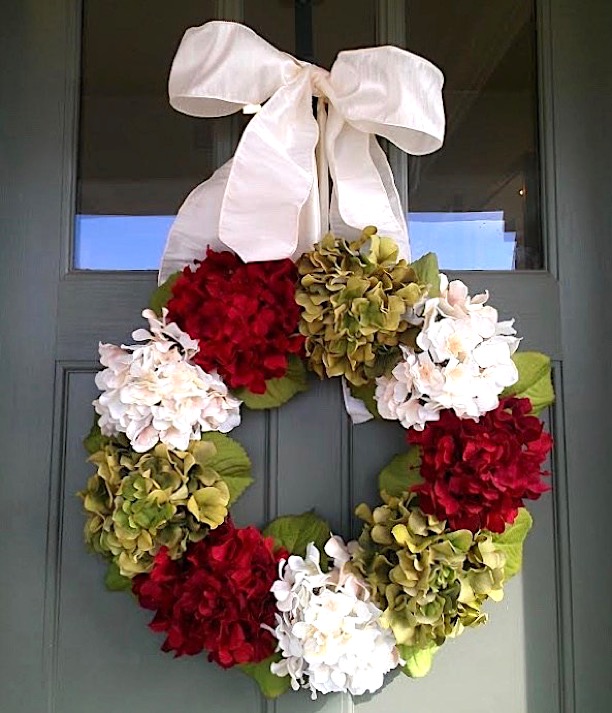
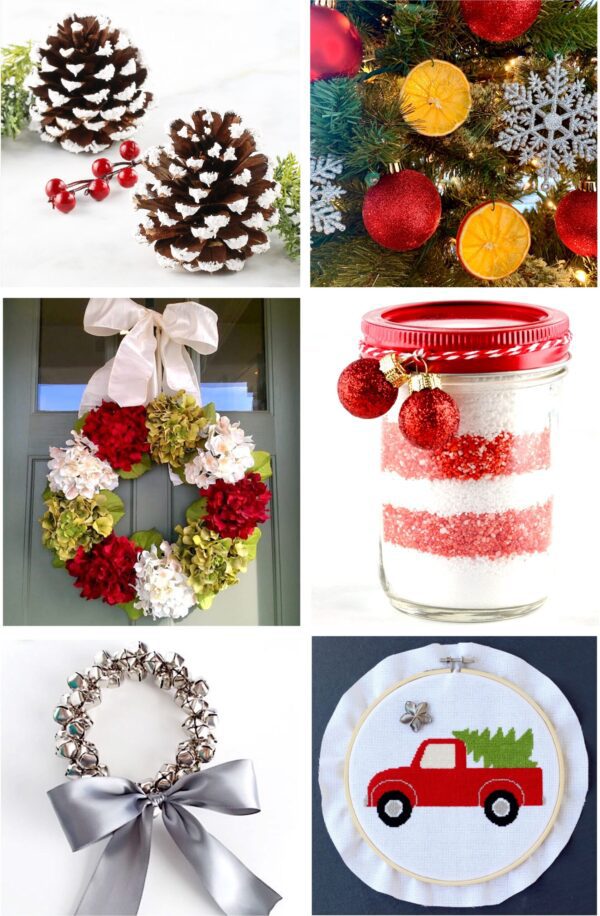
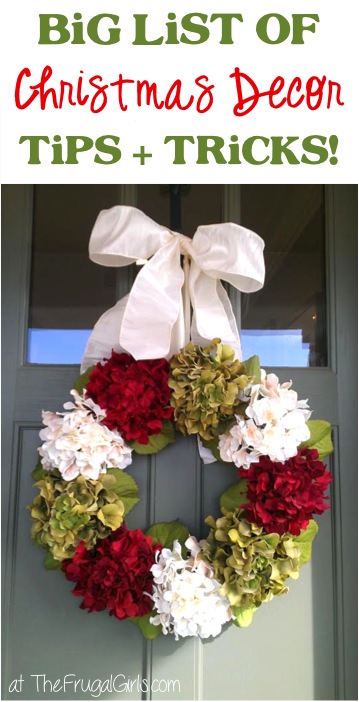
DIY Hydrangea Wreath for Front Door
Check out this EASY step-by-step tutorial to make a gorgeous hydrangea wreath for your front door!
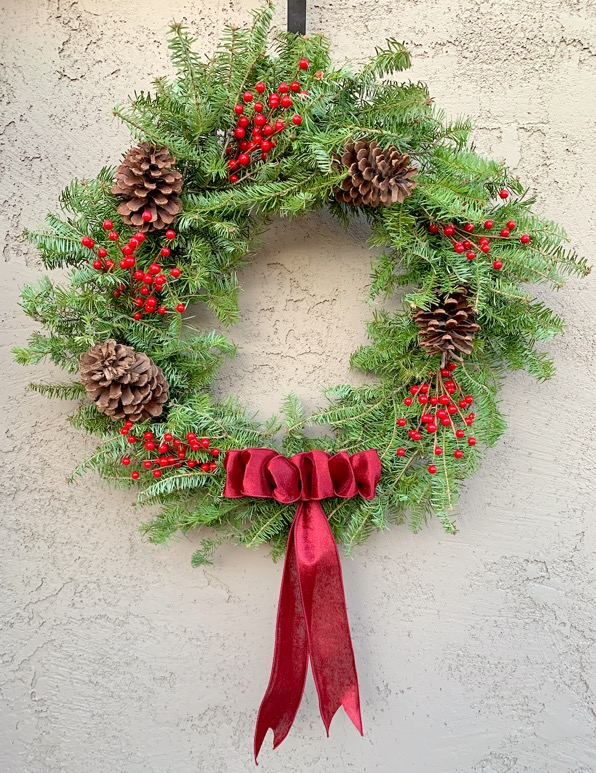
Free DIY Fresh Wreaths & Garlands
You’ll love this tip for how to make a beautiful live wreath… for FREE! When the price is FREE, decorating for Christmas becomes even more fun!
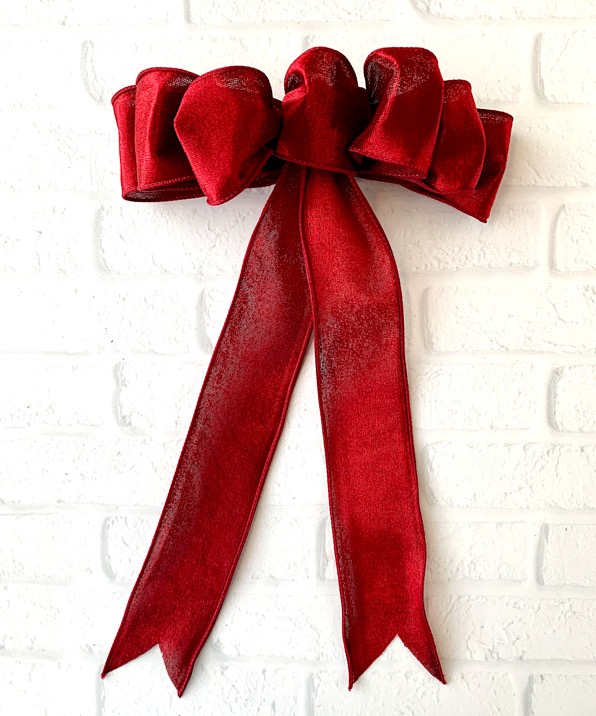
How to Make a Bow for a Wreath with Wired Ribbon
Wondering how to make a bow for a wreath with wired ribbon? This simple step by step tutorial will show you just how fast and EASY it can be!
Festive Christmas Throw Pillows:
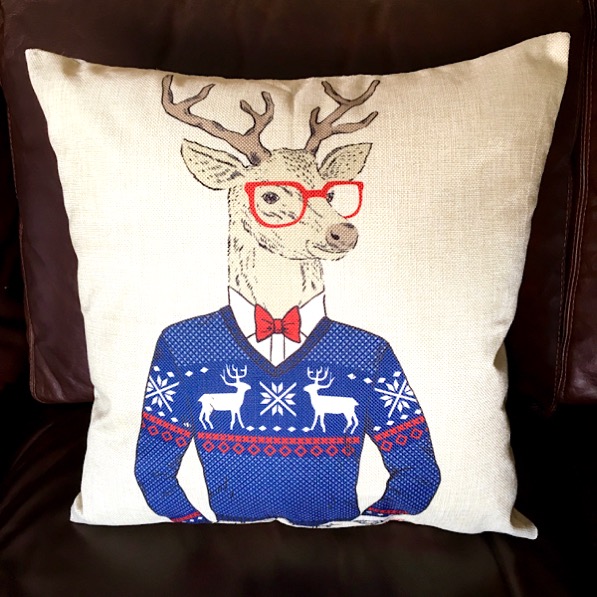
Christmas Throw Pillow Covers
Instead of buying new Christmas throw pillows this year, just cover up your old ones with some cute Pillow Covers. No one will ever know!
These removable zipper covers make swapping out your look so simples… and SO frugal! I’ve got several, and just swap them out by season… talk about a thrifty home decor trick!
DIY Christmas Candles:
Peppermint Homemade Soy Candles
Have you been thinking about making your own candles? I’ve got to tell you… Homemade Soy Candles are so easy to make!
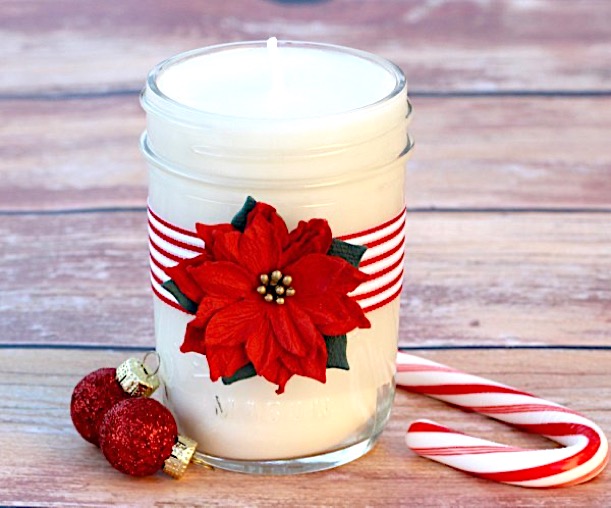
Mason Jar Christmas Candles
Add some sweet holiday decor to your home when you make this easy Mason Jar Christmas Candles craft!

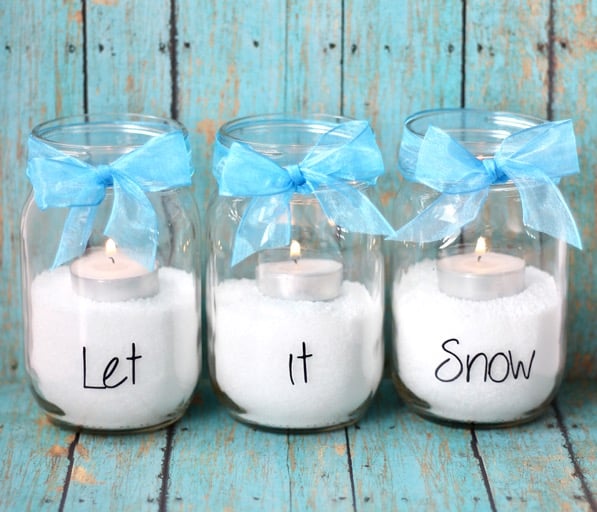
Let it Snow Mason Jar Candles
Add some fun snowy themed decor to your mantle with these quick and easy mason jar candles!
Budget Christmas Tree Decorations
So are you ready to trim the tree?
These fun Homemade Christmas Ornaments will look fantastic on your tree! But before we get started, let’s make sure we keep that tree alive!
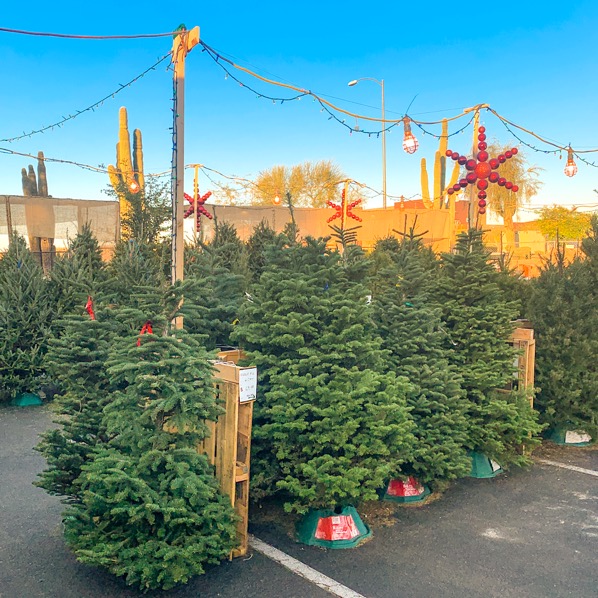
How to Keep Your Christmas Tree Alive Longer! (6 Easy Tricks)
Keep your live tree looking gorgeous all season long with these easy tips and tricks for how to keep your Christmas tree alive longer!
Orange Slices Ornaments
Are you wondering how to dry orange slices in oven? They are so easy to make and you can use them for pretty Christmas tree ornaments, too!

Orange Slice Garland
This pretty garland is so simple to make, and will add such a pretty pop of color to your Christmas decor!

DIY Glitter Ornaments
Are you wondering how to make Glitter Ornaments? They’re actually a cinch to make, and so easy to customize with your favorite colors!

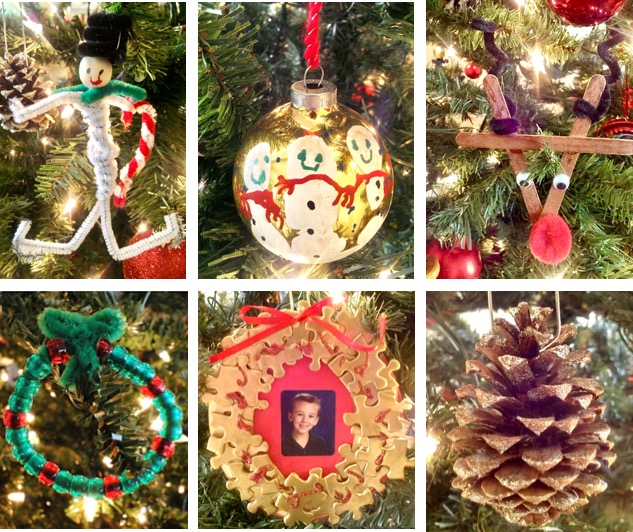
10 Easy Christmas Ornament Crafts for Kids
Go grab the kids… it’s time to make some sweet keepsake ornaments! These cute and crafty ornaments are so simple for little ones to make, and will cherished for years to come!
DIY Photo Ornaments
Deck the halls and trim the trees this Christmas with some super-cute DIY Photo Ornament! These also make fabulous thrifty homemade gifts!

Crafty Christmas Decorations:
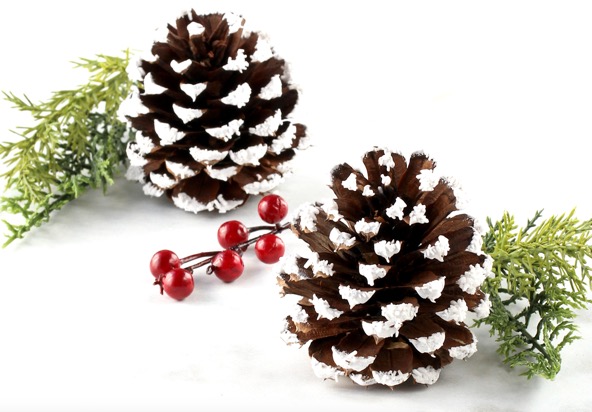
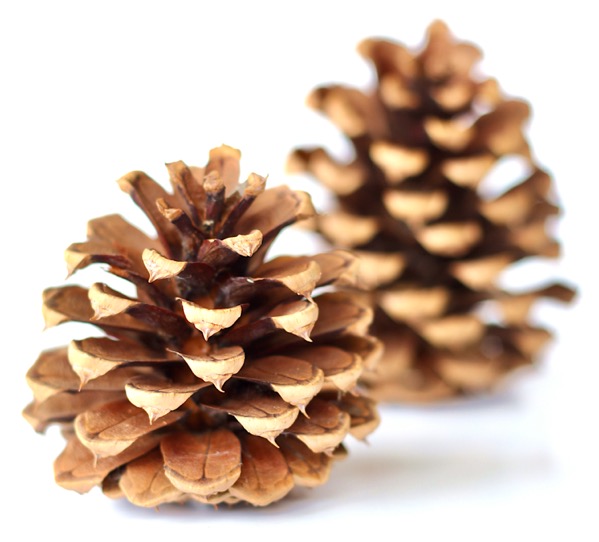
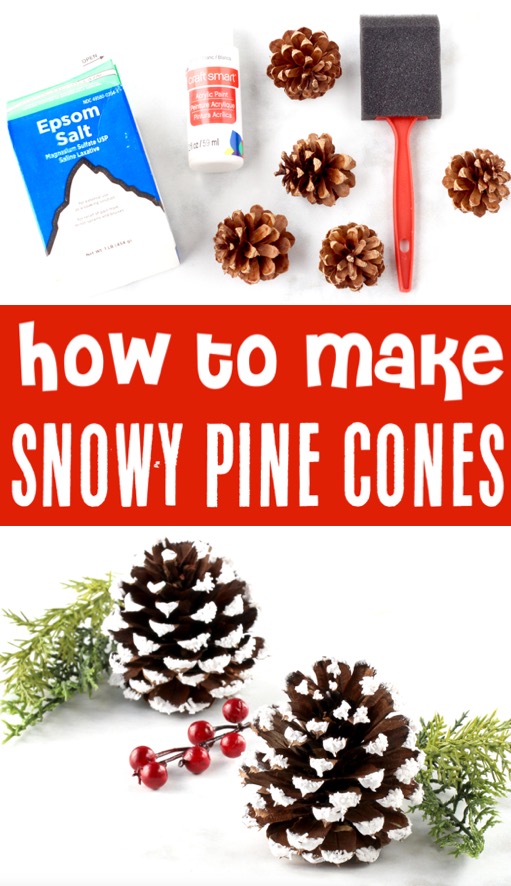
DIY Snowy Winter Wonderland Pine Cones
Snowy Pine Cones are so EASY to make, and make the perfect addition to festive floral bouquets. Or add some floral wire around the base, and attach them to your wreaths and garlands throughout your home for a gorgeous touch of holiday spirit!
DIY Cinnamon Pine Cones
You won’t believe how EASY it is to create your own Cinnamon Pine Cones, and they smell AMAZING!! They can be the perfect scented addition to your Christmas Decor this year!
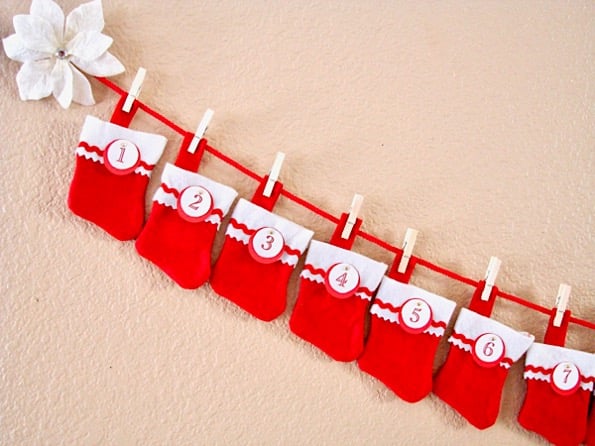
DIY Advent Calendar for Kids
So many advent calendars are 1-time use only, but you can save BIG if you invest in a reusable Christmas advent calendar! Then you get to have the fun of deciding what to hide for each day’s gift! Maybe candy, money, or fun notes with clues sending your kids on a wild scavenger hunt! Let the countdown begin!
Christmas Tablescape Ideas
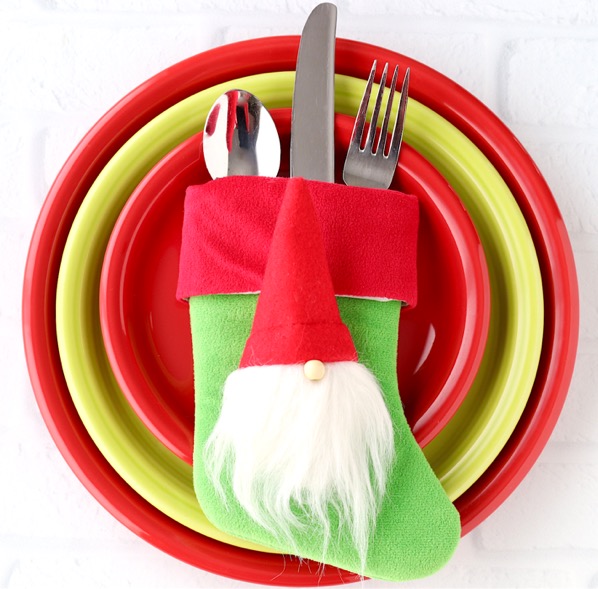
Christmas Place Settings
Placing silverware in Mini Stockings is such a fun and simple way to add some festive flair to your Christmas table! Add a dinner plate (or charger plate) beneath your salad or appetizer plates for an extra punch of color.
You can even add something fun on top of the little stocking… like a gnome, festive branch, ornament, etc.
So easy, and cute as can be!!
Related: 50 Easy Christmas Dinner Recipes
DIY Christmas Pinecone Basket (Pretty Centerpiece)
This Pinecone Basket is such a fun centerpiece to your Christmas dinner table! Why not take all those beautiful pinecones you’ve been gathering and add them to your Christmas decor?!?

More Christmas Decorating Ideas on a Budget Inspiration…
Now that you’ve decked the halls inside and created magical winter wonderland outside, you’ll know exactly what you need to fill in any gaps!
Use these tips below to score some AMAZING deals on decor at your favorite stores…
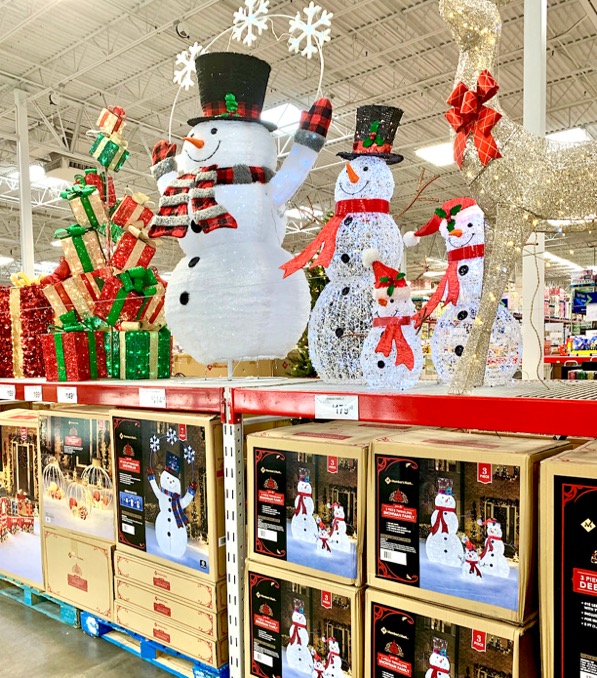
Sam’s Club Money Saving Tips
Give yourself some easy ways to save money on your baking and holiday meal prep. Then find some deals on outdoor Christmas decor to make your home into a Christmas wonderland!
Amazon Deals and Steals (11 Secrets to Save BIG)
So you’re already buying so much stuff on Amazon, right? Well it’s time to make your next checkout experience a whole lot more frugal! You won’t believe how much you’ll save with these little-known tips and tricks!
Score Walmart Deals (20 Secret Tips)
Walmart is such a convenient place to pick up baking supplies, holiday meal ingredients… and of course Christmas decor. So are you ready to head to the store loaded with some clever shopping tips and tricks?
Why spend more than you have to! It’s time to start scoring some serious savings at Walmart this Christmas season!
More Creative Christmas Holiday Ideas
So now that you know how to deck the halls on a dime with these Christmas Decorating Ideas on a Budget, go check out even more fun ho ho holiday ideas below…
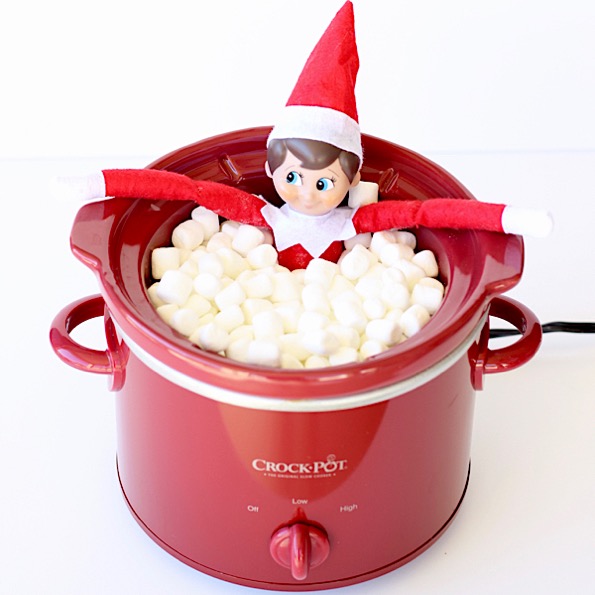
27 Funny Elf on the Shelf Ideas
Don’t Forget to include your Elf! Have a blast trying some of these funny Elf on the Shelf Ideas this Christmas!
50 Easy Christmas Crafts to Make at Home
Got the itch to craft? Do you absolutely love Christmas?? Well, you just hit the jackpot! These craft ideas for kids adults will keep you busy all throughout the holiday season!
55 Fun Christmas Activities for Families, Couples, Kids & Adults
Whether you’re looking for festive new Christmas traditions for families, December date nights for couples, holiday party ideas for adults, exciting activities for friends, or magical ideas for kids… I’ve got you covered!
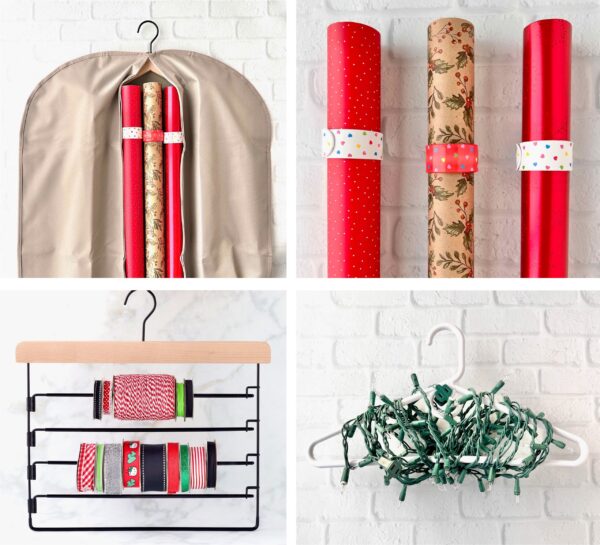
15 Christmas Storage Ideas (Genius Holiday Hacks)
Is holiday clutter taking over your home? These brilliant Christmas Storage Ideas and Holiday Organization Hacks will change your life!
Farmhouse Home Decor Tips and Ideas (Get the Look on a Budget)
Give your home a gorgeous makeover with these easy Farmhouse Home Decor Tips and Ideas on a Budget.

Got some Christmas shopping to do? From Co-Workers to Men, and Kids to Grandparents… even Teachers and your beloved Dogs, these ideas have got you covered!
Frugal Gift Ideas for Everyone On Your List!

So what are your favorite Christmas Decorating Ideas on a Budget?
Leave a comment & share!


I’m so excited to try a few ideas I did years ago with my kids now I’ve got teen grandkids and going back to some old traditions. thank you.
You’re very welcome, Karen… have FUN decorating for Christmas!
Gosh I am overwhelmed with all these ideas! I don’t know where to start but they all look so fun I’m going to try and do at least a couple. I think I’ll start with the glitter baubles that will be a lovely project to try out with my kids.
Thanks, Kate! Have fun making the ornaments with your kids this year!
Woah I’m overwhelmed with all these great ideas! I wish I had the time and patience to try them all. I cannot wait to start making some Christmas cushion covers.
Fantastic ideas thanks so much for sharing.
Thanks for the info Heidi. So many (to many) options, but great ideas. Love the cactus hats, very different.