
Perfect for beginners, this Sourdough Starter will have you baking gorgeous loaves of fresh, crusty sourdough bread in your kitchen in no time! And you’ll love watching it perform its bubbly magic week after week! Trust me, this is the foolproof recipe you’ll need to start baking sourdough!

To start, this quick sourdough starter recipe is easy to make, simple to maintain, and if taken care of properly… can last for years and years!
And once you begin using it… you can take your homemade bread recipes and give them a MASSIVE flavor upgrade!
John writes: "Very clear instructions, and so easy a child could do this."
You’ll just need a few minutes each day. That’s all it takes to create an active and bubbly starter dough for sourdough that will ready to bake with in about 7 days!
Of course once you get your starter active and bubbly, you’ll want to maintain it with 1 feeding every week. And to help you remember to feed your starter, you can even make a catchy slogan in your head like… Feeding Fridays, Sourdough Saturdays, etc. Feeding sourdough starter really is that simple.
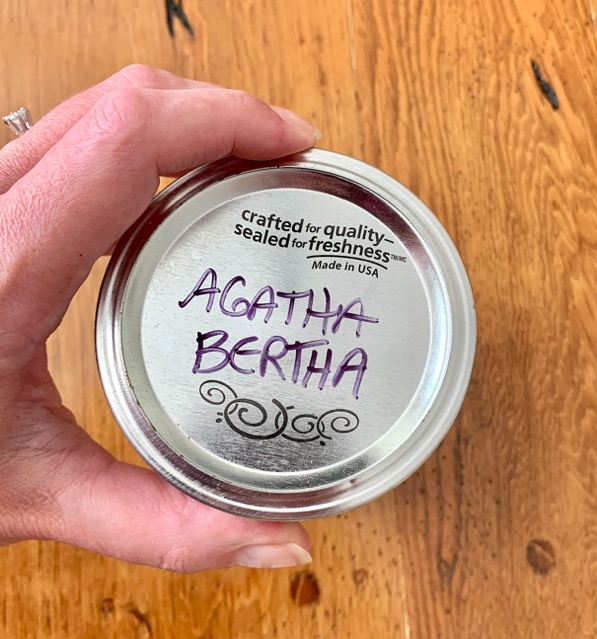
As tradition goes, you’ll want to name your sourdough starter, too! I mean, it is living, right? 🙂
Mine is named Agatha Bertha. She’s been alive and flourishing for almost a year now, and has become such a great little friend in the kitchen!
I can’t wait to hear what you name yours! So be sure to share in the comments below!!
Now… are you ready to make your own magical sourdough starter?
This is how to get started…

What is Sourdough Starter Made Of?
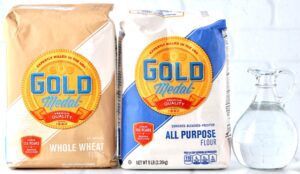
You’ll just need 3 sourdough starter ingredients:
- All Purpose Flour – I like using King Arthur Flour or Gold Medal.
- Whole Wheat Flour – It contains more microorganisms and nutrients which can kickstart your starter and help give it a faster fermentation. In other words, it makes it easier to get your starter going.
- Filtered Water – The goal here is non-chlorinated water. You could use Spring Water, filtered tap water run through a Brita, or simply leave some of your tap water in a glass on the counter for 24 hours… allowing the chlorine to evaporate.

Pin this now to find it later
Pin ItHow to Make Sourdough Starter
There’s no need to purchase a Sourdough Starter Kit when it’s so easy to make your own sourdough bread starter recipe from scratch!
So how do you make starter dough for sourdough?
You’ll start with just 3 simple ingredients, and then you will feed it about twice a day for the first week.
Once it becomes active and bubbly, usually around the 7th day, you’ll be ready to bake your first loaf of this sourdough bread recipe! That’s right, your starter will be ready for action in just 1 week!
Scroll down for the printable recipe card with detailed, step-by-step instructions.
Best Containers for Sourdough Starters:
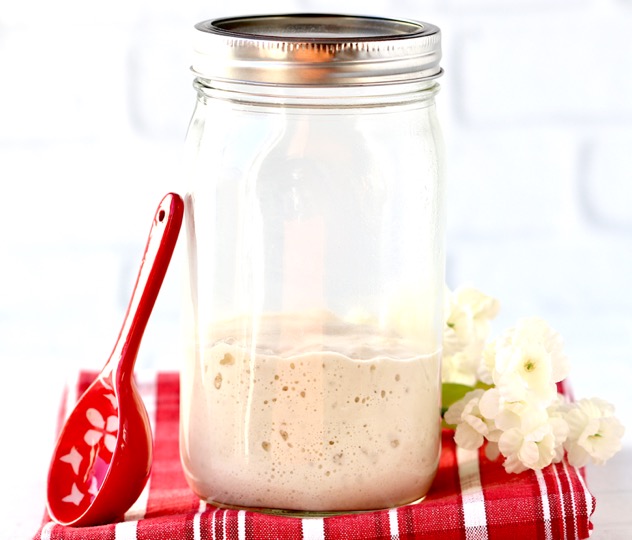
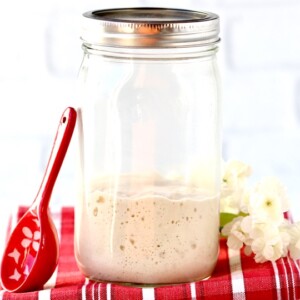
Over the years I have found that the best container for an active sourdough starter is a clear glass jar with straight sides.
I use a simple 32 ounce wide mouth glass mason jar. This sourdough starter jar gives your starter plenty of room to expand and grow, and the clear glass allows you to keep an eye on the bubbles and activity.
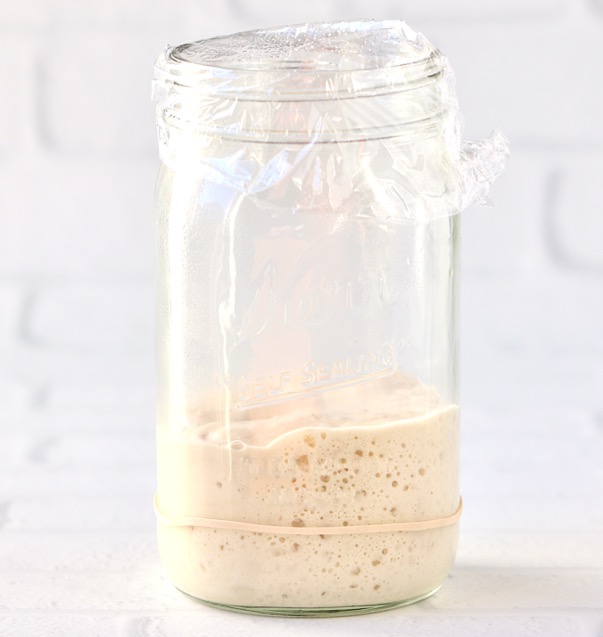
What Should Sourdough Starter Look Like?
When it comes to your starter, you’ll be looking for those bubbles to start forming.
A bubbly starter is a happy starter!
How Do You Keep Sourdough Starter Warm in a Cold House?
Got a cold house? Not a problem!
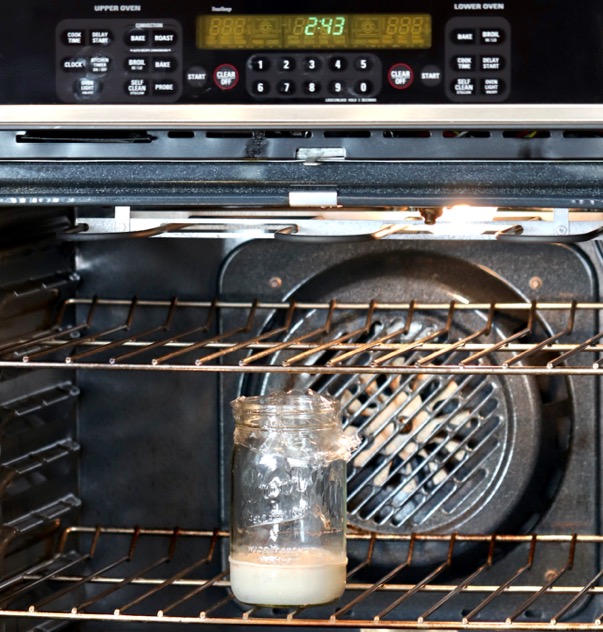
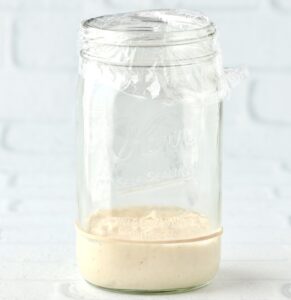
If your sourdough starter isn’t rising by day 4, after a feeding cover it with plastic wrap and a rubber band on top to hold it in place, then place it in a turned off oven with the oven light on and oven door closed for a few hours a day.
The slight warmth from the oven will be the perfect cozy spot to help it wake up and get rising.
Kathy writes: “Put it in your oven with the light on – it makes just enough heat. Be sure to remove it before using the oven, though. Maybe put tape on your switch as a reminder.”
How Often Should I Feed My Sourdough Starter?
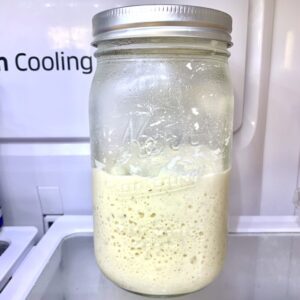
Once you get through the initial 7 days of getting your starter going, you can maintain it with once a week feedings IF you store it in the refrigerator.
If you store it at room temperature, you’ll need to feed every 12 – 24 hours.
That’s why I like to store it in the fridge. 🙂

What Can I Make with Sourdough Discard?
After your starter is well established, living in your refrigerator, and being maintained with weekly feedings, you may be wondering… “what should I make with my sourdough discard each week?”
Well, that’s a great question!
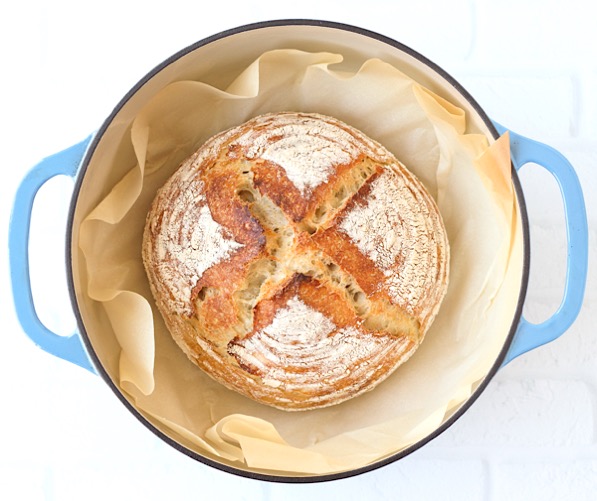
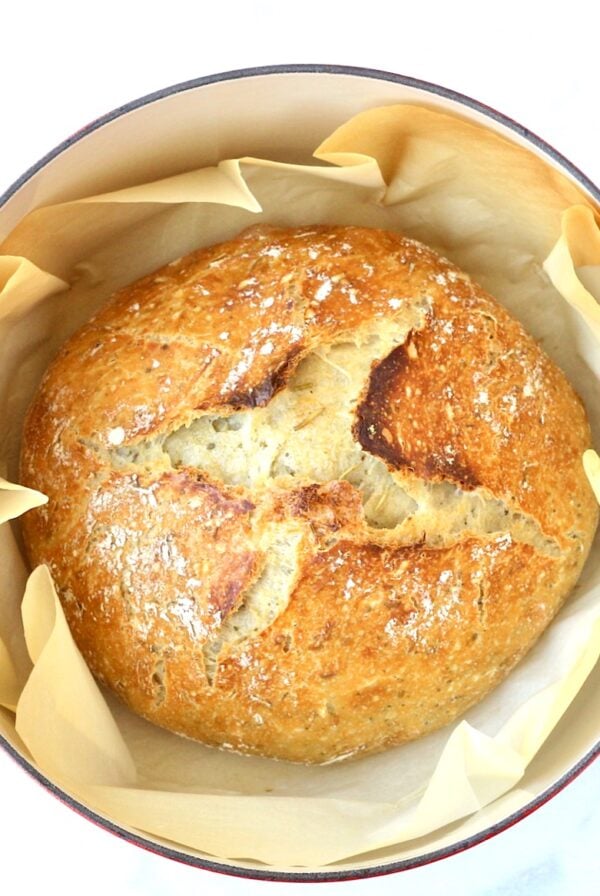
You can either toss it each week, or put it to use in a fun new recipe! My absolute favorite way to use sourdough discard is with this Sourdough Bread Recipe to bake up a fresh loaf of artisan style bread.
You can also use your discard to bake up the most scrumptious sourdough biscuits imaginable. (Trust me, they’re AMAZING with homemade Strawberry Jam or Blackberry Fruit Jam.)
Other options include sourdough crackers, sourdough english muffins or biscuits, sourdough pancakes or waffles, and even a sourdough pizza crust.
Then, don’t forget about sandwiches! You can use your sourdough bread to make the most amazing Sourdough Grilled Cheese Sandwich. And don’t forget about breakfast! Trust me, you’ll NEED to use your sourdough to make this heavenly Sourdough French Toast!
How Do I Share My Sourdough Starter?
After your sourdough starter is well established and mature, you can start sharing it with friends and family.
It makes such great Gifts in a Jar Recipe to give to your family and friends!
I would suggest waiting until your starter is several months old, then simply take your discard from one of your weekly feedings, transfer it to a new clean jar, feed it 1/2 cup all purpose flour + 1/4 cup filtered water, stir well, place the lid on the jar, leave it out on the counter for a few hours, then transfer to the fridge.
Discard and feed again the next week, just like you do with your regular starter each week, and it will be ready to share!

How Do You Keep Sourdough Starter Alive When On Vacation?
Well… it just depends how long you’ll be gone.
If you’ll be gone around 1 week or so, keeping it in the refrigerator should be just fine. Just feed it before you go, and then feed it again right when you get back.
If you’ll be gone longer, there are a few options…
- Have someone babysit (and give it the weekly feedings)
- Share some as gifts with friends & family (and you can get back the discard if yours doesn’t make it)
- Store some in the freezer. (then revive it at room temperature with feedings when you get back)
Frugal friend Lavia writes: “Mine is named Penelope. She’s about 10 years old now. I even carried her with me when we moved cross country (kept her refrigerated every time we stopped in a hotel). I keep her in a couple containers in the freezer and a couple in the fridge. It also helps to give some away in case you have a mishap, so then you can get her back from whoever else has her (that happened to me once).”
Easy Bread Recipes for Beginners


Did You Enjoy This Recipe? ⭐️⭐️⭐️⭐️⭐️ Leave a comment & review below!
Sourdough Starter
Doubling Recipe Tip
If doubling or tripling recipe with buttons below, ingredient notes found after comma will not adjust. Increase ingredients as needed.
Ingredients
- 1/4 cup Whole Wheat Flour, (+ 1/2 cup more for the week)
- 1/4 cup All Purpose Flour, (+ 2 1/2 cups more for the week)
- 1/3 cup Filtered Water (Non-Chlorinated Water) , (+ a little more than 1 1/2 cups more for the week)
Instructions
- Gather your ingredients.

- Day 1 Morning: Add ¼ cup Whole Wheat Flour, ¼ cup All Purpose Flour & 1/3 cup Filtered Water to Jar, stir well with small spatula, scrape down sides, put the lid on loosely (just be gently, and don't screw it on too tight), and let it sit for 24 hours.
- Day 2 Morning: Stir starter, put lid back on loosely & let it sit for 24 hours.
- Day 3 Morning: Transfer 3 tbsp. starter to clean jar, discard the rest. To clean jar, add ¼ cup Whole Wheat Flour, ¼ cup All Purpose Flour & 1/3 cup Filtered Water. Stir well with small spatula, scrape down sides, and put the lid on loosely. Now is a great time to place a rubber band around the outside of the jar, at the top height of your starter. This will help you to be able to see if it is rising at all yet during the day. After attaching a rubber band, let your starter sit for 12 hours.

- Day 3 Evening: In same jar, feed it 2 tbsp. AP Flour & 1.5 tbsp. Filtered Water, stir gently with spatula, put lid back on loosely & wait 12 hours.
- Day 4 Morning: Transfer 3 tbsp. starter to clean jar, discard rest. Add ½ cup AP Flour & 1/4 cup Filtered Water. Stir well with small spatula, scrape down sides, put lid on loosely, and let it sit for 12 hours.
- Day 4 Evening: Feed it 2 tbsp. All Purpose Flour & 1.5 tbsp. Filtered Water, stir gently with spatula, put lid back on loosely & wait 12 hours.
- Day 4 Bonus Tip: If your sourdough starter isn't rising by day 4, after a feeding cover it with plastic wrap and a rubber band on top to hold it in place, then place it in a turned off oven with the oven light on and oven door closed for a few hours a day. The slight warmth from the oven will be the perfect cozy spot to help it wake up and get rising.

- Day 5 Morning: It will be liquidy & may not rise… that’s okay. Transfer 3 tbsp. start to clean jar, discard rest. Add ½ cup AP Flour & 1/4 cup Filtered Water. Stir well with small spatula, scrape down sides, put lid on loosely, and let it sit for 12 hours.
- Day 5 Evening: Feed it 2 tbsp. All Purpose Flour & 1.5 tbsp. Filtered Water, stir gently with spatula, put lid back on loosely & wait 12 hours.
- Day 6 Morning: Transfer 3 tbsp. starter to clean jar, discard rest. Add ½ cup AP Flour & 1/4 cup Filtered Water. Stir well with small spatula, scrape down sides, put lid on loosely, and let it sit for 12 hours.
- Day 6 Evening: Feed it 2 tbsp. All Purpose Flour & 1.5 tbsp. Filtered Water, stir gently with spatula, put lid back on loosely & wait 12 hours.
- Day 7 Morning: Transfer 3 tbsp. starter to clean jar, discard rest. Add ¼ cup Whole Wheat Flour, ¼ cup AP Flour & 1/3 cup Filtered Water. Stir well with small spatula, scrape down sides, put lid on loosely, and let it sit for 12 hours.
- Day 7 Afternoon: After 4 hours, it’s time for a float test. Transfer 1 tbsp. starter to glass or bowl filled with room temp water. If it floats, it’s ready to bake. If it doesn’t float yet, continue with feedings for another day, and test again.
- Once your starter is ready to bake, remove the amount of starter needed for your recipe, and then feed the starter in the jar ½ cup All Purpose Flour and ¼ cup Filtered Water, stir well with spatula, let stand for 4 hours, then transfer to the fridge. This is where your sourdough starter jar will live now. 🙂 The consistency of your starter this point will be like a thick batter. When feeding, always make sure that starter is completely moistened, with no flour showing. If needed, just add an extra 1/2 tsp. of water at a time to achieve that consistency.

- Maintenance Feedings Once a Week: Continue to feed your starter 1x each week by removing and discarding half of your starter, then adding to the jar 1/2 cup All Purpose Flour + 1/4 cup Filtered Water, and stirring well with a small spatula until it's all combined. After your weekly feeding, let your starter jar sit out on the counter for about 4 hrs, then place it back in the refrigerator.


Notes
- Always keep sourdough starter out of direct sunlight.
- If sourdough starter isn’t rising by day 4, after a feeding cover it with plastic wrap and a rubber band on top to hold it in place, then place it in a cold oven with the oven light on for a few hours a day. The slight warmth from the oven will be the perfect cozy spot to help it wake up and get rising.
 Like this recipe? Rate & comment below!


Hi, do you have recipes using this starter available? I see the suggestions but I can’t select them. Thanks!
Hi Kim, I’ll be sharing my easy Sourdough Bread Recipe next week.
If you haven’t signed up for the email newsletter yet, you can sign up here and it will be emailed to you:
https://thefrugalgirls.com/email
Nice post! Very clear instructions, and so easy a child could do this. Or me. 🙂 Thanks!
Haha… thanks, John! It really is such a simple process!
I’ve always wanted to learn how to make my own starter! Thanks for sharing this helpful blog post with us!
You’re very welcome, Christie! It seems intimidating at first, but it’s actually really easy! 🙂
Heidi,
Such a fabulous recipe. Love how you have simplified it and homemade is ever so comfortable with making and devouring. Thanks for another lovely recipe.
Thanks so much, Hasin! You’re right… homemade bread really is the ultimate comfort food!
Great recipe beautiful!! 🙂
have a great start in the new week,
Tiziana
Thanks so much, Tiziana! I hope you have a lovely week as well! 🙂
This is such a great way to always have delicious bread on hand!
Yes… it really is! Nothing compares to homemade fresh baked sourdough bread! 🙂
must you use wheat flour or can you use all all purpose flour?
Hi Shirley ~ it’s not absolutely necessary to use wheat flour, but I always use it in those first few days because it contains more microorganisms and nutrients which can kickstart your starter and help give it a faster fermentation. Hope that helps! 🙂
Thanks it does. Now, I wonder what bran flake powder would do? My state PA has a Senior Box Prpgram based on income and I had ALOT! of bran flakes , so I crused in blender to nice chips and use it in an a;pplesauce ecipe and more.
If I were to grind to powder ie would have a fermentation booster, I think but, would decrease the amount (ratio) of APF/SRF :bran powder or it would be an eat an run even probably. Perhaps add some honey as well?
Your thoughts on my new created recipe?
Hmm… I honestly haven’t ever tried it that way, Shirley… but if you do, let me know how it turns out!
What a great idea! Homemade bread tastes so much better than the store bought brands.
I agree… it doesn’t even compare! 🙂
What a simple recipe! I love the name you picked for yours. Cute!
Aww… thanks, Michelle! Agatha Bertha is such a good girl… I just made another loaf from her today. 🙂
Awesome! Simple, easy to follow and bread baked sourdough definitely tastes better.
Thanks, Angie… and you’re right ~ nothing compares to home baked sourdough bread! 🙂