Need to freshen up your front door for Spring? You can make this DIY Hydrangea Wreath for Front Door in just 5 minutes!!
Then have even more fun when you try making these fabulous Fresh Christmas Wreaths, too!
Hydrangea Wreath for Front Door
Pretty up your house and add some curb appeal on a budget to your home with a beautiful DIY Hydrangea Wreath for Front Door!
Have you ever looked at your front door and thought it looked a little bare, a little bland, or… just in need of a little bling?
I have! Every front door needs a pretty wreath!
Wreaths add such a statement to your entryway, and this EASY wreath with hydrangeas can be quickly modified for every season of the year!
I’ve made several wreaths before, but this Easy Hydrangea Wreath is one of my favorites.
This fun craft comes together in a snap, and makes such a beautiful statement! I just LOVE how it looks on my door!
Now I’ve seen similar wreaths selling for well over $100 on Etsy, so if you take some time to make one yourself, you’ll save BIG! Or… you could even make some to sell at a craft fair or online!
So are you ready to make a gorgeous Hydrangea Wreath?
You won’t believe how FAST this project will be done!
Here’s what you’ll need to make yours…
Related: 45 Christmas Decorating Ideas on a Budget!
DIY Hydrangea Wreath Supplies Needed
This is what you’ll need to round up to get started…
- 18″ Grapevine Wreath
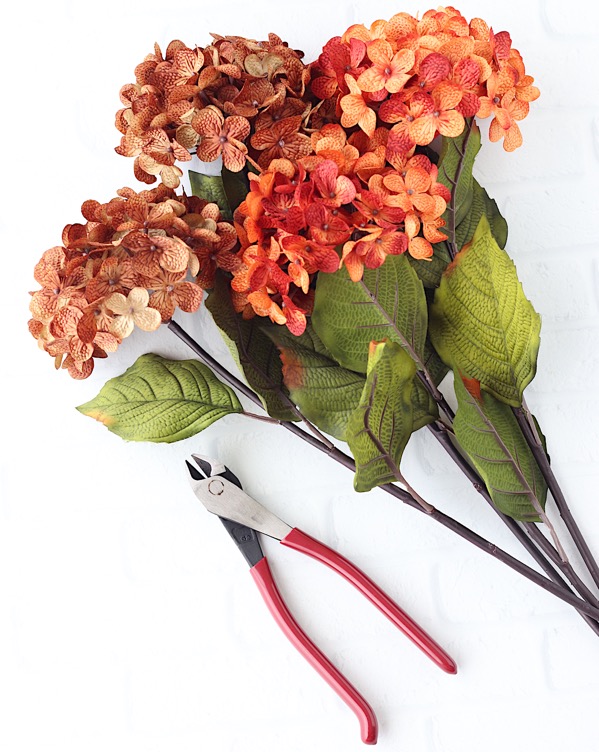
- 9 Silk Hydrangeas (3 each of 3 separate colors) – I LOVE the ones sold at Hobby Lobby!
- Wire Cutters
- Floral Wire or Hot Glue/Hot Glue G*n
- 2.5″ Wired Ribbon (I used about 3 yards)
- Wreath Hanger for your Door
Hydrangea Wreath Instructions
You’re not going to believe how EASY these gorgeous wreaths are to make!
Here’s what you’ll do…
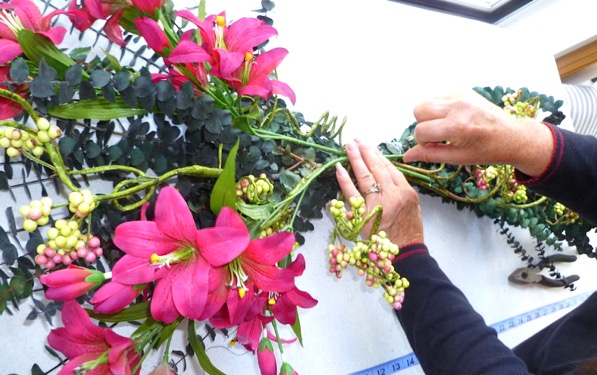
1. Trim down the stems of your hydrangea flowers using your wire cutters… you’ll want to leave enough inches on the stem to pop it through your wreath.
2. Lay out your trimmed flowers in a circle to arrange the pattern you’ll place them in.
3. One by one, insert trimmed flowers into the wreath.
4. If you’ve got a tightly woven wreath like mine, I just shimmied them on in and they were as firm as could be. If your wreath is woven loosely, you can secure the stems with floral wire.
When you’re done, add a pretty wired ribbon, make a bow, and you’re done!
Project Tips + How to Adjust for Different Seasons
When picking out your hydrangea flowers, just keep in mind what season you’ll be displaying this beauty on your front door. You can go neutral, or go season-specific with Fall colors or beautiful Christmas colors.
If you want to use your wreath year round, choose Cream as one of the three colors, and swap out the other colors as the seasons change.
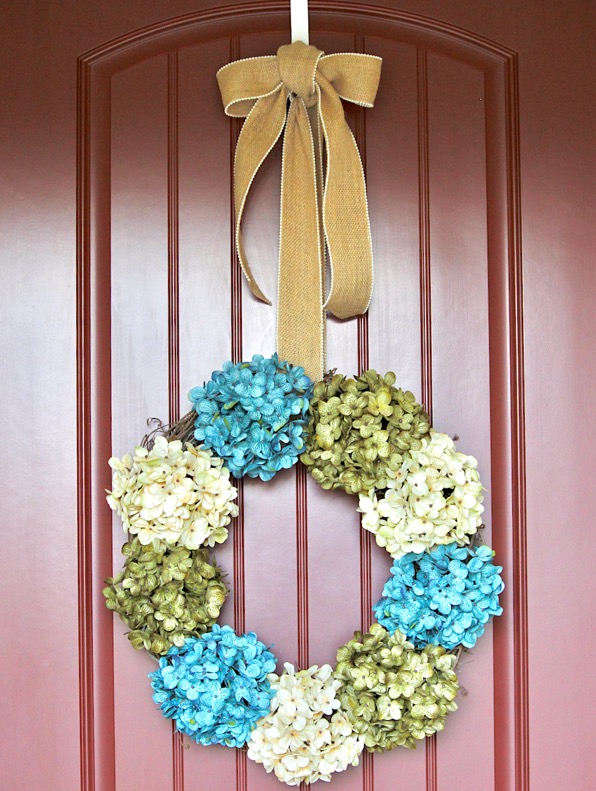
Spring Hydrangea Wreath Colors: Use Cream, Green, and Blue
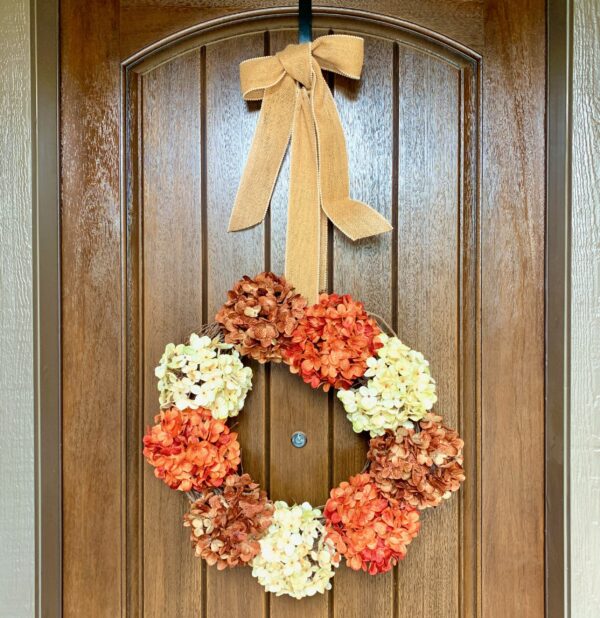
Fall Hydrangea Wreath Colors: Use Cream, Orange and Brown
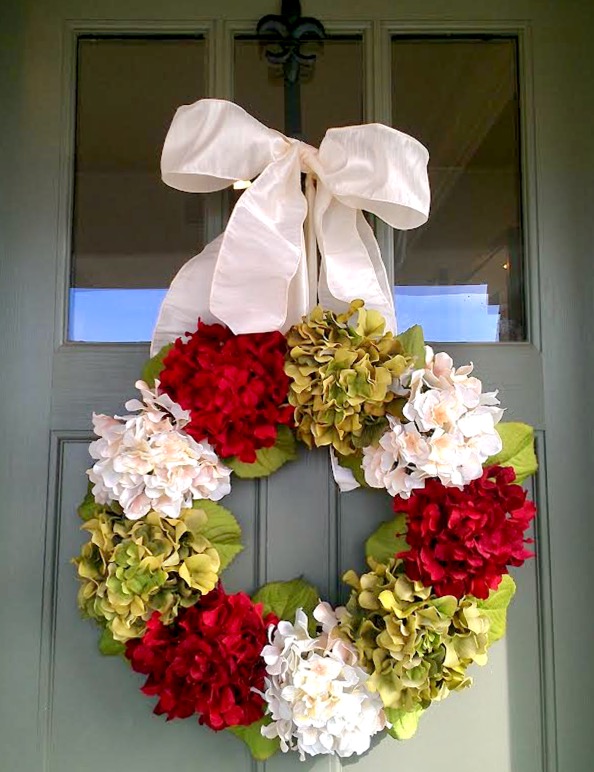
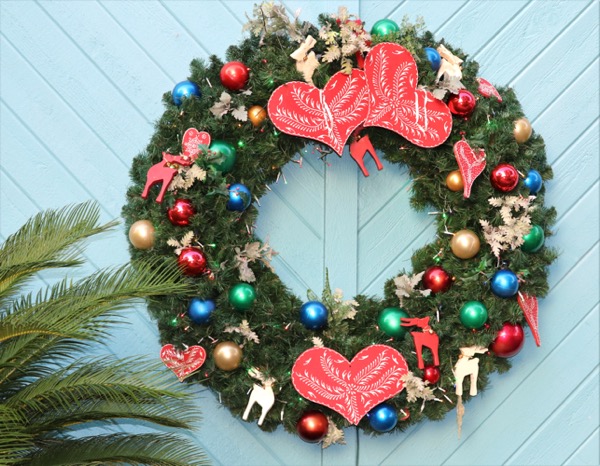
Christmas Hydrangea Wreath Colors: Use Cream, Green, and Red
DIY Hydrangea Wreath Reviews
What Your Frugal Friends Are Saying About this DIY Hydrangea Wreath Project…
Dawn writes: “These are a fabulous way to add some color and fun to your home.”
Kim writes: “This is a stunning way to decorate for the holidays.”
Penni writes: “I made one – they really are very quick and easy.”
More Creative Craft Projects
Want to see even more fabulous projects and diy tips that are easy on your wallet?
Have some fun exploring these creative ideas…
DIY Stocking Wreath
This cheerful Christmas DIY stocking wreath will make such a fun statement on your front door!

DIY Floral Swag Tutorial
Use this tutorial to create your very own budget friendly DIY Floral Swag… and enjoy beauty inside or out that will never wilt!
DIY Fresh Christmas Wreaths and Garlands
There’s no need to pay a small fortune for a gorgeous live wreath or garland this year. Here’s what you’ll need to make a gorgeous live wreath or garland on a budget!

How to Make a Bow for a Wreath with Wired Ribbon
Wondering how to make a bow for a wreath with wired ribbon? This simple step by step tutorial will show you just how fast and EASY it can be!

How to Keep Your Christmas Tree Alive Longer (6 Easy Tricks)
Keep your live tree looking gorgeous all season long with these easy tips and tricks for how to keep your Christmas tree alive longer!

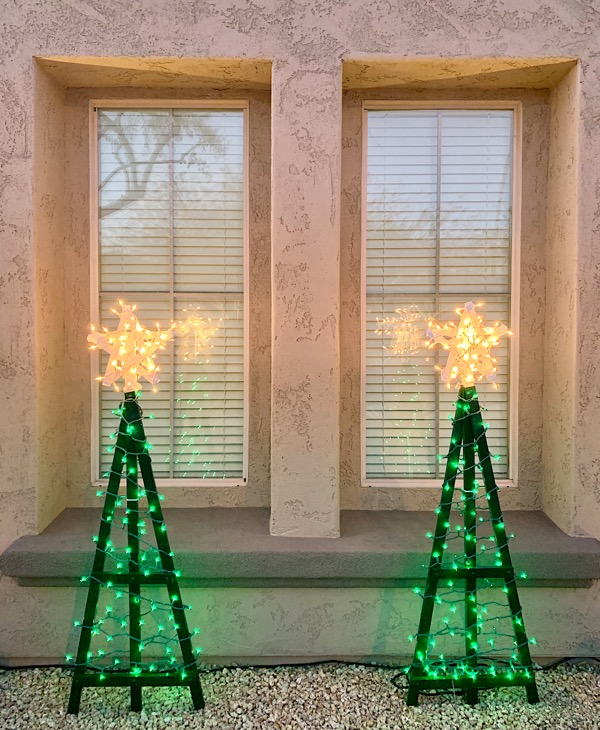
DIY Wooden Christmas Tree with Lights
Add more Christmas cheer to your front yard when you create some of these festive Wooden Christmas Trees!
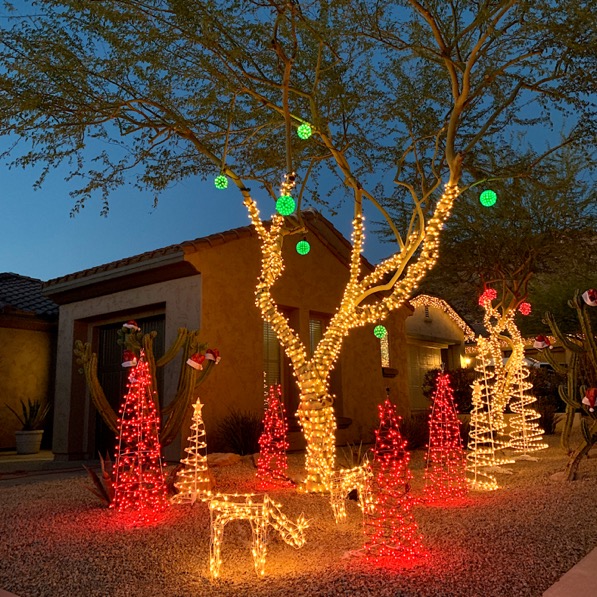
DIY Tomato Cage Christmas Tree
Give your yard decor a magical upgrade this year with a pretty DIY Tomato Cage Christmas Tree!
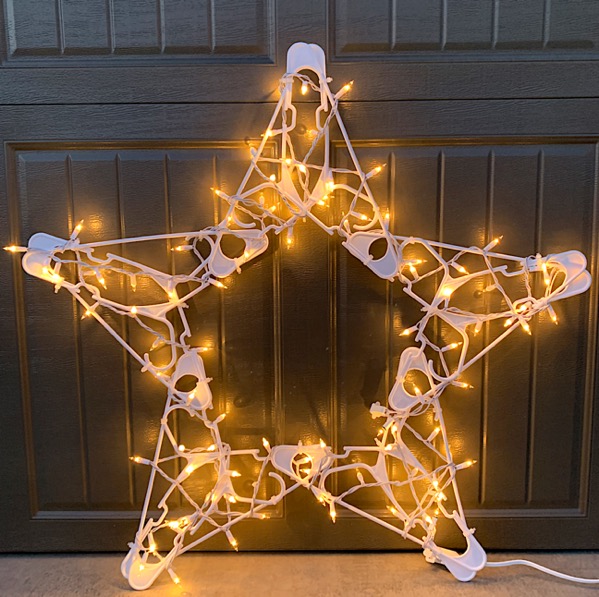
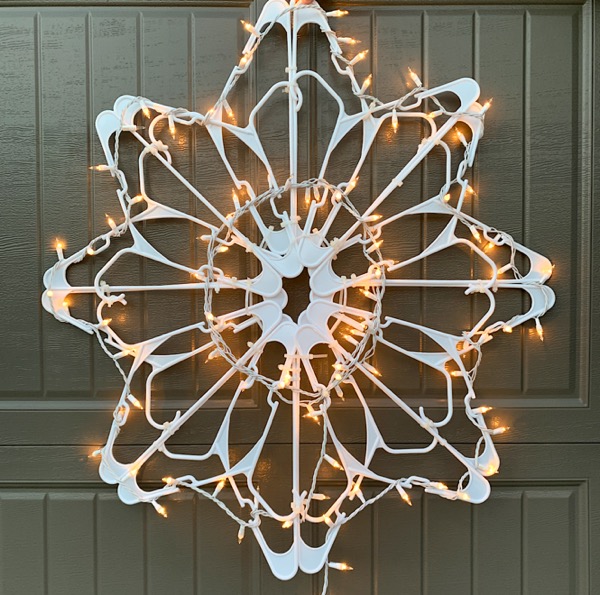
DIY Plastic Hanger Star with Lights
Give your front yard Christmas decor a frugal upgrade this year when you make this fabulous plaster hanger star strung with lights!
DIY Plastic Hanger Snowflake with Lights
This easy DIY Plastic Hanger Snowflake project is the fabulous, budget friendly Christmas decoration you’ve been looking for!
45 Christmas Decorating Ideas on a Budget
Load up on fun and frugal Christmas Decorating Ideas on a Budget with this BIG list of creative ideas and hacks!

50 Easy Christmas Crafts for Kids and Adults!
Get crafting right now with this BIG List of Fun and Easy Christmas Crafts to Make at Home!
55 Fun Christmas Activities for Families, Couples, Kids & Adults
Whether you’re looking for festive new Christmas traditions for families, December date nights for couples, holiday party ideas for adults, exciting activities for friends, or magical ideas for kids… I’ve got you covered!
Home Decor Tips and Tricks (Get The Look On A Budget)
Give your home a gorgeous makeover with these easy Farmhouse Home Decor Tips and Ideas on a Budget!

11 Home Staging Tips! (How To Sell Your Home Faster)
I’ve got some proven Home Staging Tips to share with you, that are going to make selling your home so much easier!

101 Moving Packing Tips and Tricks
Handle your next move like a pro with these Moving Packing Tips and Tricks that you can’t afford to miss!
So have you tried making a DIY Hydrangea Wreath for your Front Door yet?
Leave a comment & share!


These are sooo beautiful! I love hydrangeas so much so this is very creative and great for christmas decor! Thanks for sharing!
You’re very welcome, Christie! They are so unbelievably easy to make! 🙂
I love hydrangeas! This looks like a perfect DIY project for Christmas.
Thanks so much, Joanna! They are SO easy to make! 😉
What a fantastic idea!! Thanks for the inspiration!
Aww ~ thank you, JD! It was so easy to make, and I love how it looks on the front door. Have fun making your wreath! 🙂
I really love the Hydrangea wreath! It’s beautiful, and it appears easy to make. Thank you!