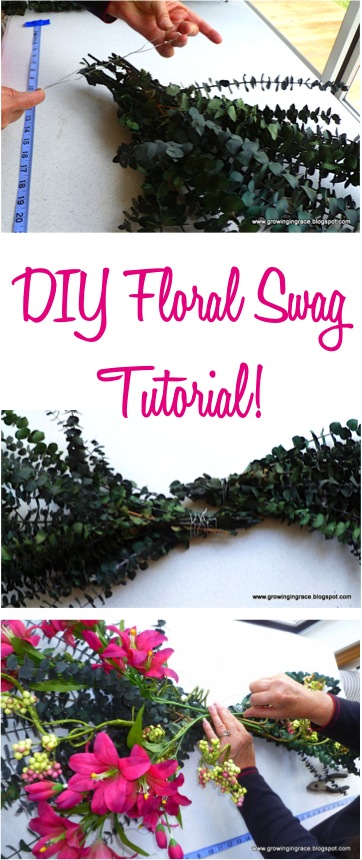
Use this tutorial to create your very own budget friendly DIY Floral Swag… and enjoy beauty inside or out that will never wilt!
Then… enjoy even more fabulous crafting fun when you try making this gorgeous Hydrangea Wreath and this beautiful Bow Made from Wired Ribbon!
![]()
The following is a fun DIY Floral Swag Craft Project and guest
post by Jo-Ann at Growing in Grace... enjoy!!
DIY Floral Swag
Are you ready to learn how to make a gorgeous DIY Floral Swag? Check out these simple step-by-step instructions from frugal friend Jo-Ann…
Cheryl writes: “Awesome tutorial! Thanks so much!!”
I enjoy the beauty of flowers, the fresh as well as the artificial ones. In fact, I like to display them throughout my home.
I display them in vases, on my mantel, on my walls in pictures or swags.
Flowers add beauty everywhere, both indoors and out. They are a constant reminder of the beauty of our God who created them.
Flowers can be very expensive, but I have found that making flower arrangements myself helps defer the cost.
Pre-made floral swags cost anywhere from $20.00 to over $100.00. Making them yourself can save a lot of money.
Here is how to make a swag of your own, for a fraction of the cost…
Related: Fun Crafts To Do at Home! (HUGE list)
Materials You’ll Need To Create Your Floral Swag
Here are the supplies you’ll need before you get started…
- Dried Eucalyptus
- Baby’s Breath
- Assortment of flowers (silk or dried)
- Ribbon (you could us raffia if you prefer)
- Hot Glue G*n and Glue Sticks
- Wire Cutter
- Measuring Tape
- 20- to 24-gauge floral wire
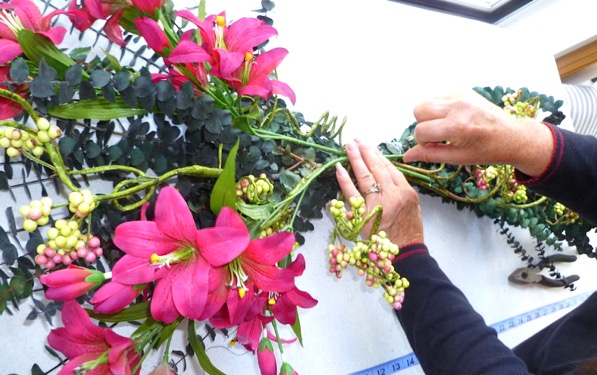
How to Make a Floral Swag
Here’s what you’ll do to create your gorgeous DIY floral swag…
1. Lay out your eucalyptus on the table and divide it in half.

2. Cut a piece of wire (approximately 18 inches long) for each half, and wrap it around each half securing the eucalyptus stems securely.

3. Next take the two halves and have the tips facing in opposite directions, overlap them approximately three inches.

4. Cut another piece of wire approximately 24″ long and wrap it around the two bunches.
5. Overlap until you have it secured together, by twisting the ends of the wire together several times.

6. In order to form a hanger for your swag, you would cut a piece of heavier wire (I used a coat hanger) 6″ long.

7. Bend it into a U-shape. Insert the little U ends into the back of the eucalyptus, bending the tips upward to make it more secure.

8. Then use your glue g*n to add glue to your hanger tips to secure it further.

9. Cut the flowers to approximately 16 inches in length.
10. Add the flowers as pictured below, and hot glue them into place or attach them with wire.


11. Make a bow and add it to the middle of your swag.

You have completed your DIY Floral Swag.
You can display its beauty in any room in your home, proudly, because you made it yourself at a fraction of the cost.

Jo-Ann enjoys sharing cake decorating tips, recipes, crafts, flower arranging, sewing, crocheting, quilting and especially gardening.
She invites you to visit her blog, Growing in Grace, and her Pinterest page. Why not hurry on over and see what she has been up to?
Wasn’t that SO easy?
I know your swag will turn out absolutely lovely, too!
More Easy Crafting Ideas
Are you still feeling crafty? I’ve got you covered!
I have even more fabulous Craft Projects to share with you that I know you’re gonna love.
Have more fun crafting when you try some of these projects for yourself…
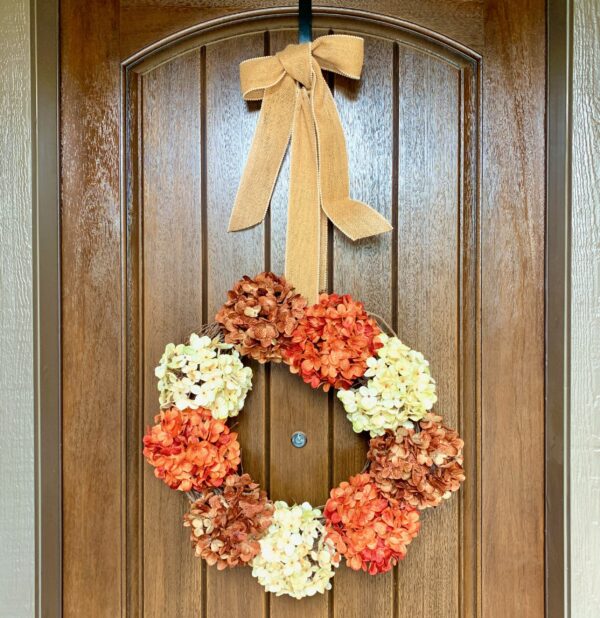
DIY Hydrangea Wreath For Front Door
Need to freshen up your front door for Spring? You can make this DIY Hydrangea Wreath for Front Door in just 5 minutes!!
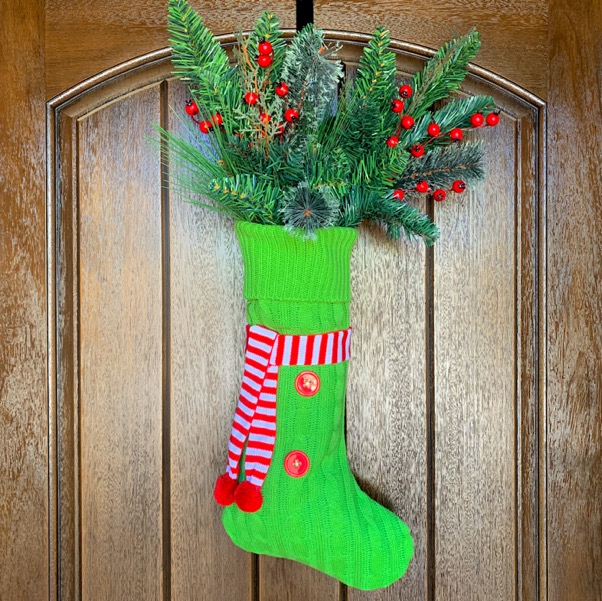
DIY Stocking Wreath
This cheerful Christmas DIY stocking wreath will make such a fun statement on your front door!
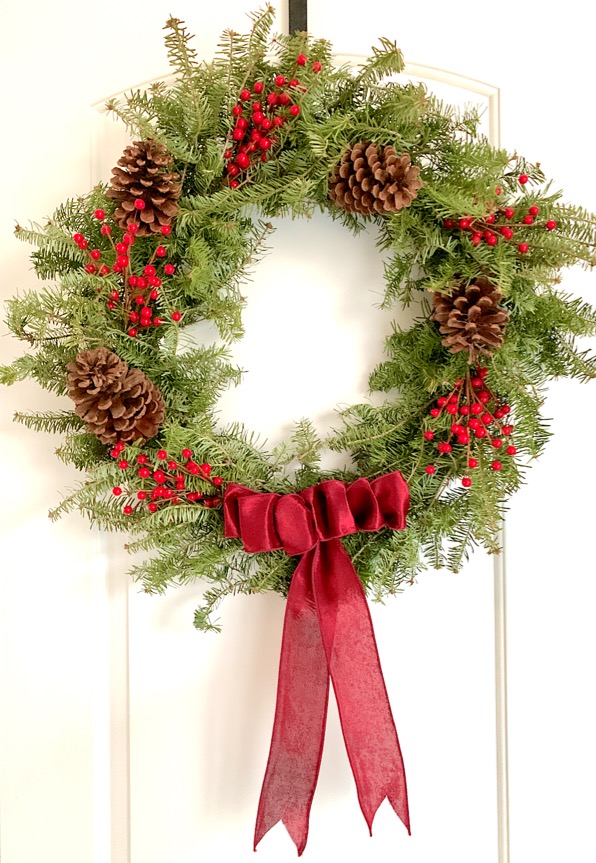
DIY Fresh Christmas Wreaths and Garlands
There’s no need to pay a small fortune for a gorgeous live wreath or garland this year. Here’s what you’ll need to make a gorgeous live wreath or garland on a budget!
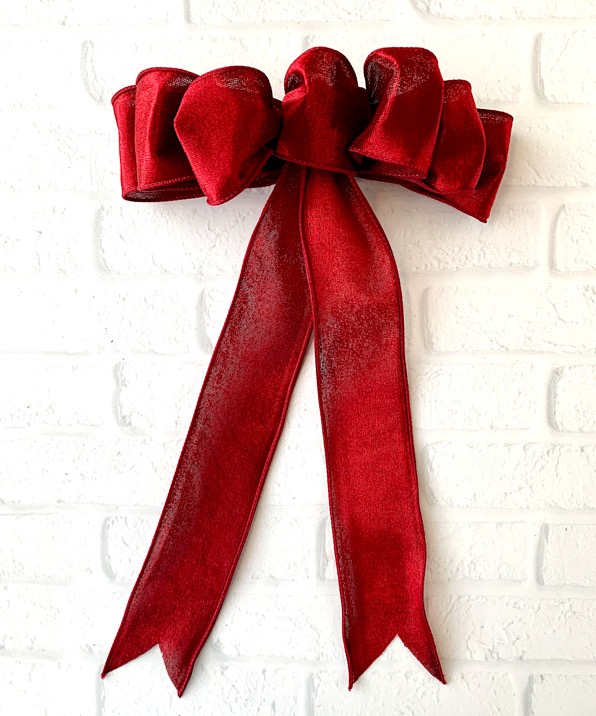
How to Make a Bow for a Wreath with Wired Ribbon
Wondering how to make a bow for a wreath with wired ribbon? This simple step by step tutorial will show you just how fast and EASY it can be!
Needle Minder Magnets DIY (How to Make Your Own in 5 Minutes)
Keep your needle handy when you’re sewing, cross stitching and embroidering with DIY Needle Minder Magnets! They’re SO quick and easy to make!

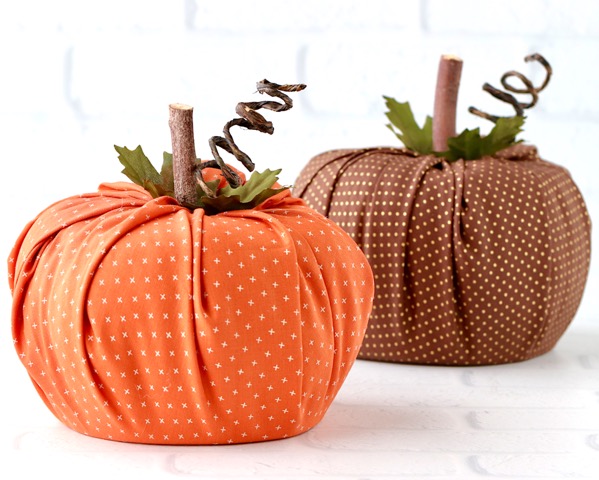
No Sew Toilet Paper Pumpkin Craft
These no sew toilet paper pumpkins are about as simple as can be to make, and will honestly take you less than 5 minutes to put together!
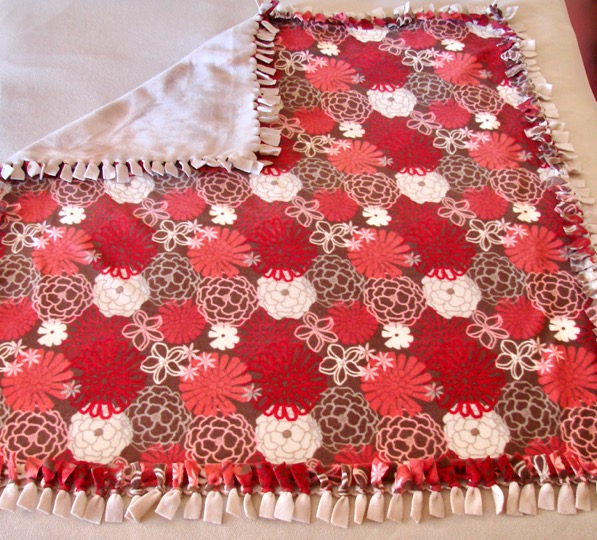
No Sew Fleece Blanket Tutorial
Create the perfect cozy blanket for a chilly day or make some extra special gifts with this easy No Sew Fleece Blanket Tutorial!
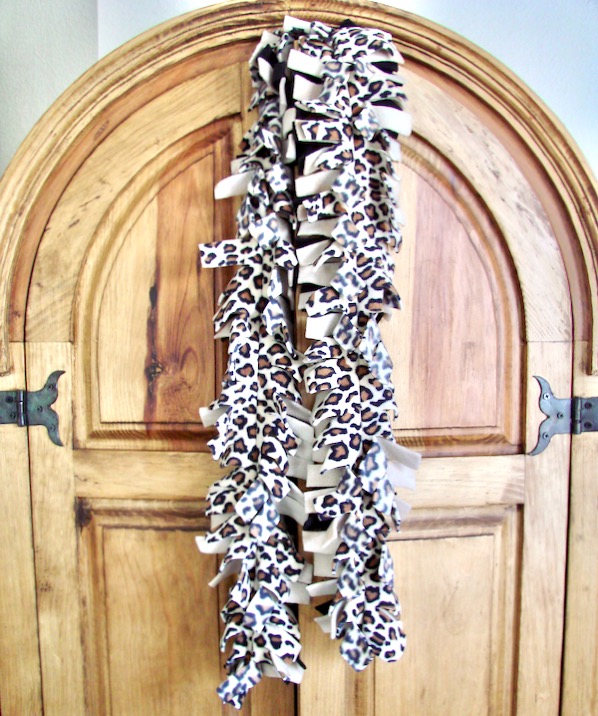
How to Make a Fleece Scarf with Fringes
When you know how to make a fleece scarf, you can afford as many scarves as you want!
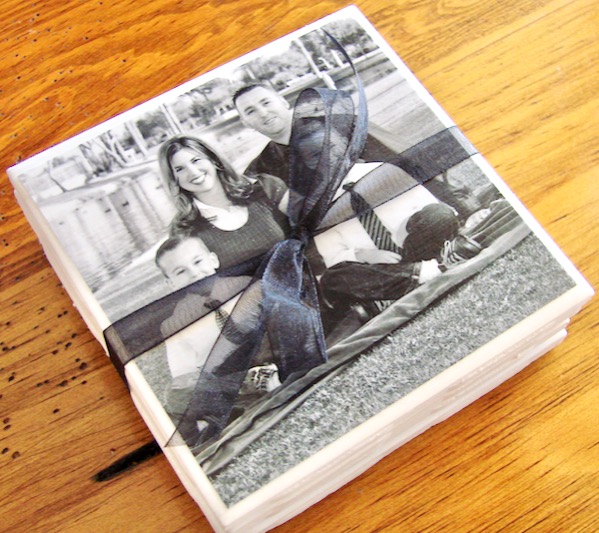
How to Make Photo Coasters
These easy DIY Photo Coasters start with a simple tile, and transform into sweet keepsakes that make great thrifty gifts!
Fun Crafts To Do that Anyone Can Enjoy! (huge list)
There are Crafts for every season, holiday, and occasion ~ perfect for both kids and adults! So many of these ideas make great homemade gifts, too! So are you ready to get crafting?
Home Decor Tips and Tricks (Get The Look On A Budget)
Give your home a gorgeous makeover with these easy Farmhouse Home Decor Tips and Ideas on a Budget!

11 Home Staging Tips! (How To Sell Your Home Faster)
I’ve got some proven Home Staging Tips to share with you, that are going to make selling your home so much easier!
So have you tried creating your own DIY Floral Swag yet?
Leave a comment and share…


thank you
you did a great job love your work
Thank you for this lesson! I searched quite a while before finding this, and the instructions are just what I needed. I really didn’t want to pay for someone else to make one of these gorgeous swags. I wanted to learn myself! 🙂
God bless!
Thanks so much for the sweet comment, Linda… so glad you found the tutorial helpful!
So gorgeous! Thanks for the “how to.”
Absolutely love your stuff. The instructions on making the swag was great. I just need hoe to make a floral bow do you have instructions on how to make those or a booke of the things on your site. Again I just love your ideas they are so do able.