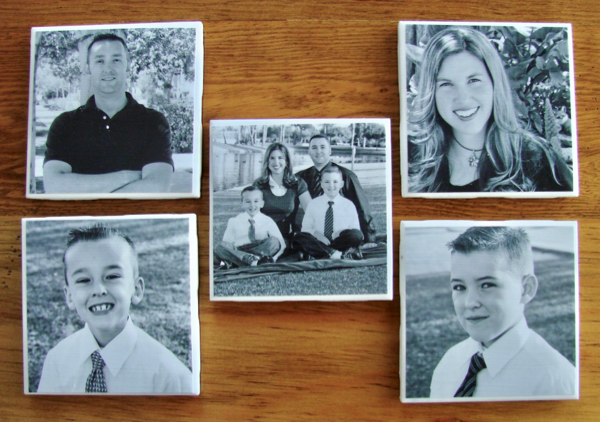
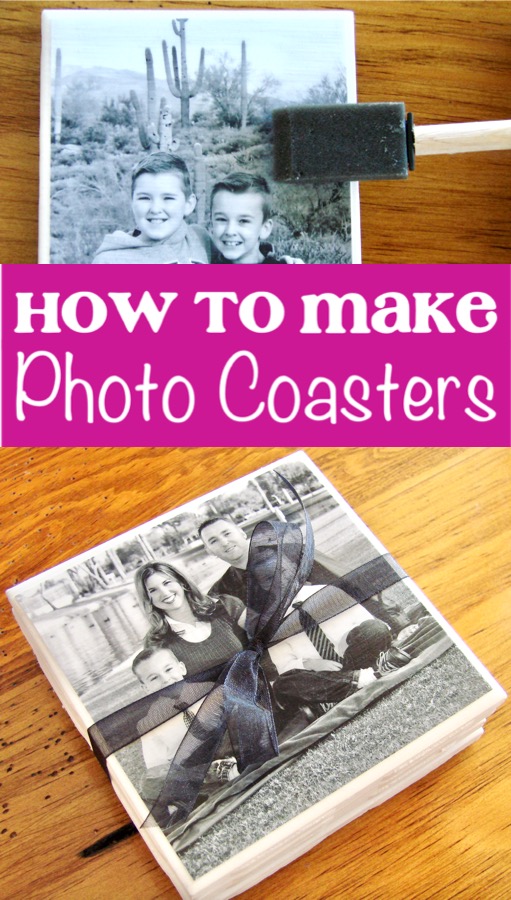
Are you wondering how to make Photo Coasters at home? They’re actually so easy to make!
Be sure to check out these sweet Gifts in a Jar, too!
How to Make Photo Coasters
I’ve got another fun, easy & thrifty project to share with you ~ How to Make Photo Coasters. Grab the Mod Podge, it’s time to do a little crafting!
These easy DIY Photo Coasters start with a simple tile, and transform into sweet keepsakes that make great thrifty gifts!
Make some for yourself, and make some extras to give as a Frugal Gift Idea!
So what are you waiting for? It’s time for another frugally Fun Craft project!
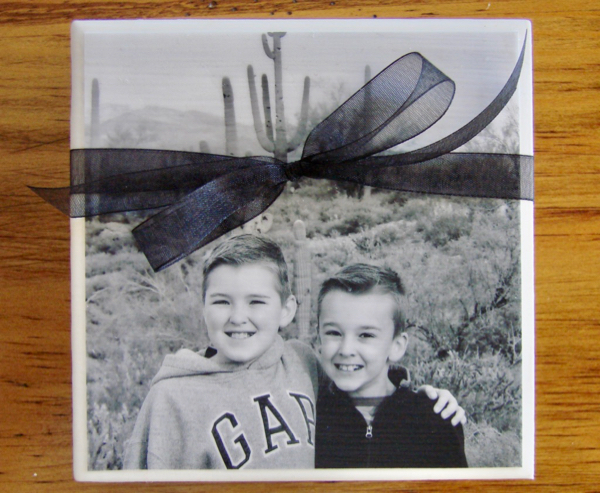
Making your own personalized photo coasters is the perfect excuse to get some of those cute photos off of your phone. Plus, this easy craft isn’t very expensive.
So what exactly do you need to get started?
Keep reading…
Related: Fun Crafts To Do that Anyone Can Enjoy! (huge list)
What is Needed to Make Coasters?
- Small Foam Paint Brushes
- Ceramic Tiles {I found these at Lowe’s for 16 cents each!}
- Mod Podge {I used ‘Glossy’}
- 4×6 Photos {I had mine printed ‘Matte’ style}
- Waterproof Acrylic Sealer Spray
- Note: if you are using different brands of products, the results may vary.
- White Acrylic Craft Paint
- Felt, Fleece or Cork scraps for backing + Hot Glue to attach the backing
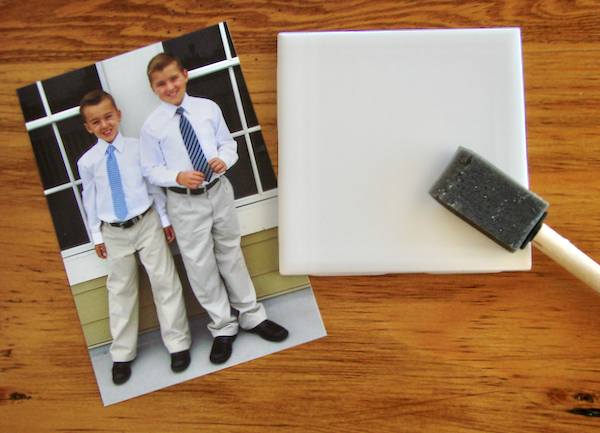
How to Make Photo Coasters with Mod Podge
Paint the rough, unfinished side edges of the coasters. Once the tile has dried, grab your photos.
Trim each photo into a square shape, to fit the your tile.
Now, be sure not to rush the project. Give it plenty of time.
I made these over the course of several days, and allowed each coat to dry completely for many hours before applying the next coat.
*Note: Black and white photos are also fun to use on this craft!
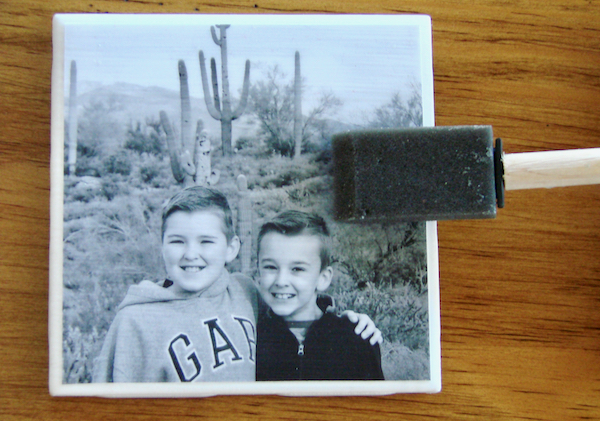
How Do You Transfer Pictures To Coasters?
Apply Mod Podge to the back of the photo with a sponge applicator. Then press down onto tile. Allow to dry completely.
{note: make sure each coat dries completely before applying the next coat}
Once dry, apply a layer of Mod Podge with a sponge applicator to the top of the photo. Use even left-to-right strokes {as always with Mod Podge, lines will show}.
Allow to dry completely.
Repeat with 2 more layers of Mod Podge {allowing each layer to dry completely before applying the next}.
How Do You Make Photo Coasters Waterproof?
Once the coasters have had 3 layers of Mod Podge applied, and have dried completely, take them on outside.
It’s time to spray with Acrylic Sealer! This is what you will seal the coasters with.
Lay coasters on wax paper. Or something else you don’t mind getting sprayed with some over-spray.
The Acrylic Sealer is an important step. It will seal the project. This will ensure the coaster is waterproof, and can handle wet glasses sitting on the coasters.
You’ll want a strong coat of sealer on each coaster. I applied a total of 5 coats of sealer, allowing each to dry completely overnight before applying the next coat.
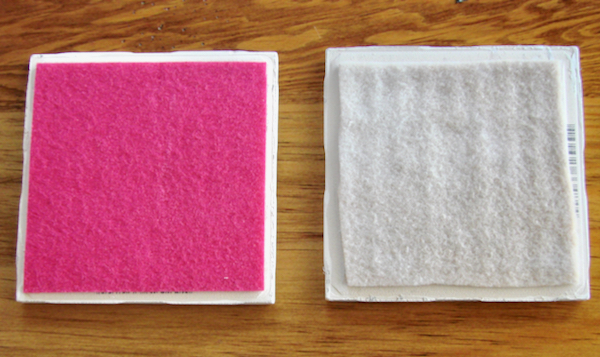
Now it’s time to add some backing to the coasters.
I used felt on some, some fleece scraps on some, or you could even use some squares of cork material…
Apply the backing with a hot glue gun, and allow to dry completely.
You did it ~ aren’t these too cute??
Now its’ time to choose. Do you save some for yourself, or give some as Thrifty Gifts? Or should you do both?
Then promise me, whatever you do… don’t forget to make one of the dog! 😉
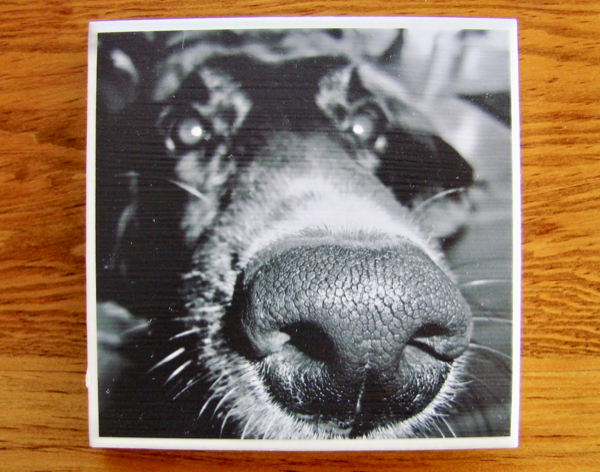
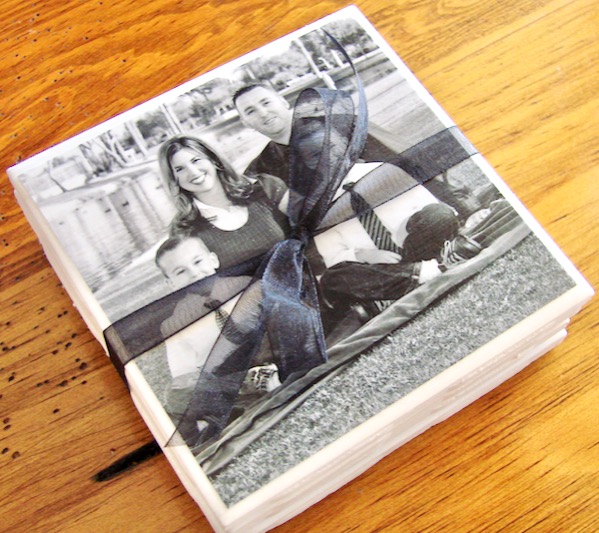
Once the coasters are completely dry, it’s time to stack up a set. Then grab some ribbon for a bow.
Voila!
Now you’ve got an extra-cute and thrifty homemade gift to give to someone special!
A BIG thanks to frugal friend Joli for sharing this fun project idea with us!
RELATED: Grandma Gift Ideas
Photo Coaster Reviews
What Your Frugal Friends are Saying About This Photo Coasters Project…
Maria writes: “Awesome! Gave them to my mother-in-law for her birthday, she loved them! Super cute & very inexpensive!”
Rachel writes: “I had my son decorate 2 tiles and then used pics for the other 2 and gave them as teacher gifts at the end of the year. They were a big hit!”
Eric writes: “Turned out great! Super easy and fun to make.”
Anita writes: “Made them as Baby shower favors!”
Lindsey writes: “Absolutely my favorite Diy project by far”
RELATED: Coffee Lover Gift Ideas
More Fun Crafts and Homemade Gift Ideas
So now that you’ve learned how to How to Make Photo Coasters, be sure to check out more Fun Photo Crafts and Homemade Frugal Gift Ideas.
Homemade gifts can be some of the most memorable gifts you can give.
Plus, giving homemade gifts is great for your budget!
Clipboard Crafts (DIY Decorating Clipboards Ideas)
You’ll love learning How to Make Customized Decorative Clipboards with these easy DIY decorating ideas for clipboards!
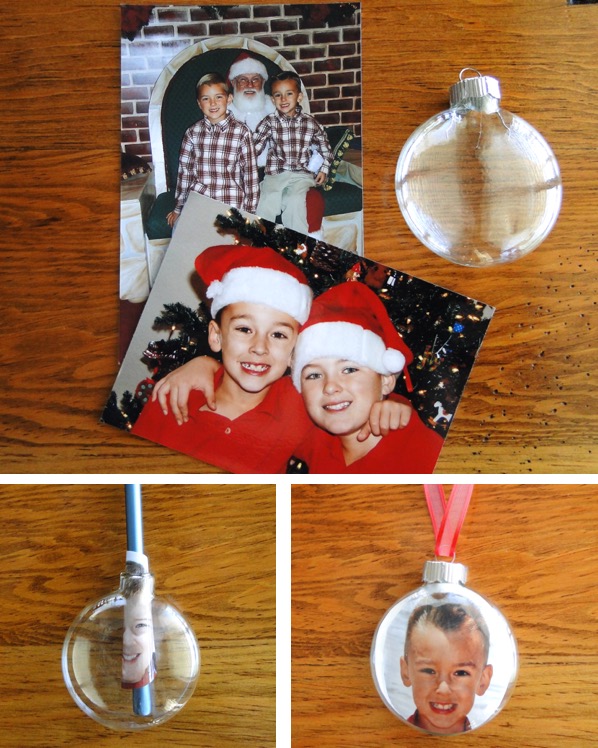
Easy DIY Photo Ornaments
Deck the halls and trim the trees this Christmas with more fun photo ornaments!
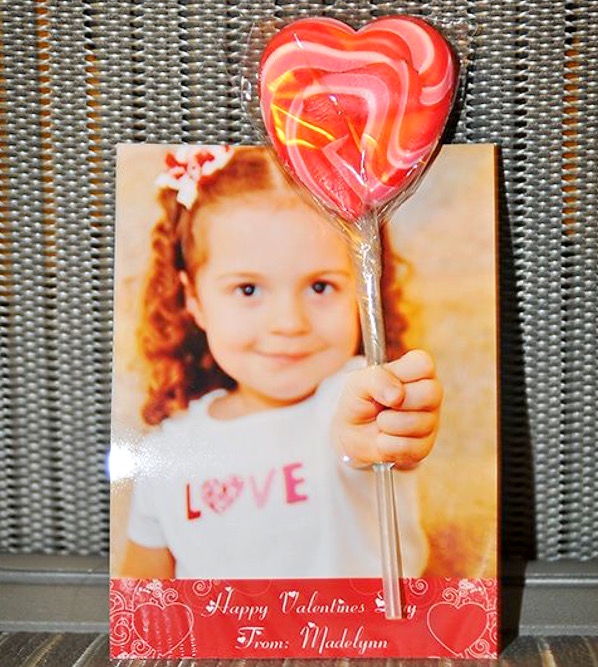
How to Shoot and Create 3-D Photo Cards
Ditch those cheesy store-bought cards, and learn How to Make 3D Valentine’s Day Cards your friends and family will LOVE!
Needle Minder Magnets DIY (How to Make Your Own in 5 Minutes)
Keep your needle handy when you’re sewing, cross stitching and embroidering with DIY Needle Minder Magnets! They’re SO quick and easy to make!
No Sew Toilet Paper Pumpkin Craft
These no sew toilet paper pumpkins are about as simple as can be to make, and will honestly take you less than 5 minutes to put together!
No Sew Fleece Blanket Tutorial
Create the perfect cozy blanket for a chilly day or make some extra special gifts with this easy No Sew Fleece Blanket Tutorial!
How to Make a Fleece Scarf with Fringes
When you know how to make a fleece scarf, you can afford as many scarves as you want!
DIY Floral Swag Tutorial
Use this tutorial to create your very own budget friendly DIY Floral Swag… and enjoy beauty inside or out that will never wilt!
DIY Hydrangea Wreath For Front Door
Need to freshen up your front door for Spring? You can make this DIY Hydrangea Wreath for Front Door in just 5 minutes!!
DIY Stocking Wreath
This cheerful Christmas DIY stocking wreath will make such a fun statement on your front door!
Fun Crafts To Do that Anyone Can Enjoy! (huge list)
There are Crafts for every season, holiday, and occasion ~ perfect for both kids and adults! So many of these ideas make great homemade gifts, too!
21 Joann Fabric Hacks! (How to Save Money at Joann’s)
Make your next trip to Jo-Ann Stores extra frugal when you shop prepared with the latest Joann Fabrics Coupons, discounts, and shopping hacks.
Photography Tips and Tricks For Your BEST Photos Ever!
Becoming an AMAZING photographer is easier than you think, thanks to these little-known Photography Tips and Tricks for your phone and DSLR!
75 Creative Teacher Gift Ideas (Budget Friendly Gifts)
Use this BIG List of Creative Teacher Gift Ideas to load up on some truly inspired teacher gift tips!
101 Gifts in a Jar Recipes
Get ready for one humongous gigantic list of homemade gift giving inspiration!
Frugal Gift Ideas for Everyone on your List!
Score frugal gift ideas for the Kiddos, Teens, Dad, Grandma, Grandpa, Co Workers and more!
So have you tried this tutorial for How to Make Photo Coasters yet?
Leave a comment & share!
Don't Miss Out... Subscribe Now!
Marilyn says
I was wondering if you can use the same process to make a trivet with a 6″ x 6″ tile? Not sure if putting a hot dish on it will ruin the tile. Have you tired this?
Heidi says
I honestly haven’t tried that, Marilyn… but if you do, let me know how it turns out! I’d love to hear!
Marilyn says
I’ll let you know!
Diane says
Love the coasters and the box. Great job and never thought about the spray. Great idea.
Crystal says
First off, this is a lovely tutorial! Thank you! I’m hoping you can help me save my coasters! As I was adding the gloss finish over the top, I noticed some dust on the surface. I quickly tried to pinch out a spec and because the sealer wasn’t totally dry, it smudged. Without thinking I grabbed a paper towel and it left even more residue! Unsure what to do, I ran it under water, but there is still quite a bit of paper towel residue on my favorite coasters. 🙁 !! Do you know of any tricks to fix this??
Danielle says
Can I use regular photo paper on the tiles? I was just going to print a few photos at CVS or something. Thanks!
Heidi says
Hi Danielle ~ yes… I always just use regular photos. Have fun making yours!
Mary says
There are a ton of comments here so I may have missed it but…
Why do you have to put mod podge over the pic before the sealer? I want to make these to be used at my wedding and don’t like this “there will be lines” thing I keep reading about. If you’re going to seal them in anyway, why bother with the mod podge on top of the pic? (I get that you need it under to glue the pic to the coaster [i think?]).
Super new to crafting, thanks for any help!
Kyleigh says
I don’t know if this has been mentioned prior, but you can get 4×4 square pictures printed at Walmart in the 1 hour. I ordered mine online anpicked them up in store. This saved me tons of cutting time since the tiles are 4×4.
Heidi says
That’s a great tip, Kyleigh… thanks for sharing! 🙂
Kyleigh says
Also if you wrap your brush in aluminum foil it won’t dry out so you can use it the next day. Instead of having to get a new brush with every coat. This will save a little money
Tanya says
Oh my goodness! I have big bubbles underneath the photos! And they seemed to have appeared out of nowhere – seriously!!!
Anyone any thoughts??? Please!!!
Dave says
Have experienced this myself. Be sure not to skimp on the Mod Podge on the tile before placing your photo on the tile. If the tile isn’t completely covered, obviously the photo won’t stick in the “dry” areas, resulting in bubbles. If using glossy photos, you want to avoid touching the photo directly as much as possible, so you don’t leave fingerprints. Wear a pair of cotton gloves, press a finger on the center of the photo to hold the photo in place and use either your fingers (glove covered) or a piece of cardboard or a credit card to press on the photo, moving from the center out to the edges, like a squeegee. Be extra careful not to get any wet Med Podge on whatever your using when you get to the edges, so you don’t transfer it onto the photo as you continue the process. Personally, I use my fingers, so I can feel if there are any “bubble” areas.
Emily says
Hi! I really like this idea! However, can you be more specific on the ceramic tiles that you used? I’m just not sure what I am looking for.
Thanks,
Emily
Chris says
Hi, I actually have a question, can the pictures be printed off of the computer, or do they have to be actual pictures like from walgreens.
Thomasina says
We’re you able to print from your computer? I printed photos from office depot & I’m curious if i can use those or if i have to have photos. Thanks!
Sonda says
I did the coaster with the pic and put mod podge on them a total of 3 coats let them dry 1 day between coats. Was going to put a sealer over them BUT then my husband stacker them together pic to pic and they stuck together when I pulled them apart the mod podge pulled off. Help do I re mod podge or just use a sealer? I did a total of 18 coaster as gifts for Christmas at a loss of what to do now
Bob says
Same happened to me. Just push the lifted area back down until you can’t see the defect. Then apply one more coat of mod podge. Then spray your sealer!
megotjava says
Awesome idea would be such a great personal gift. Ty for sharing this.
Mary Lou Albrecht says
I am making picture coasters from Lucite squares. There is a bottom coaster square, a picture insert, a top coaster square. The 3 components are held together by small magnetic posts in each corner. However, when a drink is placed on the coasters, the moisture causes the drink glass to slip off of the coaster. What can I use to make the coaster surface non-slippery?
Mary Lou Albrecht says
I am making picture coasters from Lucite squares . There is a bottom coaster square, a picture insert, a top coaster square. The 3 components are held together by small magnetic posts in each corner. However, when a drink is placed on the coasters, the moisture causes the drink glass to slip off of the coaster. What can I use to make the coaster surface non-slippery?
Bonnie says
Made these for Christmas gifts & everyone seemed to really like them. They were a lot of fun to make, too.
April Haintz says
I am in the midst of making these for Christmas for the grandparents (and myself) and I LOVE them! Thank you so much for sharing!
Daenna Calderon says
Did you use “photo” paper or did you use regular print paper for the photos? I want to make these but not sure what print material to use, Card stock, photo, print… please help!
Heidi says
Hi Daenna ~ I used just regular 4×6 photos printed at the store {like Costco, Walgreens, etc}
Hope that helps!
Amada (pronounced: a.m.a.th.a) says
Hello,
First of all these are very cute! 🙂
Secondly I have been playing with making coasters for months now and I can’t find a good waterproof sealer! 🙁 I don’t want to have to keep buying cans of sealers that aren’t going to work and then I have no use for them. I’ve been looking into the tree house studio one that you used, and I was just wondering if, as you used/tested them over time, how they stood up to Water and Heat? I use alcohol inks and after I get them just right I don’t want them to smear or wash away, which has been happening. :/
Thank you for your time and any help you can give! 🙂
Sincerely, Amada (pronounced: a.m.a.th.a)
John 3:15-16
Amie Flather says
Some advice when workign with coasters or any other thing that you will ModgePodge and perhaps have warm-hot items placed on it… PLEASE be sure to use a clear acrylic spray specially formulated for high temps to coat rather than a regular clear acrylic spray. I learned this the hard way. You can find clear acrylic sprays in DIY stores in the paint sections and even in department stores like Walmart near the auto section. Many times these small acrylic tiles have bumps along the sides to groove them together into the floor or on a wall. You can use a Dremel tool to smooth these out very easily. Alternatively, a nice bit of trim found in craft stores can hide it – ribbon won’t, though, because it’s too thin and smooth. Also, I saw someone asked about glue to get the tiles to stick to wood. Gorilla glue works great but you need to use it sparingly since it will squish out and you’ll have a glue mess. GOOP may work as well and at least it dries clear. DO be sure that each coat dries fully and you fully allow for the curing time on your project!
Marilyn Tavenner says
I was making trivets as well, but then wondered, will they be heat resistant after they are done? Does anyone know or do you know how I can make sure they are heat resistant? Thanks. Love these.
Marilyn says
Hi,
I love this idea and just bought some tiles, but not as cheap as some of you on here are saying, but I want to try and see how they come out. If they come out good, I’ll bargain shop at places to see how cheap I can get them. A comment above mentioned trivets and that’s what I was thinking, they should work great for them too! Anybody tried it? Love all the ideas. Am thinking of ways of making crafts to go to craft shows and this idea has so many various things to do that it should work. The comments about stacking though, was wondering if people just need things to sit longer to dry, or has anyone figured it out yet?
Mike Joseph says
I have made several sets of these to give out as Christmas gifts to my family and we followed the directions to the letter & they have been sitting for over 3 weeks and when we statck them they are sticking together to the point that once you get them apart they are ruined. The sealer does not seem to ever complety dry. We used the exact supplies as mentioned in the directions. Why are they still sticky after setting & drying?
Marilyn Tavenner says
Not sure why they are still sticky, mine turned out fine. I used the Mod Podge spray sealer on mine and have had them stacked and nothing is sticking. I let them sit for a day or two before stacking though. Hope this helps.
Sam says
I just did the coasters they turned out great.
Tammie says
Hey I found the cheapest tiles at Lowes which were the glossy ones does the pictures go on the glossy side or the back side?
Heidi says
Hi Tammie ~ you’ll place the photo on the glossy side. Hope that helps! 😉
Allison says
Hi Heidi,
How long did your sealant take to dry? It’s been 24 hours and its still sticky, also I just got acrylic sealer it doesn’t say anything about being clear and it has a weird look on the photo. Do you think it would dry clear? What should I do to make sure these turn out nice? They are part of my one year anniversary gift to my boyfriend and being a broke college student I would rather not start over. Any advice would be awesome! I’m afraid to put more coats on :/ thank you!!!
Jill Clayton Hudgens says
Will the lines go away after spraying on the sealer?? So far, my project has ridges (i’ve applied 3 coats of Modge Podge)
Heidi says
Hi Jill,
As always, when you use Mod Podge some lines will show. Be sure to use even left-to-right strokes and a bigger brush to minimize the lines and ridges.
Hope that helps!
~ Heidi
Renea says
I read a comment on another blog that reccomends a clear sealer from auto zone that is used to harden the paint on car touch ups. I havent tried it but i hope to on my next project.
christine says
I have decided to make some of these for a wedding shower gift. I really lucked out at Home Depot. They not only had the tiles for 13 cents each — but they had carpet samples in the same size (4×4) and I asked what it would cost to get a dozen carpet square samples, and they gave me the dozen for FREE! I’m working on a ‘sample’ right now, and I’m very excited!
Jeannette Howile says
I made these for my three daughters and my mom for Christmas…needless to say it was a big hit!!
AmyH says
Love this project & can’t wait to get mine started too!!
1. MP needs to cure – depending on how many coats you use it could take 2-4 weeks to completely cure, then depending on which product you used you should apply the acrylic sealer. This is likely the problem that some are having with impressions being left in the surface of the coasters, etc. Make sure to start your projects with plenty of time to allow curing.
2. Plaid does NOT recommend you use original photos (like printed at CVS/Walmart/Target/Walgreens, etc). They say the best option is to make color copies using a dry toner copier. If others have had success with regular photos – great! More options for everyone, but this is their recommendation.
3. Outdoor MP is water resistant, but may need to be re-coated every so often if they’re actually used as coasters.
4. If you use inkjet printed items, seal them with a matte acrylic sealer before using the Mod Podge – spray a very light coat, let dry, spray again.
5. Air bubbles – don’t shake MP, just adds bubbles. Save the foam brush for base coating only as it adds air to MP and creates bubbles in your work. Use a large, flat bristle brush when applying the top coats.
6. 2 other products to try (yes I know MP is costly, but looks like it goes a long way): Mod Podge Hard Coat – dries clear with a non-tacky surface and Royal Coat Decoupage Finish – superior water resistance.
Sorry to be so long, but hopefully this answers many questions as people are checking this project out.
dela callahan says
I made something very simular but, instead of tiles (love this idea) I used white plates. I purchased these at the Dollar Tree. I copied my pictures on my ink jet printer on plain white paper and decoupaged them using the same techinque as the tiles. They came out great!!! These make great gifts. Use several family pictures on one plate like a collage purcase plate hanger and you have a one of a kind gift.
Melissa says
I made these before but didn’t do the sealant. Thank you for pointing out how important this step it. My coasters did not do well without the sealant on them. Your coasters are adorable!!
Cher says
Ok..here we go! I did Not want to use photo photo’s!! I wanted
to be able to print out my photo’s right out of my regular old HP printer. I did Only black and white to start out. Ok..ink jet
Ink WILL smear if you put Mod Podge on it Everytime. So the trick ( Paint Mod Podge one coat only on tile LET this DRY )
is print out your photo put a layer onto the top of the tile
then stick your photo on the tile and let Dry. DO NOT PUT MOD PODGE ON TOP OF PHOTO!!!!!!!!!! Also after you print out your photo the ink on the photo must dry also!! You have to do these stages of Dry Time I call it. Anywho after your photo ( on the tile ) is dry I sprayed several coats of
Matte Finish by Krylon ( got at Joanns Crafts). Spray tile
several times. Let dry out each time you spray a layer!!!! Now I went to my local Home Depo and picked up
a product called Super Glaze by Parks. This is a pour on Finish and Preservative. It does dry crystal Clear resistes heat & chemicals and is Water-Proof. There is 32 fl oz 1 ( one quart ) in the box. You just mix the two bottles for as much
as you may need. Pour on the top of the coaster smooth out with a spreader / stir stick / paint paddle / anything to help
you spread the mixture…very easy. Use latex vinyal gloves also. Super Easy to use. Dries crystal clear. Only thing you have to MAKE SURE you do is Mix the glaze the right way with
even even parts. If you don’t mix like it says the glaze will have soft spots on your project area ( like the photo tile ).
So Mix and Stir Stir Stir like it says!!! Sure you might have to pay a
bit more for this Glaze but you can USE your Ink Jet Photo’s
right out of your printer. Also like with Mod Podge you have
to ALWAYS ALWAYS LET EVERYTHING “DRY” BETWEEN STAGES!!!
Hope this works for some of you it did for me! You can use
this Super Glaze for all kinds of projects…Great Stuff.
Oh…almost forgot….I did this outside / or / garage. This
is epoxy resin. Have fun!! When you may see a table/ bar top
that has coins/ shells / fabric et in it…the embedding was
done with a product like this Super Glaze. I got smooth white
tiles and also 10 rock type of tiles for my project. Remember
if you DONT Seal the Ink Jet Photo with SPRAY the ink WILL
SMEAR everytime. Also I like the Spray as it goes on even unlike using a brush of Any type. Pop any bubbles you might see also !! Have fun :-)))
[email protected] says
Totally cool concept Heidi! I’ll be playing around with this idea a bit. Thanks………….Azara
Caitlin says
What type of paper is needed to do this? Did you use transfer paper? Or will regular photos work?
Heidi says
Hi Caitlin ~ I just used regular photos. No special paper is required. 😉
~ Heidi
Terri says
I LOVE this coaster idea! I have a St. Patrick’s Day Party every year & I like to give our guests a keepsake to remember each year and googled how to make coasters and found this idea. I’m thinking of using the invitation in place of the photo as its going to be in the shape of a beer bottle cap this year. I’m hoping to find a round tile or I guess I could still put a round invitation on a square tile. Any other ideas on what other “medium” I could use to apply the invitation to via modge podge?
Thanks!
Terri
Patty says
HELP! I did some photo coasters for the family but when I stacked them together they got stuck and when I pulled them apart them got messed up….
Sarah says
Does the sealant have to specify “waterproof”? I cannot find the brand listed anywhere around me… I am thinking of using polyurethane instead. I do have Mod Podge brand acrylic sealant, but it doesn’t say that it is waterproof. Any thoughts as to which might be more likely to actually seal them for use with wet/hot cups?
Thanks so much for the great idea, my grandmother will LOVE these. 🙂
lauren says
Hello,
Hoping you would still answer a question even though this is an old thread. Isn’t Mod Podge kind of white? So why are we spreading it on top of the photos? Wouldn’t that cover up the picture somewhat? Or does it dry more transparently than it looks when first applied?
Any insight from anyone would be helpful! Thanks, and happy holidays!!
Heidi says
Hi Lauren ~ Mod Podge is white when applied, but dries clear. You will still see the brush strokes from the application process, but it will dry clear.
Hope that helps! 😉
~ Heidi
lauren says
Awesome! Thanks so much for replying. I’m not much of a crafter, but I’m giving these a shot. Thanks for the great and CHEAP idea!
harmony says
I love these!
Gina says
I have a question…I did a ‘test’ coaster and gave it to my husband to use. He put a cup of hot coffee on it and the cup melted the acrylic coating, causing the coaster to stick to the cup! I had let each coat dry 24 hours and the last coat for two days. Can you not set hot cups on the coaster or did I do something wrong? Thanks!
Brian says
Love the idea. I tried this using tiles with some white porcelain tiles and transparency paper. This was for my gf who is going to dental hygeine school. The transparencies were printouts of teeth radiographs (xrays). When I glued them to the porcelain with Mod Podge, it would not dry.. even after several days. I think this is because I was gluing a non-permiable surface to another non-permiable surface. So, I tried a non-water-based glue (Elmers All Purpose Spray Adhesive) for them. It worked ok. I allowed it to dry (3-4 hours) and then did the sealing with an acrylic sealer. I did probably 10 coats. Ultimately it was a huge failure. I’m not sure what happened but about a week after completing it those I gave them to said they were leaking water. Odd considering the only thing I used that was water was the acrylic sealer.. unless the liquid was actually some kind of silicone or something from the Elmer’s glue.
So why use the transparency? When I print the radiographs using regular paper or even photo paper, they don’t have that… “pop” The Transparency against the white background looks AMAZING. Pitty I can’t get it to work right.
Terri says
Could you color copy the transparencies & get the “pop” you were going for or we’re they black & white transparencies? Just a thought.
yolanda says
hello i would like to glue, stick fabric and pictures to glass like glass jars and candels in jars. how and what would i need?
Rachel says
I’m currently making these for a friend as a wedding present, and I say currently, I’m letting the mod podge dry underneath the pictures as I type this! I want to be sure before I continue on…. once they’re dry and the pictures are stuck to the tile, do I just apply the mod podge layer to the top of the photo, or do I do the entire photo just starting at the top??
Heidi says
Hi Rachel,
After they are completely dry with this first layer you’ve started, you’ll apply the Mod Podge over the entire top of the photo. Just make sure each layer dries completely before applying the next. Hope that helps! 😉
~ Heidi
Val S. says
I used free sample tiles from Home Depot…they are the perfect size for coasters!
tonya migliore says
I tried this but my photos smudged and the colors smeared and did not lay flat. What am I doing wrong? Thanks
Jessica says
Hi! I’m making these coasters as a gift for my grandmother. I have already pasted the pictures to the coasters bu was wondering if I put the Mod Podge all over the picture or just at the top? 🙂
Rachel says
I just posted the same question, it’s been a bit since you’ve done them, do you have an answer??
Liz says
Did you use actual photo paper or regular paper? I am making this for mothers day for my mom of all her grandchildren.
Thank you for your help.
Heidi says
Hi Liz ~ I used actual developed photos on photo paper.
~ Heidi
stacey says
Hi Heidi – I love this project and would like to share the details and a photo on my site. Can I please get your permission to do so? I’d credit you and link back to your site and post, of course! Thank you!
Heidi says
Hi Stacey ~ I’m so glad you liked the project! I just sent you an email. 😉
~ Heidi
Danielle says
Awesome! I made these today for my mom’s birthday and they came out amazing. Thank you!
Heidi says
You’re very welcome, Danielle! I’m glad you enjoyed the project ~ I’m sure your mom will love them!
~ Heidi
LindaB says
I am curious as to how your coaster gifts came out for Christmas and if you had any problems with the quality of the photo coasters. Are they holding up well? Would you do anything differently? I am planning on making these as coasters for gifts to wedding guests using a cute photo of the newlyweds.
Amanda F says
Instead of coasters (i have many already) I am going to use larger tiles and make a ribbon hanger for the back and put them on the walls with my family pictures on them. I am redoing my living room this spring and thought they would look fabulous! And I hate choosing frames and when I need an extra one, I can never find a matching one. This way I can make them when I need! I love craft projects and with my mom working at a craft store, I can get a discount (and even better if they have a sale on the items) and save myself a good chunk of money! Thanks for the ideas frugal girls! Keep em coming!
imjustra says
I would live to see a picture of you photo project. It sounds cute.
Thanx
Heather says
I made these for Christmas presents for my parents and my in-laws and a dear friend who babysits for us. They all LOVED them! Best idea! I need to make some for myself now….
Heidi says
Yay ~ I’m glad they all liked their photo coasters!!
~ Heidi
Sarah says
Hey everyone, just wanted to update and let people know that I did finish these and for the most part I think they turned out pretty well. No word yet on whether or not they can hold up to cups or mugs but I think most of the people who I gave them to are using them as decoration.
I did 12 hours between each modpodge coat. Then 24 hours between the first two coats of spray, and 12 hours after that (because of time). I feel like I should have put a thicker coat of spray on it because they turned out a little matte kind of. I let them sit after the last coat for 3 days and the felt on the bottom kind of still smudged it a little bit but not bad enough to where they were ruined.
Thanks so much for this idea. I loved it and everybody else thought they were wonderful gifts. (And they were so cheap!!!)
🙂
Heidi says
What a great idea Kendra ~ I love it!!
~ Heidi
Kendra says
I was also thinking about making these as welcome to you new home gifts/graduation presents for students moving out by including favorite recipes printed on them. That way they can’t lose their favorite recipe!
Sarah says
That sounds like a great idea!
Kendra says
My coasters turned out great! I made a set for my parents wedding anniversary. I stole a photo album out of their house and turned all the photos into black and white after I scanned them on the computer. I then printed them out, made the coasters. I thought my mom was going to be the most touched however I watched my dad cry when he opened them. They use them at their bar and they have NO problems with them.
Karla says
I made these for Christmas this year to rave reviews! Looking forward to making them again next year!!!!
CG says
Found this page after making my tile coasters. I’ve used wrapping paper and to some, happened the same as Rhonda. I think I may have figured 2 reasons why, in my case:
– Didn’t seal well the tile’s sides;
– Didn’t use wrapping paper till the edges (left a white border around the paper square).
Other causes may have to due also with the sealer. Between coats, every time I saw something lifting I used more mod podge. Some people wrap the tile, gluing it to the back of the tile. I didn’t use spray sealer, I’ve used polyurethane sealer that I’ve spread with a foam brush – 4 coats. So, in my case, in 15 coasters, 2 are bad, but the rest, I’ve tested with a hot cup, and a wet cloth, and they’re ok.
Good luck!
Gina says
I also had thought about using Polyurethane sealer… But ended up buying Clear acrylic sealer then a friend told me to read these comments…I’m to the point of dealing them and now scared to death about what to use to seal them…
The polyurethane would work best for me as it is cold now where I live and spraying outside isn’t going to work for me…But I have a can of fast drying polyurethane clear gloss here at the house read the back and it only talks about using on wood…just wanted to make sure you and I are talking about the same product? And if so how long did you let each coat dry and how many coats did you put on?
Also to others that might read this. I used a tip from a friend and just printed them off on my printer on regular paper… I did the off white tiles and did them in sepia and if I can get the sealer coat to work then they came out GREAT… Others have said that their would peel right off…not a problem on mine at all which I’m sure is because the photo paper is thicker. I did have to be careful not to put but thin layers of the mod podge on at a time so the ink didn’t get to wet but after the 2nd or third coat not as big of a worry… I think I have 5 very thin coats on mine… Sure hope I figure out what sealer to use. any info on the poly finish would be a GREAT help…
cyndi says
We made these this year for Christmas presents and they turned out great. Such a easy project but look like they took a ton of effort. Thanks for the idea. BTW I figured out the cost and it was around $0.67 each. Also a saving tip is price match at lowes. Homedepot had tiles for $0.14 and lowes price matched them plus so i ended up spending $0.13 per tile
Nette says
Thanks for sharing! I love! love! love! this idea.
Sarah M says
I see the successes but none of them indicate whether or not they tested the coasters. I’m wondering what went wrong for those who had cup imprints on their finished product.
KC says
This is such a perfect gift idea! Does Home Depot sell these same tiles too?
Rhoda says
I followed the directions to the letter but found it was very easy to lift my photo off of the tile. If you grabbed a corner it came right up. Is there something else to use besides the Mod Podge to make sure it adheres to the tile??
Stacey says
I know this is almost a year old, but I made them and used spray adhesive to put the picture on then covered them w/2 coats of Modge Podge and then sprayed them w/sealer.
Danielle Wagers says
I have applied my photo- waited 12 hrs, then applied my 1st layer of Modge Podge, which I am leaving sit for 24 hours. Any tips on getting the Modge Podge applied evenly? I am using wallet sized photos.
Bettie says
Jaime–apply to the shiny side.
I made one just to wreck using the outdoor mod podge and no spray sealer. I did 3 coats of mod podge letting it dry several hours in between coats. I purposely placed water on the coaster and left it there until it dried–NO damage! Yay!
cari says
where did you find the outdoor modpodge?
Bridgette says
Yeah, Thank you for sharing.
jamie says
was wondering do you apply the picture to the rough edges? or do you just paint the rough side so it matches? Do you apply the picture and modge podge to the shiny side of the coasters?
Anita says
I did a mini-version of this craft. I bought small tiles to make refrigerator magnets. (It was around $3 for about 30 of them. They came stuck together but were super easy to pull apart and snip off the extra foamy glue on a few of the edges.) I made some with photos and had my daughter color some with markers. I put an initial coat of mod podge on to provide a surface the marker would stick to. On some I put a second layer of mod podge, but the markers never dried enough, so it tended to smear the colors. (She is 3 so it actually made some of them a little better. So I did this with the ones she hadn’t used much color on and left the others as is.)
I sprayed all of them with 3 coats of the acrylic sealer. (I didn’t even wait too long between coats–about 30-45 minutes if that. They don’t have to seal the same as no wet drinks will be sitting on them.)
I bought a 2 packets of magnetic backing (the ones designed for wallet-sized pictures.) I was generous with the magnet and cut them to cover almost the whole tile. And wala–10 sets of 3 magnet-tiles for under $20. (I did not have to purchase the mod podge but I did purchase the acrylic sealer at full price.)
Bettie says
Has anyone tried using the watertight Outdoor Mod Podge? I think this form of the product is perfect for this craft and elliminates the need for a spray sealer making the craft even more cost effective. Also-if some are still afraid to try the craft as a coaster-have you concidered glueing a ribbon hanger to the back of the tile? Just a couple of thoughts off the top of my head.
Bridgette says
Please let us know if the other type of Mod Podge work without the sealer.
Megan K. says
Just finished 91 total. I had to do them in batches but they came out great. I took my time and let dry longer than first time,partly just because I’ve been busy! I know there will be a lot of happy parents, grandparents, aunts, uncles, sisters and brothers this x-mas though! They turned out so cute! Thanks again for the idea!
Kendra says
Started mine out tonight…Stole my mom’s photo album to make coasters of my parents giving eachother those looks of love that only true people in love can have from when they first got married. I am doing this as a 34th wedding anniversary present. The only bummer is when I bought my can of what I thought was acrylic spray, I noticed was adhesive in the bag. Does anyone know if walmart sells a sealer? Because I live too far to drive back to the craft store.
Sarah says
Thank you very much! I’ll let you know how they turned out!
Heidi says
Hi Sarah ~ I used 3 coats of Mod Podge and 5 coats of spray. 😉
Let each coat dry thoroughly in between coats ~ I spread this out over the course of a week, so each coat was thoroughly dry. Hope that helps!
~ Heidi
Marilyn says
Did this work? You can put wet glasses on the coasters and no marks? How about hot coffee cups, etc…
Sarah says
So, I really really want to make these, it seems the perfect gift for my family this Christmas on my super tight budget but some of the comments are scaring me. I’m going to let them dry a day inbetween mod podge coats and then three days after the gloss… I certainly hope this works because I’m kind of putting all my eggs in one basket. How many coats of clear spray do you need?
Cassandra, it looks like you put more than one coat of spray?
Anybody else have any advice besides time and latex gloves??? I’d really appreciate it!
Bridgette says
I didn’t use gloves for this project. To press the pictures down I just flipped an unused tile upside down and pressed down while sliding my picture around to remove any air. Then while the tile was still down I made sure the picture was straight. They turned out great. (so fat)
I still have the last two layers of of Mod Podge to go. I’m wondering if the lines will ever go away. Anyone know?
Cassandra says
I love this craft. I made a small set for DH’s and my parents. Let them set about 20 between mod podge coats and then let them set a day before spraying. An hour between each spray on coat and then let them set out side till I finally found the glue sticks, about 3 days. lol They turned out GREAT!! Thank you. 4 Christmas gifts for less than $20.
Megan K. says
Becky, Sorry I haven’t been on in awhile and didn’t see your post but I’ve been so busy I started mine on sunday with putting the pictures on. Monday I put the first coat of mod podge on and tonight the 2nd coat. I’m going to try just doing one coat a day for now and hopefully it will work. The first time I tried it I made like 75 and when I went to start the second batch I had about 3/4 of the mod podge left after 3 coats. I still had some of the sealer spray left after doing the 5 coats but not sure how much exactly.I bought by sealer spray at A.C. Moore and used a 50% coupon and the mod podge at hobby lobby using a 40% off coupon. Since I was making so many I bought a 100 pack of tiles at Lowes. I think the price was 16.98 and used a $10 off coupon from their Facebook deals awhile back to get them for under $10 with tax. I will let you know how it goes after I use the spray I’m a little worried since it has gotten so cold here as of lately I can’t leave them outside to dry after I spray, but fingers crossed everything works out because they are just too darn cute!
shannon Carlsen says
Suzannah- Let me know how they turned out. I just did a few more. The first I let each coat dry 12 hours, it looked beautiful.. Then I put a cup of water on it. It left an imprint of the cup. I was crushed. the other 12 that I had in the works, apparently got to cold. I left them in the sun room each day and we have had freezing weather. They all are messed up to a degree. I quit. I’m so disappointed in my work. My inexpensive holiday gifts cost me double and I still have no gifts.. 🙁
Suzannah says
In 3 hours, I’ve completed painting the sides of 25 coasters, cutting the pictures, applying the pictures to the tile, and 2 coats of mod podge. I’m going to do the other coat of mod podge tomorrow and spray the first coat of spray. the mod podge dried really quick, I didn’t use a lot. I’m thinking the sealer takes longer to dry. I will let you know. i’m hoping by Sunday I have 25 done. They are turning out great. I used the latex gloves, (no smudges) and the mod podge does leave some lines. Not big lines or noticeable. That’s mod podge though. The spray shouldn’t leave lines, it should just seal them. Turning out great. Really happy with them.
Suzannah says
I’ve left my first coat of mod podge dry for an hour, do you think that’s long enough? Just wondering and any suggestions would help. I didn’t press down with my fingers at all, i used the side of my fist. It worked really well.
Gina says
This is such a cute idea for grandparent gifts. Thank you so much for posting. And thank you to the other commenters for their tips as well.
Suzannah says
I used latex gloves to place the photo on the tile and there are no smudges and I didn’t use a lot on the photo. Enough to last but not over abundance. Also, latex glove on one hand.
Perfect!!!!
Suzannah says
I’m making these over the next few days and was wondering how long you let the coats dry? I will give them overnight to dry the first coat and then tomorrow let the second coat dry. I hope these turn out well because they are fun to make and will make great gifts. Any ideas on number of coats and how long you let them dry? I wonder if latex gloves will help when pressing the photo onto the coaster. I’m going to try it and will let everyone know how it goes.
Becky says
One more question! How much Mod Podge and Sealer did you use for 70 coasters? Thanks!
Becky says
Megan and Shannon,
I’m so curious! Did it work out this time? I really want to make these for several family members’ Christmas gifts, but with three kids under four, time is so precious right now!
I’m making them to save $$ (which is also scarce), but if I end up making them and they take a ton of time (and they’re all ruined), I will only have wasted the time & money–and I’ll still have to go out and buy other gifts. . . so I’m curious how your coasters turned out? Thanks!
shannon Carlsen says
I am starting over also. I am giving each coat 12 hours to dry. This should make them perfect!
I love all the crafts you post. Thanks Heidi
Shannon
Megan says
I am ordering some more pictures and am going to try again later this week. Hopefully these ones will be better because they were so cute before I messed them up! Thanks for the idea!
Heidi says
Megan & Shannon ~
The key is to not rush the project, and give it plenty of time. Make sure each coat dries completely before applying the next.
I made these over the course of several days, and allowed each coat to dry completely for many hours before applying the next coat.
If you are using different brands of products, the results may vary. Hope this helps! 😉
~ Heidi
shannon Carlsen says
Megan.. Ah.. same boat… I have started with 1 more.. I’m letting each step dry for 12 hours.. I will see if this helps. How annoying though. You did more than me I was only at 30, but to have them all ruined.. SO FRUSTRATING!!! I’ll let you know how this one turns out.
Megan K. says
I had the same problem Shannon. I made 70 throughout the last week, after drying for 2 days I stacked them and they were stuck together. I took all the pictures off and want to try again was wondering if I should’ve waited more than the 20 mins the sealer can says in between coats?
Andrea Finch says
This works best on dry days if it is humid it may not dry properly.
Then if you spay on the next layer before the first is completely dry the bottom layer will never dry.
I have a table that I painted during a rainy week 11 years ago and it is still slightly soft.
shannon Carlsen says
please help… What did I do wrong. I followed step by step.. BUT when I put anything into the coaster it damages the top. I can’t even stack 2 together without ruining the bottom one. The only thing I can think is that I didn’t let the sealers dry enough, has anyone else had this problem?
Michele Carson says
Can you use the Mod Podge Clear Acrylic Sealer (gloss) spray instead of what you have in the picture? I couldn’t find yours but this was at Wally World. ??? Also, this doesn’t say waterproof either….Help! Thanks.
Nicole G says
I made one the other day as a trial. Worked well except when you press on the surface, your fingerprint is left behind. You can smudge it out. Any idea how to prevent this? I’m afraid a heavy mug would leave a ring.
Tiffanie Schley says
I’m looking for a little more info on the tissue paper printing?
Laurina says
Tracing paper is a bit more sturdy and works, tissue jammed.
Lisa says
Get some 110lb cardstock – Office Max ImPress (the printers inside Office Max) will sell you a few sheets for just a few pennies. Use white tissue paper and try not to get any creases. I tape all 4 sides with masking tape so there are no gaps. A little tape on the tissue paper and fold over to the back. Make sure it’s pulled nice and tight for an even print, but not too tight or the paper will bow.
Feed it into your printer and print. No need for special settings or anything – at least not with my HP inkjet. Let the finished sheet dry AT LEAST an hour, then cut it apart. I actually find that gently tearing it makes it easier to hide the edges than cutting, but to each their own.
Been doing this for years on everything from tiles to rocks to picture frames to clothes pins.
Lisa says
Oh, and I don’t use Mod Podge – I use a 50/50 mixture of Elmer’s glue and water. Make sure to use a good acrylic sealer, though.
julie says
You mention you did this using a rock could u explain the method more sounds interesting
Heidi says
Hi Erica ~ these particular tiles I used were the already glazed, shiny surface tiles.
The sides of the tiles are rough and unfinished, so I painted the side edges with a similar color off-white paint.
Hope that helps! 😉
~ Heidi
Erica says
What an awesome project idea!! I’m just wondering- do you use glazed or unfinished/unglazed tiles for this?? And what do you mean by painting the edges?
Thanks so much for the ideas and tips!! Also- you can make your own Mod-Podge with regular Elmer’s glue and water. I forget the ratio but you can google it. 🙂
Lori says
Thanks for reminding me. I did this a while back with napkins. I had a thought, what about making them photo frames? I am going to try to come up with a backing to use. I kinda like the tile with unfished edges and propped up in my bookcase 🙂
Jennifer says
Mod Podge is pricey–I try to use a 40% or 50% off one item coupon @ A.C. Moore when I need to get it.
donna says
Love this idea. Is there any way to make Mod Podge? At my Joanne’s it was priced $7.99 for the larger bottle. Thanks.
Heidi says
Hi Donna ~ my sister-in-law makes Mod Podge using watered down tacky glue. I haven’t tried it myself yet, though. 😉
Tina Dixon says
Elmers glue!
🙂
Serena O says
What a perfect gift for the grandparents! So much more budget friendly than the ones from the online photo stores! THANK YOU!
Angie says
Ok, ANOTHER great idea…seriously, my Christmas gift-getters are receiving just about everything you’ve taught us to make! 🙂 🙂 You are a blessing!!!!!
jennifer says
Great idea! definitely a good idea for the inlaws!
Janice says
Love these! I wonder if you could use a larger tile and make a trivet? I guess it’s worth a try. Thanks Heidi!
Sherry says
I love this idea. I’m going to definitely be making some of these for holiday gifts.
tabitha says
I’m super excited about this idea!!! I will totally be doing this for Xmas.
Christy says
I love this idea. I think I am going to try this for grandma gifts for Christmas. I have done this before with a large tile, but had the kids handprint in paint and wrote their names with a paint pen.
marie says
love this idea! i’m making a wall “plaque” with the same idea in mind for my in-laws. i’m getting pics of all the grandkids and using the same technique to put it on some scrap wood from a broken bookshelf to hang on the wall. 🙂 now i think i’ll make the plaque and some coasters. 😉
Jenny says
Hey Marie,
I just wondered what you ended up using to attach the tiles to the wood and if it held up good? I am doing this same idea as we speak for a bridal shower gift:)
thanks!
Julie says
GREAT idea(s)!! Thanks so much for sharing, and for the extra tips in the comments! Love being able to get new ideas from other crafters!
Katrina says
I was searcing for an easy gift to make for this holiday…I have found the perfect gift right here!! Thanks so much….off to Michael’s and Lowes!!
Anne says
I love this idea! We don’t have very much money and would make a great gift for the holidays.
Tina Dixon says
Go to the dollar General store and buy some dominoes for $3 for the tin box. It has I believe 24 of them in it. Print out some neat family photos or any other designs that your family members would like in a 1″ by 2″ size. You can size them in Microsoft word. Just print them on white card stock, or the tissue paper. I have a inkjet printer and people go out and spend a small fortune on stuff to stop the ink from bleeding. I simply use elmers glue. Just put a coat under the image, glue it on, then put several smooth coats of it on top. I usually use a fine side of a nail file and sand the edges of the photos to round the edges on the corners and smooth the sides. You can then put the diamond glaze on it, spray them, or put some really neat stuff I found at Michaels called Americana triple thick brush on glaze. It puts a great shine on them. I buy those adhesive magnets at Walmart, stick on one and you have great frig. magnets for Christmas gifts. Give them a set of 4.???
Ayla says
What kind of paper did u use for the photos
Ashli Welsh says
I have made these before, but I printed out the photo on tissue paper from my own printer. Just trim the tissue paper to fit an 8×11 sheet of paper and tape it together lightly at the top before you put it in your printer. It worked really well and made the photo look like it was printed right on the tile. Then I embellished with stamps. It was a great look at you even save the cost of photo printing! Thanks for the great project!
cindy says
did you mod podge the tissue paper onto the tiles then? did it look a little more textured.. am very interested in doing these for a shower gift for a bride …..
Ashli says
I did use mod podge to put them on and then covered them with another coat when they were dry. You do have to be more careful since the tissue tears easily when wet. The textured look ended up being really cool. You do have to be careful what photo you choose, not all of them look good when printed on tissue.
Amber says
Hi there,
I have been trying to make these on tissue paper, I’ve taped the tissue paper to a regular sheet of paper. My printer keeps destroying the tissue paper in the feed. Do you have a special printer or tissue paper?
Thank you,
Rita says
you need to attach the tissue paper to something a little more rigid, like say, card stock.
Lisa says
I always use printer paper for my photos on tiles. Works great with everything. You might have to adjust the color and/or contrast when you print the photo out. I find that the photos come out a bit darker when I print on regular paper. I also use Mod Podge Glossy spray to seal, using about 5 coats. When spray is applied, the photo tends to come out a bit darker that’s why I adjust the color first. Works great for me.
Tina Dixon says
Hi, I just wanted to put my two cents in! LOL To use tissue paper for tile or dominoes, go buy some of the temporary hold spray for patterns to stick to fabric. Just spray some on a piece of cardstock and press your tissue on there. Make sure you cut it around the edge of the card stock though. It will re-stick over and over many times with just one spray, great stuff! Peels off easy too.
Kelly O says
I do something similar with stamps. Instead of painting the tile, pick one with an interesting texture and stamp whatever you want on the tile. I did initials for Christmas two years ago and it went over so well it’s kind of my go-to gift now. You just spray a sealant over the tile when the paint dries.
I love the picture idea and will definitely add it to my rotation.
KK says
Kelly, I love this idea. I’m thinking of making these as gifts for my wedding party using a stamp in the theme of our wedding. What kind of paint did you use for the stamp? What kind of surface should the coaster have? What kind of sealant do you need, and is that the only spray you need to use on the tile?
Thanks so much!
Kelly O says
I actually used a stamp. Just find an archival, permanent ink and a foam stamp. I used the foam because not only was the stamp less expensive, it also gets in the little nooks and crannies in the marble tiles better.
You can either use a craft sealant from Hobby Lobby or somewhere like that, or you can just get the Krylon sealer. It’s lots cheaper and works just as well. The only thing you need to be sure to do is get a matte sealer. For whatever reason the shiny ones don’t work and the ink will come off. The matte sealer keeps it on nicely, and it complements the texture of the tile better anyway (I think, at least.)
KK says
Great! Thanks!
Sarah says
Can you post a picture? This sounds like a great gift but I’m a visual person!!