Learn how to make Korker Hair bows with this fun DIY tutorial that makes the process so easy!
Then have even more fun making bows and clips with some help from this BIG List of DIY Hair Clips and Bows!
![]()
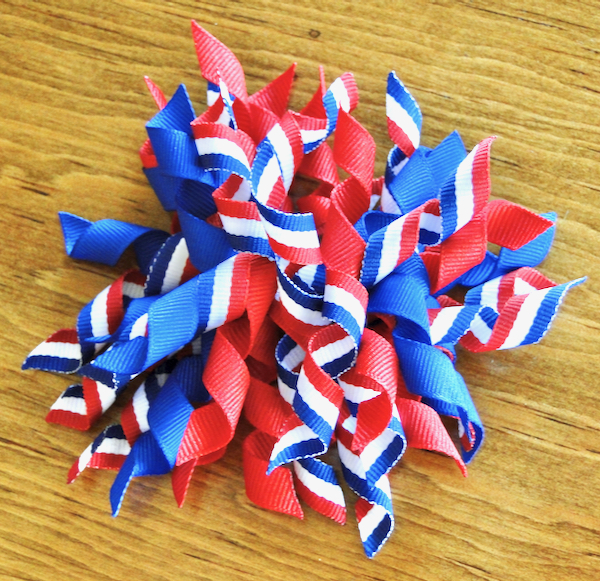
How to Make Korker Hair Bows
Have you been wondering How to Make Korker Hair Bows with the curly ribbon??
Well, check out this easy Korker Hair Bow Tutorial below…
Related: Fun Crafts To Do that Anyone Can Enjoy! (huge list)
Korker Hair Bow Supplies
Here’s what you’ll need to round up to get started…
- Grosgrain Ribbon ~ 3/8″
- Dowels ~ 1/4″ by 12″
- Clothespins ~ regular or mini
- Alligator Hair Clip or Barrette
- Glue G*n
Instructions to Make Korker Hair Bows
Here’s what you’ll do…
1. First, you’ll start by gluing ribbon to an alligator clip ~ go here for step-by-step instructions ~ or you can also just use a barrette!

2. Now… on to the korkers! Wrap ribbon around dowel, and secure each end with a clothespin. (I used mini clothespins)

3. Place on foil-lined cookie sheet.

4. Bake at 250 degrees for 20 minutes. (yep… I know it’s weird, but trust me… it works!) 😉
5. Allow dowels to cool, then carefully remove super-cute corkscrew ribbons from the dowels ~ you can gently unwind them.

6. Or just slide them right out.

7. You can experiment with how many ribbons you’ll use, depending on how full you want your bow. I used seven ribbons for this bow.

8. It’s time to cut your ribbons to your desired length. My corkscrews were around 12″ long, so I cut them into thirds… with each piece ending up around 4″ long.

9. Angle cut the edges of the ribbon, then quickly run the ends of the ribbons under quick flame to prevent them from fraying.
(no burning your fingers… mm-kay??)

10. Then start stacking the ribbons, alternating the colors. Keep them pressed together neatly in the middle.

11. Once you’re done, you’ll tie the last piece of korker ribbon left around the middle, like this…

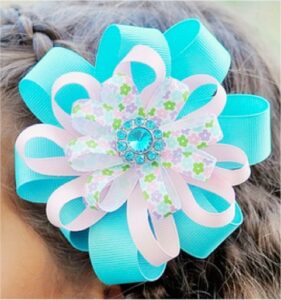
12. Fluff the ribbons… and you’ve got a seriously CUTE korker bow!

13. Now it’s time to glue them onto the top of your alligator clip or barrette (knot side facing down) ~ and you’re all done!! 🙂
More Hair Clip Ideas
For more fun 4th of July Hair Clip ideas, check out these…
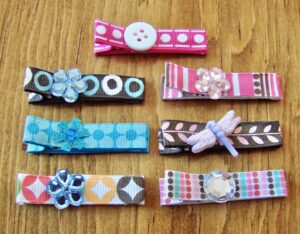
4th of July Clippies ~ go here for instructions

4th of July Clippie Bows ~ go here for instructions

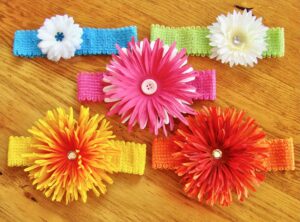
Pretty Flower Clips ~ go here for instructions

A BIG thanks to frugal friends Danielle & Denon for sharing the tips and tricks to make these adorable korker bows!
More Fun Hair Clip and Bow Tutorials
Get inspired with more fun Hair Clip Tutorials and Ideas here…
How to Make Cute DIY Hair Clips for Babies and Little Girls
Let me show you how to make Cute Hair Clips for Babies and Little Girls!
DIY Flower Hair Clips and Headbands
Start creating your own adorable headbands with these easy tutorial for How To Make Cute Flower Headbands for Babies and Little Girls!
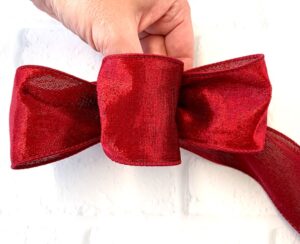
How to Make a Bow For a Wreath
Wondering how to make a bow for a wreath with wired ribbon? This simple step by step tutorial will show you just how fast and EASY it can be!
BIG List of DIY Hair Clips and Bows (Easy Tutorials)
You’ll love this BIG List of Fun DIY Hair Clips and Bows. They’re SO easy to make, and make super-cute gifts, too!
Fun Crafts To Do that Anyone Can Enjoy! (huge list)
Feeling crafty?? Get inspired with these easy and fun crafts to do at home!
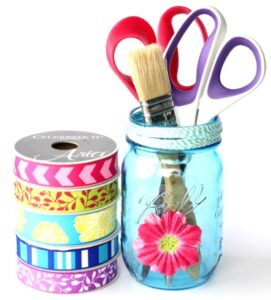
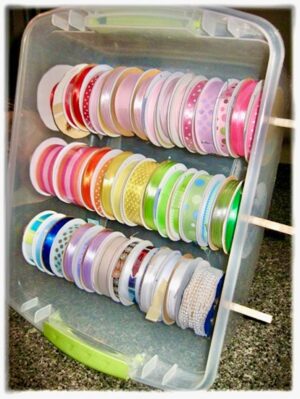
Ribbon Storage Ideas for Spools
Make sure your pretty ribbon is right where you need it with these easy Ribbon Storage Ideas for Spools! These simple tricks are such a game changer!
So have you tried this method for How to Make Korker Hair Bows yet?
Leave a comment and share…


Fray check is a great product to use on ribbon. Much safer!
Awesome thank you! I have been searching everywhere how to do this!
How do you get it to fluff so nicely/evenly? I couldn’t get mine to look like yours for the life of me! The ribbon keeps bunching together & only going out to the sides, exposing the middle part where the tying ribbon is. I can’t get it to fluff all around & look uniform. Any tips?
Use a needle and poke it through halfway, stack each ribbon in the needle before puking it all the way through. It will help keep everything centered while you even the ribbons out.
Does Anyone know how you can stop colours running when Korking. Using dark ribbons with white Polka Dots in it the dots never remain pure white?
Great tips though as I’ve never used tin foil.
Thanks for the help. I’ve been wanting to make these to add to my bows & such on my business page. Thanks a lot for the simple & easy directions. Can’t wait to try them!
Thanks I love doing these and I have not done the foil before but I think I will. I also love to spray the ribbon with starch before baking, I found it keeps the curl better.
my favorite bow size is extra large
*helpful hint to ease frustration*
if you spray the ribbon with some NATURAL starch, they will come out stiff, keeping their shape for YEARS to come! Do not use a toxic/flammable starch in your oven though, and increase the oven time to 30-35 min. 🙂
ahhhh, i have been looking for curling ribbon and couldn’t find. now i know how to make curly bows. thanks for the tips!
I LOVED these cute little bows. Unfortunately my daughter has outgrown hairbows. HOWEVER – she has NOT outgrown cute flip-flops! Guess what I did? I used your “recipe” for corker hair bows and instead put them on flip-flops. My daughter and I ended up with the CUTEST little flip-flops for 4th of July!! They are so cute, I’m going to make some for every holiday (Well, maybe not Christmas. Actuallly – we live in Texas so I could probably even wear them in December!!) Thanks for the tutorial and great idea!!
Great idea, Richelle!! 😉
~ Heidi