Learn how to make Korker Hair bows with this fun DIY tutorial that makes the process so easy!
Then have even more fun making bows and clips with some help from this BIG List of DIY Hair Clips and Bows!
![]()
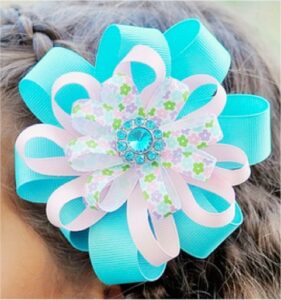
How to Make Korker Hair Bows
Have you been wondering How to Make Korker Hair Bows with the curly ribbon??
Well, check out this easy Korker Hair Bow Tutorial below…
Related: Fun Crafts To Do that Anyone Can Enjoy! (huge list)
Korker Hair Bow Supplies
Here’s what you’ll need to round up to get started…
- Grosgrain Ribbon ~ 3/8″
- Dowels ~ 1/4″ by 12″
- Clothespins ~ regular or mini
- Alligator Hair Clip or Barrette
- Glue G*n
Instructions to Make Korker Hair Bows
Here’s what you’ll do…
1. First, you’ll start by gluing ribbon to an alligator clip ~ go here for step-by-step instructions ~ or you can also just use a barrette!

2. Now… on to the korkers! Wrap ribbon around dowel, and secure each end with a clothespin. (I used mini clothespins)

3. Place on foil-lined cookie sheet.

4. Bake at 250 degrees for 20 minutes. (yep… I know it’s weird, but trust me… it works!) 😉
5. Allow dowels to cool, then carefully remove super-cute corkscrew ribbons from the dowels ~ you can gently unwind them.

6. Or just slide them right out.

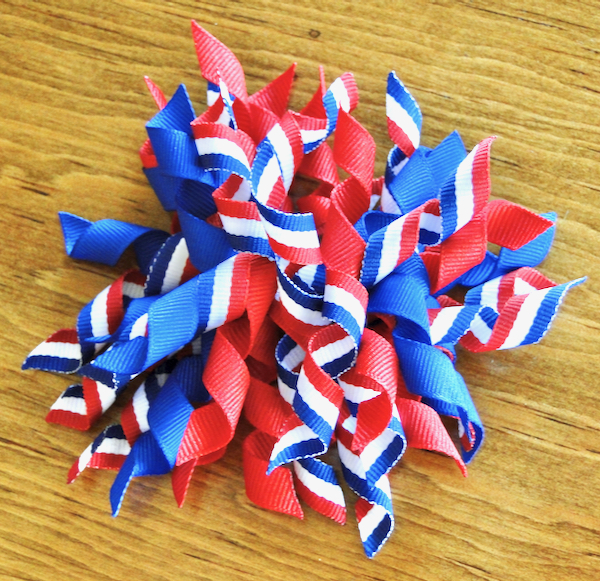
7. You can experiment with how many ribbons you’ll use, depending on how full you want your bow. I used seven ribbons for this bow.

8. It’s time to cut your ribbons to your desired length. My corkscrews were around 12″ long, so I cut them into thirds… with each piece ending up around 4″ long.

9. Angle cut the edges of the ribbon, then quickly run the ends of the ribbons under quick flame to prevent them from fraying.
(no burning your fingers… mm-kay??)

10. Then start stacking the ribbons, alternating the colors. Keep them pressed together neatly in the middle.

11. Once you’re done, you’ll tie the last piece of korker ribbon left around the middle, like this…

12. Fluff the ribbons… and you’ve got a seriously CUTE korker bow!

13. Now it’s time to glue them onto the top of your alligator clip or barrette (knot side facing down) ~ and you’re all done!! 🙂
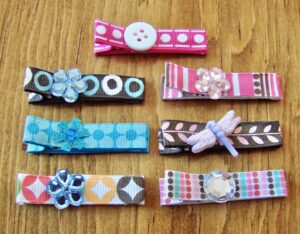
More Hair Clip Ideas
For more fun 4th of July Hair Clip ideas, check out these…
4th of July Clippies ~ go here for instructions

4th of July Clippie Bows ~ go here for instructions

Pretty Flower Clips ~ go here for instructions

A BIG thanks to frugal friends Danielle & Denon for sharing the tips and tricks to make these adorable korker bows!
More Fun Hair Clip and Bow Tutorials
Get inspired with more fun Hair Clip Tutorials and Ideas here…
How to Make Cute DIY Hair Clips for Babies and Little Girls
Let me show you how to make Cute Hair Clips for Babies and Little Girls!
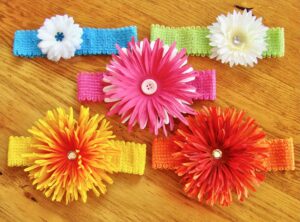
DIY Flower Hair Clips and Headbands
Start creating your own adorable headbands with these easy tutorial for How To Make Cute Flower Headbands for Babies and Little Girls!
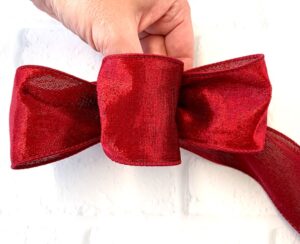
How to Make a Bow For a Wreath
Wondering how to make a bow for a wreath with wired ribbon? This simple step by step tutorial will show you just how fast and EASY it can be!
BIG List of DIY Hair Clips and Bows (Easy Tutorials)
You’ll love this BIG List of Fun DIY Hair Clips and Bows. They’re SO easy to make, and make super-cute gifts, too!
Fun Crafts To Do that Anyone Can Enjoy! (huge list)
Feeling crafty?? Get inspired with these easy and fun crafts to do at home!
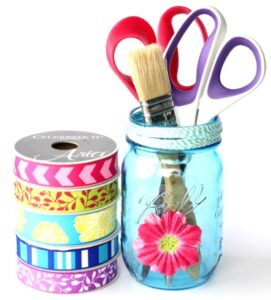
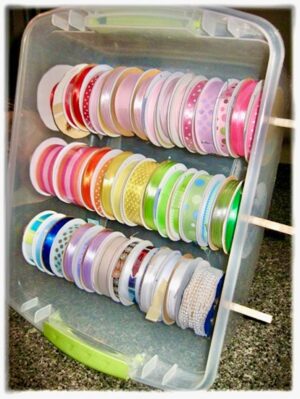
Ribbon Storage Ideas for Spools
Make sure your pretty ribbon is right where you need it with these easy Ribbon Storage Ideas for Spools! These simple tricks are such a game changer!
So have you tried this method for How to Make Korker Hair Bows yet?
Leave a comment and share…


I HAVE GOT TO TRY THIS!!!
I’ve always wondered how to make these things!!
Thanks so much for sharing this! I’ve got an almost five year old daughter who loves anything girly…she’s going to love these! We’ve also got a 15 month old daughter who wants to do everything like her big sister, so we’ll have to make matching bows for the girls :).
Quick question…I have made these bows before this way and find that the ribbon doesn’t stay curled. They look cute at first, but then end up barely curled after a couple weeks. I even tried spraying them with starch before putting them in the oven. Did you have this problem, or is it just me? Thanks for any input. Love your site!
Hi Page ~ hmm… I honestly haven’t had any problem with the curls coming out. I wonder if it might have to do with the temperature or amount of time they were in the oven?
~ Heidi
You can try using liquid starch….dip them in it before wrapping or use the spray kind and spray after wrapping them. You can also try using Stiffen Stuff spray. It isn’t cheap, but works to make ribbon stiffer and stay the way it is shaped. The only thing you have to remember is to clean out the spray head with warm water when finished or the spray will clog the nozzle.
If the ribbons won’t stay curled… You can try using liquid starch….dip them in it before wrapping or use the spray kind and spray after wrapping them. You can also try using Stiffen Stuff spray. It isn’t cheap, but works to make ribbon stiffer and stay the way it is shaped. The only thing you have to remember is to clean out the spray head with warm water when finished or the spray will clog the nozzle.
i do 275 for 20-25 min i spray with starch before and after. keeps them curled. my new problem is using satin ribbon or ribbon with like glittery designs. they like to bleed or melt. i’m guessing lower temp and less time. ideas?
Could this be a humidity “problem?” I wonder where ya’ll live. I say that because it is pretty humid here in Iowa.
Thanks for the replies! I’ve tried both spray and liquid starch. I’ve also left them in longer than 20 minutes and increased the temperature in the oven some. I will see if I can find the Stiffen Stuff. 🙂
I have been making hair bows for a few years now (have sold a few) and have learned a few tips along the way…some trial and error and some by searching the internet.
-Light ribbon takes longer to curl than dark. (don’t know why, but have experienced and found discussions online about it)
-I find I have to “cook” my ribbon MUCH longer than the instructions (not just these) always say.
-Some ribbons, depending on their content just take totally different times to curl and some (like some printed ribbon) doesn’t hold curl well.
Stiffen Stuff is AMAZING! It is pricey, but I always use a 40% off one item Michael’s coupon to get it cheaper…After cooking the ribbon, I spray with stiffen stuff, let dry then spray 1 or 2 more times! makes them extra crunchy and it holds REALLY well!
-I always use a dowel that is slightly smaller than my ribbon width and make sure to TIGHTLY wrap the ribbon around the dowel! Hope you have better luck!! 😀
GREAT tips! Thanks SO very much!
I use a ribbon curler and starch spray. The curler is available at Michael’s.
I cannot wait to try this with my girls, they have been bugging me for hair bows, or fancy hair ties, and the $ is just a little nuts. I am not sure how I ended up with a couple of girly girls, but these are right up their alleys
Oh my daughter is going to love making these 4th of July hair bows. She’s been making different ones this week as she’s creative. She works at Michael’s part time so buys all her creative merchandise from them to make these bows. They are so cute on the ones she made so far. She told me she rather make her own than pay $5.00 or more for a plain simple from the stores.
If barrettes don’t work for you (my daughter has very fine hair and barrettes slide out too easily), you can do the same, only add a ponytail holder before you secure the center piece of ribbon.
Great tip, Sara!
~ Heidi
Aww ~ I’m so glad you like the tutorial! They’re so fun {and simple} to make!! 😉
~ Heidi
Those are so adorable! Thank you for posting this! I love to make bows for my daughter and her friends. I have always wondered how to make the ribbon curly. I would have never thought to wrap the ribbon around a dowel and then bake it in the oven!!
Oh these are so cute, I really need to make some for the little girls I know and not just because I never knew you could put ribbon in the oven and am dying to try it. Thanks for the tutorial, soooo cute!
OH MY GOSH, my daughter is sooooo going to love me after I make these! Thanks!!!!