Get ready to get crafting with this fun and audaciously easy DIY Marble Magnets Tutorial!
Then… have even more fun with Mod Podge when you also make this fabulous Clipboard Craft!
![]()
Marble Magnets Tutorial
I’ve been seeing the cutest marble picture magnets at the stores, but I haven’t been able to bring myself to pay full price for them!
But then I thought… why not just make some? 🙂
These cute magnets are SO fast and easy to make… and instantly transform any magnetic surface from drab to fab!
I started playing around with my Mod Podge one day (just like we used in the Cute & Crafty Clipboards), and came up with this DIY Marble Magnets Tutorial.
You won’t believe how easy it is to make a Marble Magnet!
Here’s what you’ll do…
Related: Fun Crafts To Do that Anyone Can Enjoy (huge list)

Marble Magnets Supplies Needed
You’ll just need a few simple craft supplies to make your own marble magnets…
- Mod Podge (I used Glossy)
- Small, Strong Round Magnets
- Flat Glass Marbles (I found small ones at Hobby Lobby & larger ones at JoAnn’s ~ near the silk flowers)
- Foam Brush
- Hot Glue G*n
- Small Pictures (cut out from magazines or scrapbook paper)

How to Make Marble Magnets
Here’s what you’ll do…
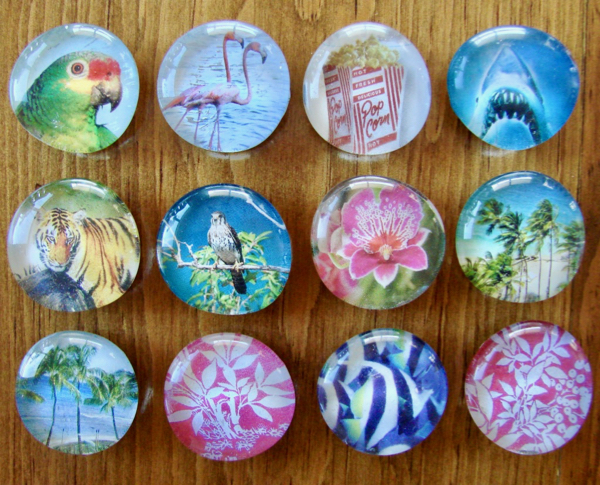
1. Find small pictures that you would like to use for your magnets. Bright pictures with vivid colors work great!
I used pictures cut out from free and cheap magazines and from scrapbook paper scraps. (tip: photos printed on photo paper and stickers don’t work well for this project ~ just trust me) 😉
2. Place marble over picture to visualize what it will look like. Trace around marble, then cut out picture… just a smidge inside the traced line.

3. Apply a small amount of Mod Podge to the back (flat) side of the marble piece.
4. Place marble piece on top of the picture, and press down. Don’t worry ~ the Mod Podge will dry clear.

5. Set aside, and allow to dry.

6. Once the picture has dried, attach magnet to the back using hot glue (make sure to use the hot setting on your glue g*n).
There you have it ~ wasn’t that so easy??

7. Variations: Have fun choosing pictures, styles, sizes, and designs! You can even make some using larger flat glass marbles.
Then save some for yourself, and give some as thrifty gifts!!
These Marble Magnets were so simple and fun to make, I actually made a bunch! And yes… that is ‘Jaws’ in the corner there!

More Easy Crafts and Homemade Gift Ideas
I have even more fun craft ideas and ways to keep your kiddos entertained that I know you’ll love. Check out these creative tips…
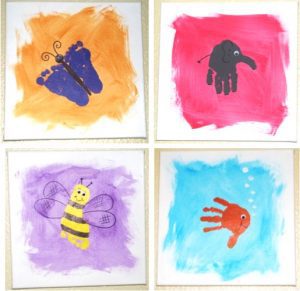
8 Fun Handprint and Footprint Canvas Art Ideas
Make some artwork you’ll cherish forever with these sweet Handprint Canvas Art ideas!
Homemade Soy Candles
Have you been thinking about making your own candles? I’ve got to tell you… Homemade Soy Candles are so easy to make!

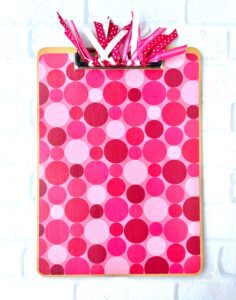
Clipboard Crafts (DIY Decorating Clipboards Ideas)
You’ll love learning How to Make Customized Decorative Clipboards with these easy DIY decorating ideas for clipboards!
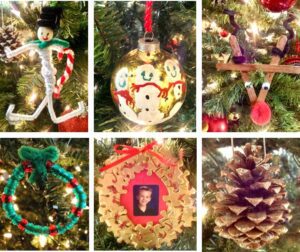
10 Easy Christmas Ornament Crafts for Kids
Nothing beats homemade ornaments by the kids. These are my favorite ornaments that I’ll treasure forever!
Fun Crafts To Do that Anyone Can Enjoy (huge list)
Feeling crafty?? It’s time to get your Craft on and get inspired to do some fun crafts!
Frugal Gift Ideas for Everyone on your List!
Score frugal gift ideas for the Kiddos, Teens, Mom, Dad, Grandma, Grandpa, Co Workers, Your Dogs, Your Cats, and more!

So have you tried making these DIY Marble Magnets yet?
Leave a comment & share!


I just finished making a set of these for a birthday present and they turned out AMAZING. My friend is in love with London, so i hopped online grabbed a few pictures and printed them out on regular paper. I got the flat marbles at the dollar store (about 30 in the bag). I had the mod podge already so that was no extra cost, and the magnets were FREE, many businesses and schools use magnets for business cards or calendars, the left overs get thrown out when the calendar is no longer current, so I scooped them up at the end of the year and I just cut them to fit my rocks.
Overall each magnet ended up costing about 3 cents! (I will probably spend more to wrap them HAHA)
THANK YOU FOR SUCH AN AWESOME IDEA!!!
You’re very welcome, Amanda… I’m so glad you had fun making these! The London theme sounds adorable, too!! 😉
~ Heidi
I got a few of these as a gift from a student a couple of years ago! She drew designs and pictures on paper and used that instead of a magazine pictures or photos. I love them and they are still on the fridge!
What a fun idea ~ I love that!
~ Heidi
Love this my 3 1/2 loves this THANKS SO MUCH FOR A GREAT TIP 🙂
This is great, I don’t know how I missed it earlier, but I’ll be trying this out to use and give as gifts through the year!
What a great, thrifty craft idea…thanks so much!
My 5 year old son and I made these last weekend. He loved helping to find just the right pictures. These will make cute gifts for Christmas. Thanks so much!
What a great idea for a baby announcement too! Put the baby’s picture on the magnet (as suggested, printed on regular paper) and give with the announcement and your family has a handy “framed” picture of the new arrival.
I am so making these for a cool, CHEAP, family Christmas exchange gift! I’ll do one with a picture of each grandchild….. sentimental gifts are a HOT commodity in my family!!! THANK you once again for such and awesome yet simple idea! YOU ROCK!!!!
I made these awhile back and decorated an old Altoid’s container to hold the magnets – just by using mod podge and some leftover scraps. Once it was dry, I placed a small piece of tissue paper in the bottom of the tin and put the magnets on top and folded the sides of the tissue over the magnets like a present. Its a great way to recycle those old tins and show off the magnets at the same time!
Hi Sarah ~ just test them to see how they’ll look by holding up a picture to the back. Some may be more clear than others. 😉
~ Heidi