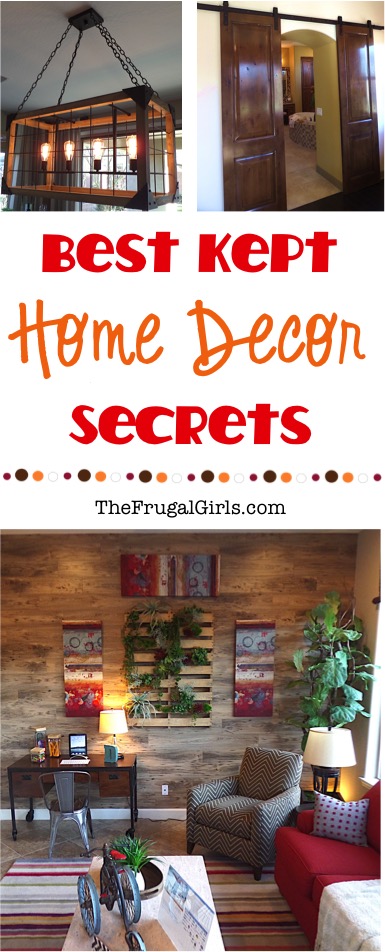
Give your home a gorgeous makeover with these easy Budget Home Decor Tips and Ideas!
Then… get your home brilliantly organized with some help from these savvy Home Organizing Tips and Tricks!

![]()
Budget Home Decor Tips
Could your home use a little refresh?
It’s time to get inspired with these best kept designer secrets and Budget Home Decor Tips to get the look you love… on a budget!
Over the years, my hubby and I have owned 8 different houses, and remodeled several of those… even taking one down to the studs.
It’s been quite an adventure, and we’ve learned SO much along the way from contractors and our own do-it-yourself projects.
That’s why I want to share all of these insider DIY tips and tricks with you!
You’ll be amazed at just how easy it is to give each room a fun, fresh makeover with these easy DIY and decor hacks!
So are you ready to decorate your home on a dime with some simple cozy home ideas?
Roll up your sleeves, and let’s get started!
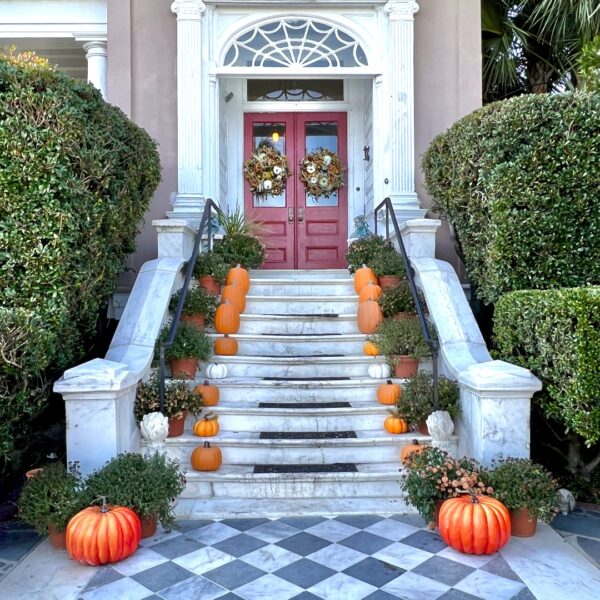
Budget Door Ideas
The perfect front door can add so much curb appeal to your home!
Give Your Front Door some Fresh Paint
If you have a painted door you already love, consider giving it a fresh coat of paint.
Maybe a pretty new color and fresh paint may be all it needs to make your entryway pop!
Consider using a semi-gloss high quality exterior paint on front doors. This may help it stand up better to weathering, fingerprints, etc.
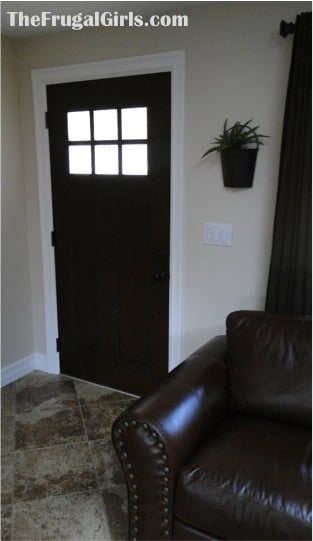
Here’s another little trick for you. At one of the homes we remodeled, we swapped out a standard builder grade door for a classic 6-window front door.
It looked AMAZING, but after installing it I noticed anyone could look straight in from the outside. Awkward!
Here’s the quick, simple and frugal little trick I came up with to solve that problem…
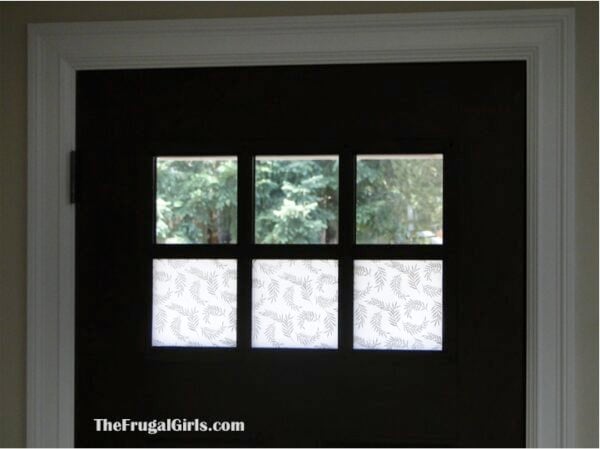
DIY Front Door Privacy Ideas
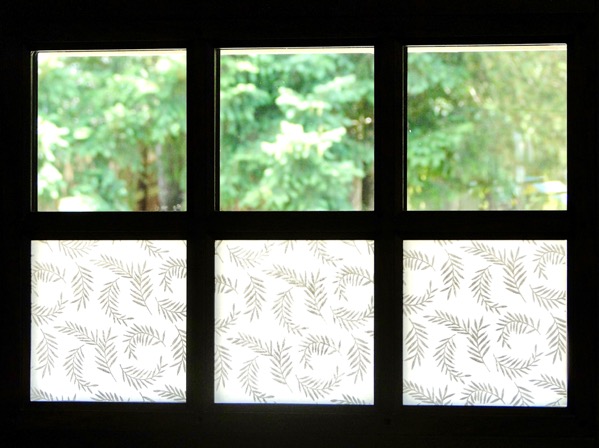
If your front door could use a little more privacy, you need to try this simple trick!
Nothing can update a house like a pretty new front door! We recently installed a new front door on our home, but there was one little problem… no more privacy! 😉
Yep ~ the 6 pretty little windows at the top weren’t frosted or tinted, and you could see right in to our t.v. and living room.
I wanted to find a way to keep all of that light coming in through the windows, but also make it private… oh, and I didn’t really want to spend any money either!
So one day it popped into my head to try some different types of scrapbook paper! The vellum didn’t seem to let in enough light, but then at JoAnn’s I spotted these pretty pages (with a little bit of sparkle).
They were in the scrapbooking section, and almost like a sheer fabric type of paper. I fell in love, and knew they would do the trick!
Back at home I simply cut them down to fit the size of the squares, and affixed using itsy bitsy pieces of double sided tape. (glue dots should work, too!)
paid around $1.00 for each page, so it was about a $6.00 project. The price was right, it still let in light, and looked SO pretty, too!
Medbie writes: “Remembering this post helped me with a front door emergency today! I’m so glad for your blog!”
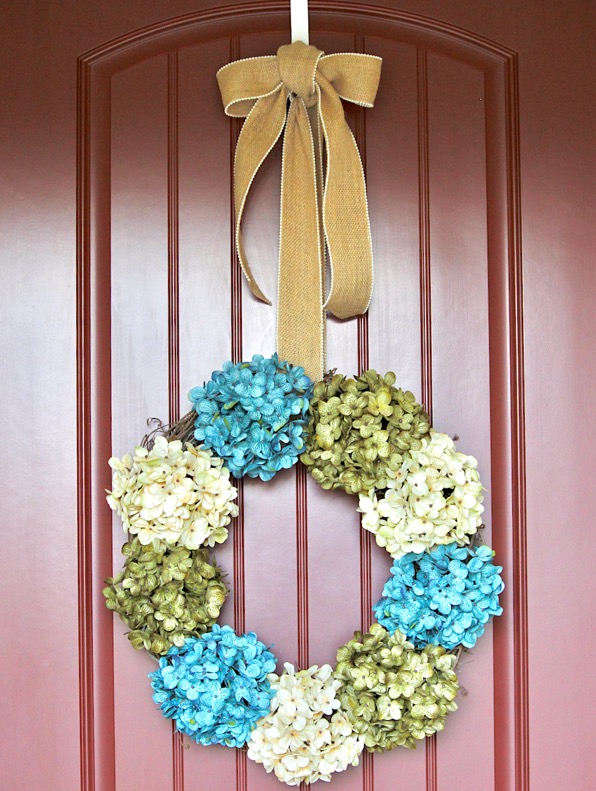
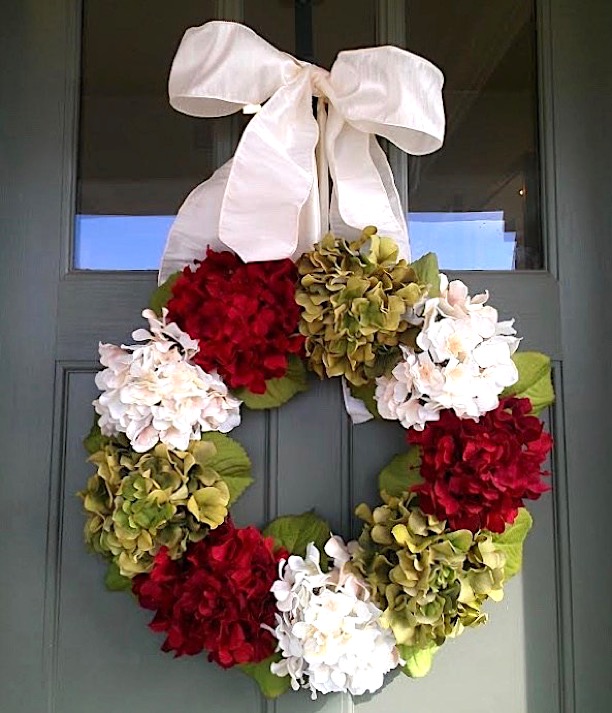
DIY Hydrangea Wreath for Front Door
Could your front door use a pretty little makeover? Sometimes a new wreath is all it really needs! Learn how to make a gorgeous hydrangea wreath in just 5 minutes!
You can even swap out the colors of the flowers for different seasons.
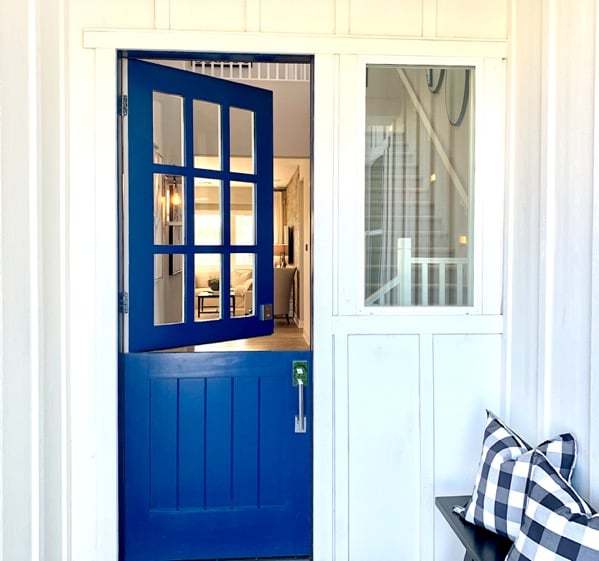
Consider Adding Dutch Doors
Is your front or back door a little fugly?
They’re a farmhouse must-have, and the perfect way to let in some fresh air while keeping the little ones and pets safe and snug inside.

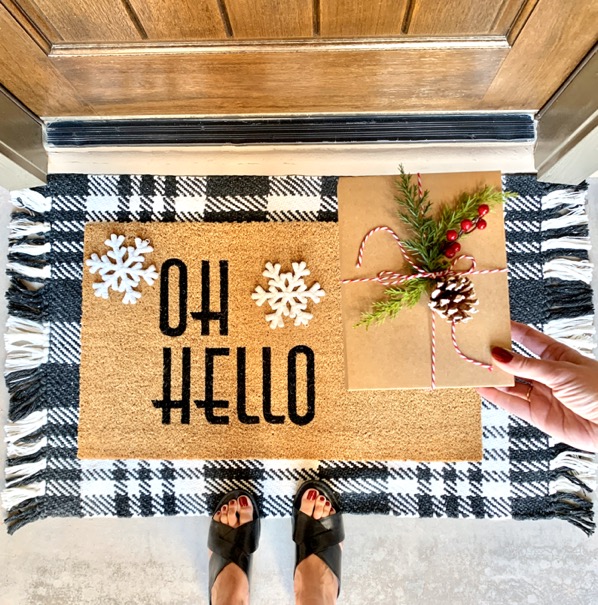
Don’t Forget the Doormats!
Pretty doormats can make any entryway feel so welcoming! I picked up these at Target, and had them shipped straight to my, well… front door! 🙂
Consider layering mats of different sizes and textures for a fun look like I did here…
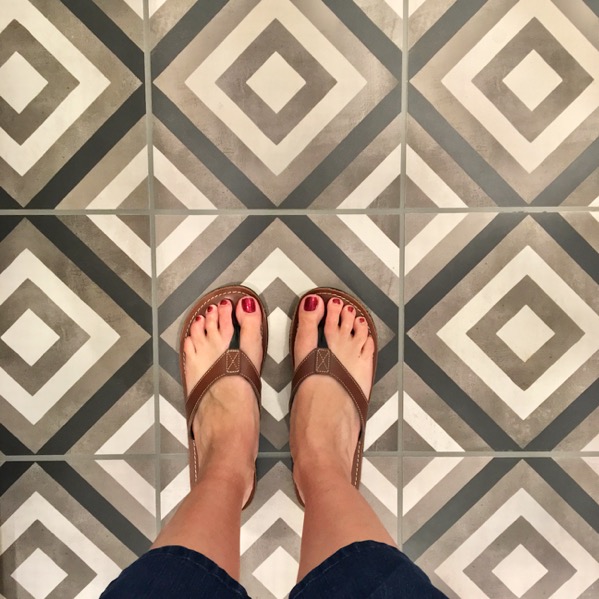
DIY Flooring Ideas
When it comes to flooring in your home, there are several different options to consider, with pros and cons to each.
Here are a few of my favorite options…
- Hardwood Floors (Durable, Stands the test of time, Can be great for resale!)
- Laminate / Vinyl Floors (Easy to install, We’ve purchased from Home Depot and installed in the kids’ bedrooms)
- Porcelain Tile (More durable than ceramic tile, Resistant to scratches & stains, Easy to clean, Cooler to the touch… making it great for hot climates)
- Concrete
- Pavers (Great for a rustic mudroom or laundry room with an exterior door)
- Carpet
Brenda writes: “If you’re a fan of carpet, get the very best padding. It’s what determines how well your carpet holds up. You can buy cheaper carpet that way too!”
Budget Dining Room Ideas
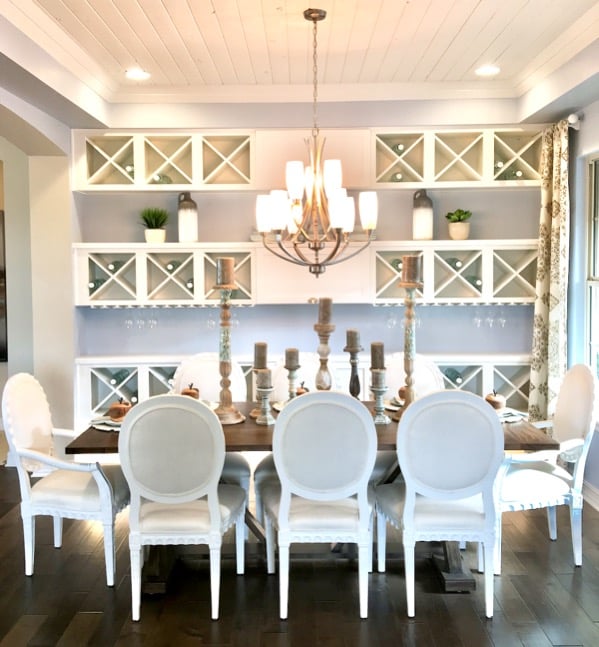
I’ve always thought dining rooms should be beautiful. I mean, they’re that special place where families come together to share conversations, delicious meals, and even game nights!
So if your dining room is need of a little refresh, check out these creative ideas to create a gorgeous dining room without overspending!
My dining room is one of my favorite rooms, a place where my family shares conversation, good food and joyful celebrations.
Not only that… it’s where we come together after a long week to play our favorite board games and card games, and make all those crazy fun memories! The prettier the space… the more fun it is to spend time there, right?
It’s time to invest in a space to create fabulous memories with family and friends alike. Make your own dining room amazing with these Stunning Dining Room Ideas!
Stunning Dining Room Ideas
Here are some simple tips to completely transform your dining room…
1. Add a Throw Rug Under Your Table.
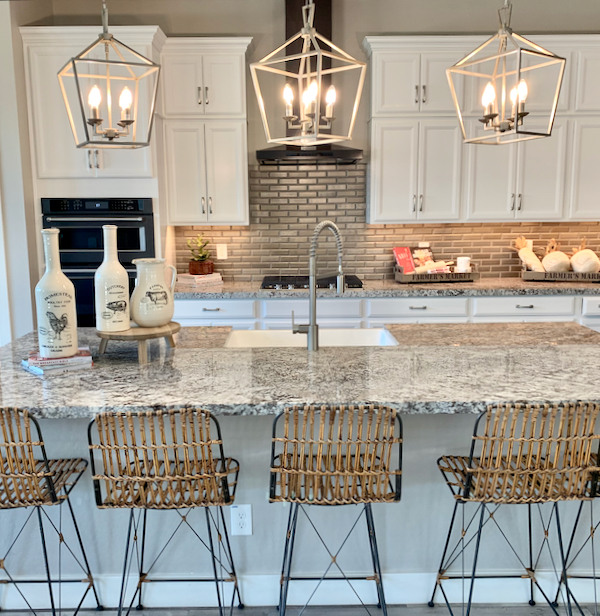
2. Upgrade Your Light Fixtures.
3. Add Candles &/or Flowers to Your Table.
4. Set Your Table Pretty… Every Day!
5. Spruce up Surrounding Walls with Mirrors or Pretty Decor.
6. Install Crown Moulding on the Ceiling.
7. Recover Your Chairs.
8. Consider Refinishing Your Table.
Heather writes: “Refinish furniture on your own. I recently purchased a solid oak dinette set that was 30 yrs old and in fantastic shape for $30 at a yard sale. I refinished it in black lacquer spray paint and distressed the edges. It looks fantastic. The paint supplies cost me $20 at Walmart.”
Score Walmart Deals (20 Secret Tips)

DIY Paint Hacks
Renea writes: “A note about painting…definitely tape up swatches of color in several places in your rooms and observe them for a week before deciding. Depending on time of day and lighting, the colors will look different. I’ll sit and look at the taped swatches for 10 minutes, then pull down one that I like least. By the end of the week, I know exactly what I like most. Also, at Home Depot, Lowes, and Sherwin Williams, you can buy samples for $5 to paint a 3 foot section in a room and see how it looks before getting a whole gallon. That $5 and 10 minutes of painting has saved me a few big mistakes.”
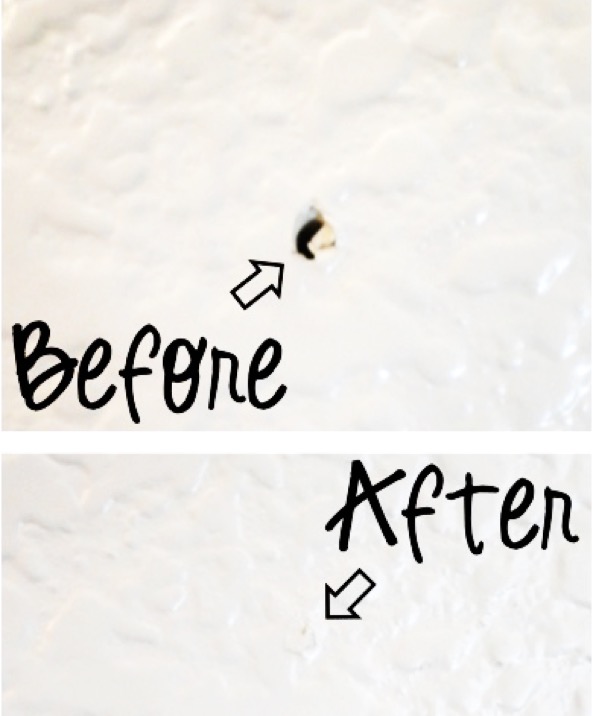
Do you have holes that need patching? My grandpa was a professional painter, and had the best little secret trick to fix holes in seconds!
Here’s what you need to do…
10-Second Nail Hole Fix
Save BIG with Mis-Tints and Oops Paints!
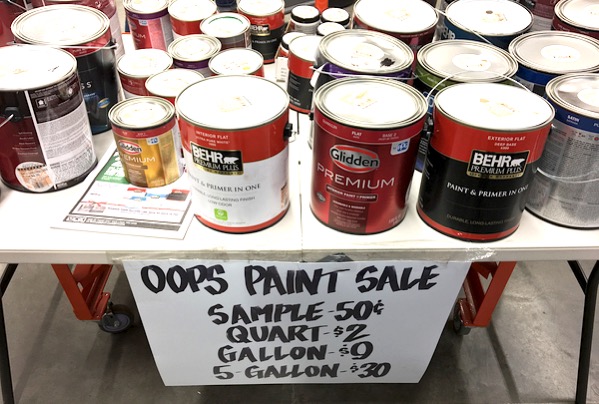
Shelly writes: “Always check the mismatch paint shelf at Lowe’s. If you are open minded on colors, you can get a gallon for $5.00.”
And guess what… she’s right! I’ve repainted entire rooms in my home for $5.00 or less thanks to the mis-tinted paint at Lowe’s and Home Depot!
Don’t let your paint go to waste once you are through with a painting project. Use this tip to have some ready-to-go for touch ups and within arm’s reach at all times…
How to Store Leftover Paint
Living Rooms Ideas on a Budget
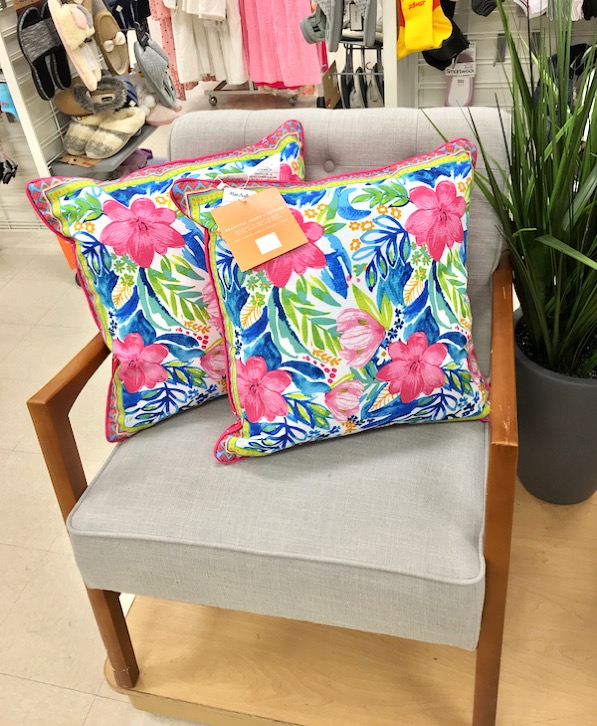
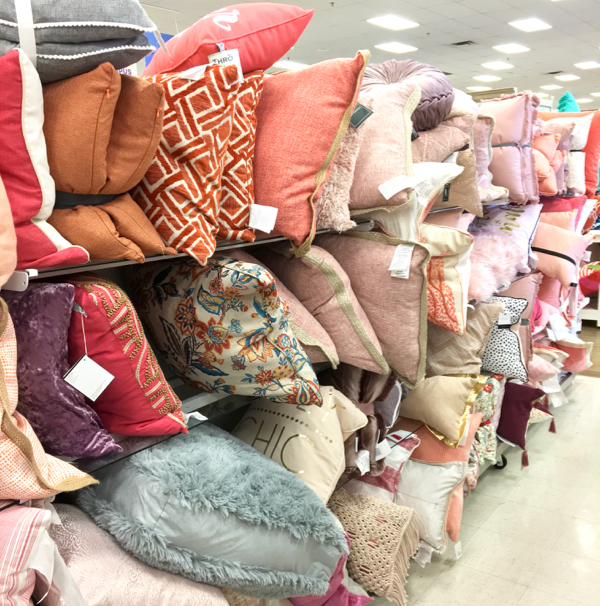
One of the easiest ways to update the look and feel of your living room is with new Throw Pillows!
A simple trick for saving BIG on Throw Pillows is to simply purchase one insert, then rotate the Throw Pillow Covers.
That way you can easily have seasonal designs and fun, fresh new looks whenever you’re in the mood for an update! 🙂
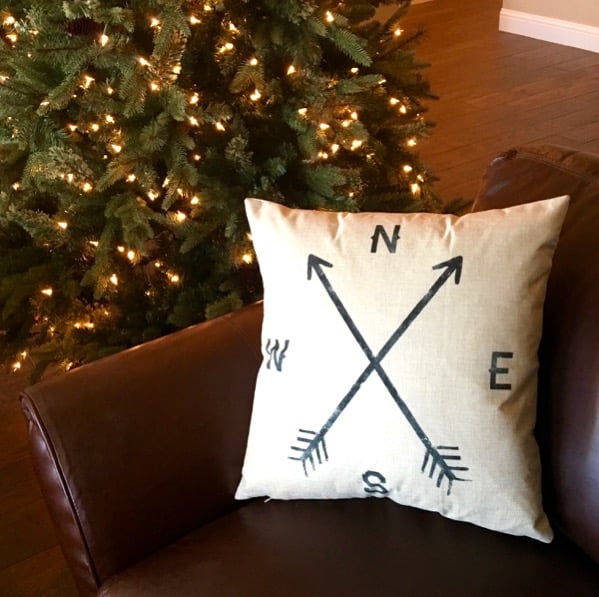
Thrifty Decor Secret: Throw Pillow Covers!
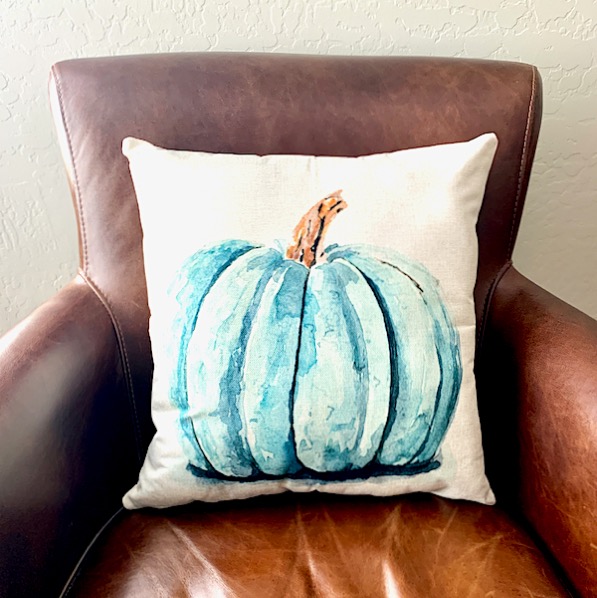
There’s no need to be sad about a season ending. Just swap out your old pillow covers with some fresh new Pillow Covers and you’ll be ready for the next happy season.
I’ve got several different Pillow Covers, and just swap them out seasonally using their handy zippers… it’s one of my favorite thrifty home decor tricks!
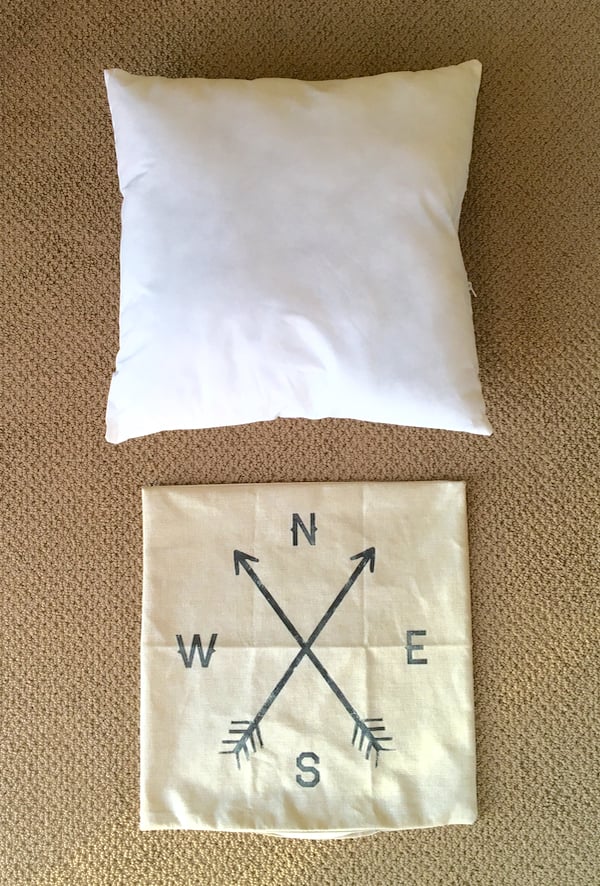
They’re so inexpensive compared to buying new pillows, and I love that I can pop the covers off and wash on gentle cycle, too!
If you get an 18″ x 18″ cover, fill it with an 20″ x 20″ pillow insert for a plump, gorgeous throw pillow! Same goes with a 17.3″ x 17.3″ cover, fill it with an 18″ x 18″ pillow insert. Here I’ve got a 20×20 pillow that I stuff into an 18×18 insert…
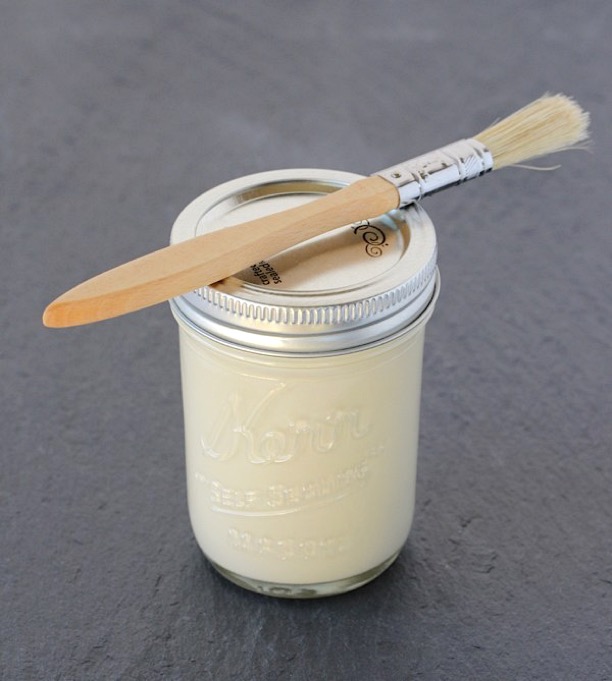
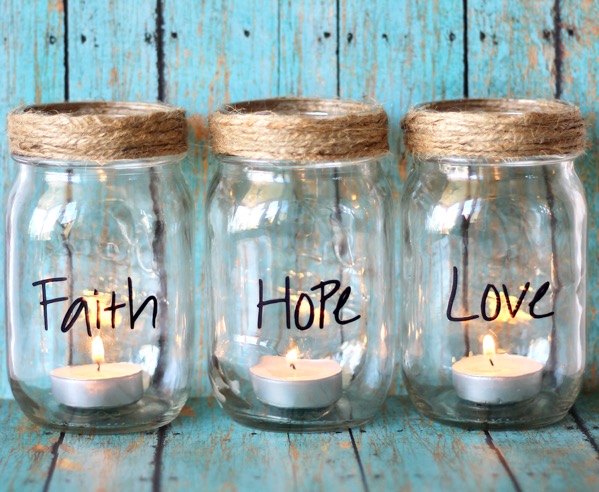
DIY Mason Jar Candles
Little-Known Marshalls HomeGoods Shopping Hacks
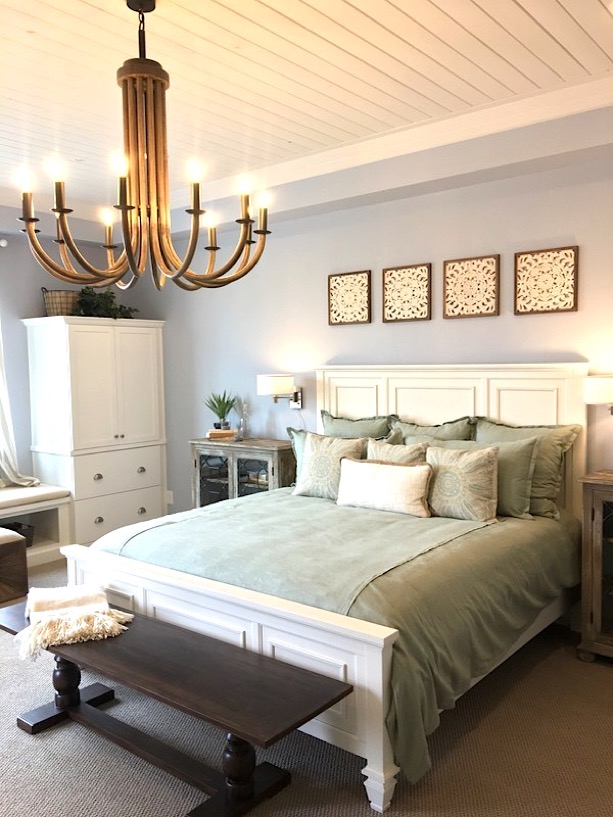
Fun Master Bedroom Ideas

Are you ready to transform your bedroom into a cozy retreat?
Put these easy tips and tricks to use to create a gorgeous, inviting bedroom you’ll be dreaming of all day long!
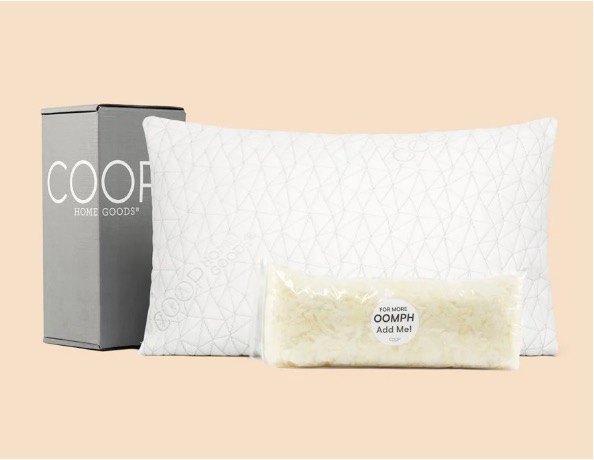
Add some Coop Home Goods pillows and a mattress topper for luxurious comfort all night long!
Coop Home Goods Pillows & Bedding
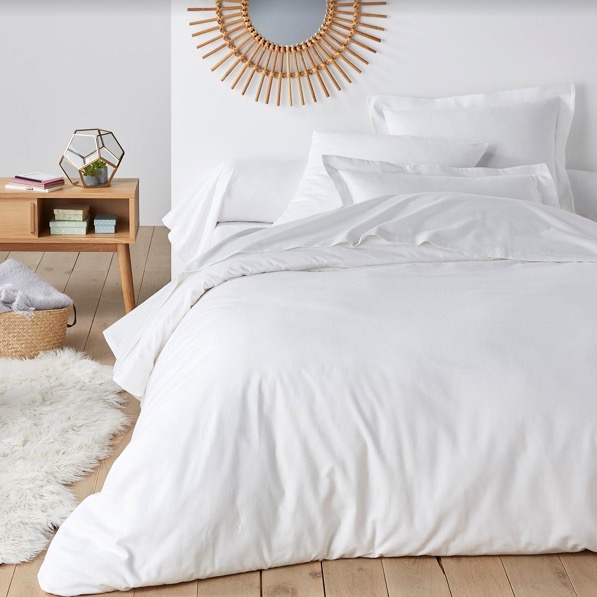
Or upgrade your bedding with soft & cozy cotton Duvet Sets from Pizuna Linens! With 5-star hotel quality and trendy colors, you can create a dreamy room in no time!
Pizuna Linens Duvet Sets
Kids Bedroom Ideas
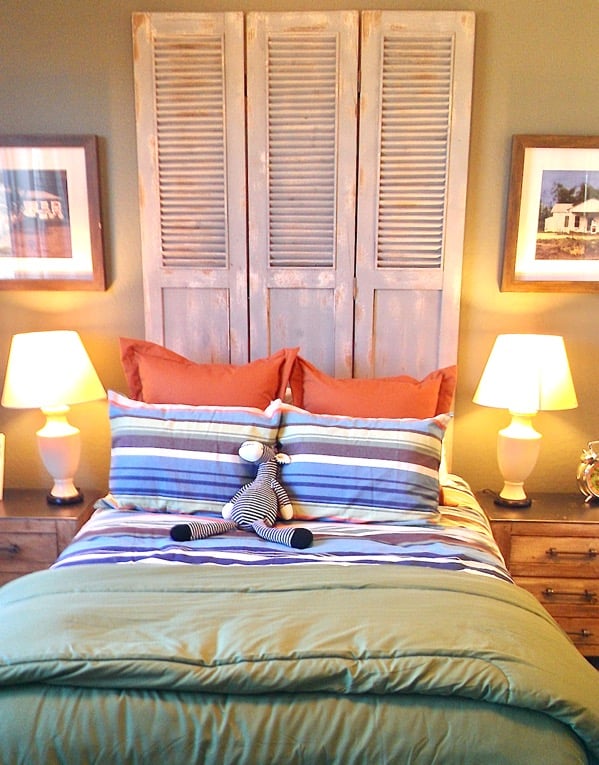
Shutter Headboard DIY
Thinking outside of the box is essential when it comes to Home Decor ~ not only will you come up with some creative solutions… you’ll love the FUN results!
For example, rather than a traditional headboard, vintage style distressed shutters make a fabulous statement piece!
Boys Bedroom Ideas That Are 100% Cool!
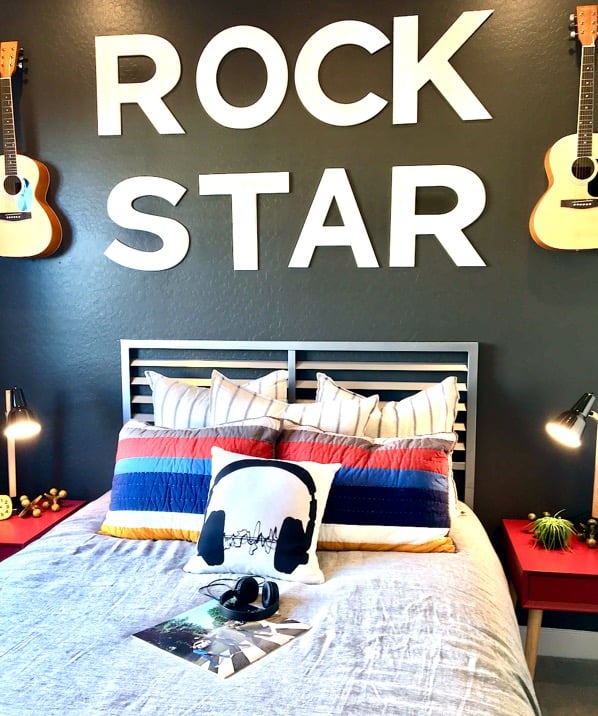
Would you like to decorate an awesome bedroom for your boys? Your guys will LOVE these cool and unique bedroom decor ideas! From epic sports themes to outdoor adventures, these boys bedroom themes will inspire your guys all day long!
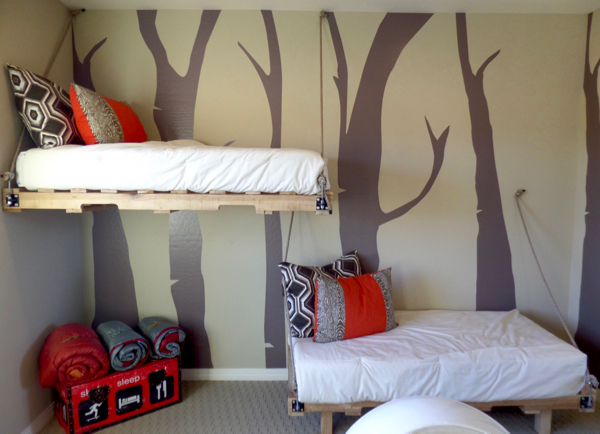
Bunkbeds are fun, but these suspended beds take fun to a whole new level! Use Tree Vinyl Wall Art to make a fun statement on the walls!
Decorating for the Basketball fan? There’s nothing more fun for a sports fanatic than to have their love of sports reflected in their own Basketball Bedroom!
Think of ways to incorporate their favorite sports items or teams into bedroom decor! Skateboards, Surf Boards, and even Basketball Hoop Backboards make for fabulous statement pieces hung on the wall!
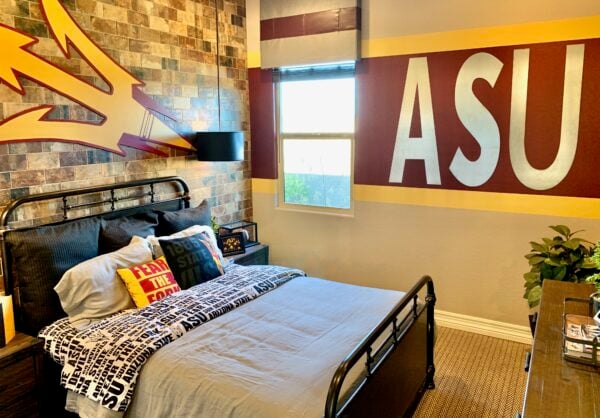
Or use wall clings and stencils to go all out decorating with their favorite college team!
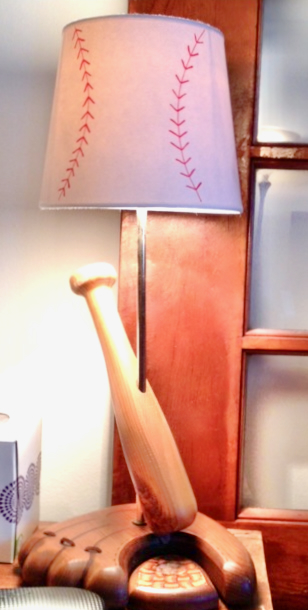
Turn any lamp into a baseball lamp with this easy lampshade idea!
Frugal friend Linda writes: “I just wanted to share with you a lampshade I decorated myself! My husband had this lamp since he was 8, which is a long time ago. This also meant that the lampshade was literally falling apart.
I researched baseball lampshades online and they were all expensive, and/or too fancy for this lamp. Then I did a little online research, and figured out I could make my own with a red sharpie, white decorate yourself lampshade & paper plate for tracing the curved lines. Tada! So cute and only $11 with a coupon and a sale at Hobby Lobby!”
Most importantly… involve your boys when decorating their rooms and have FUN together making their space extra special!
Laundry Room DIY Decor Tips
We all spend a lot of time in our laundry rooms with our never-ending loads of laundry… so the room might as well be cute and cheerful, right?
Get inspired with these fun ideas here…
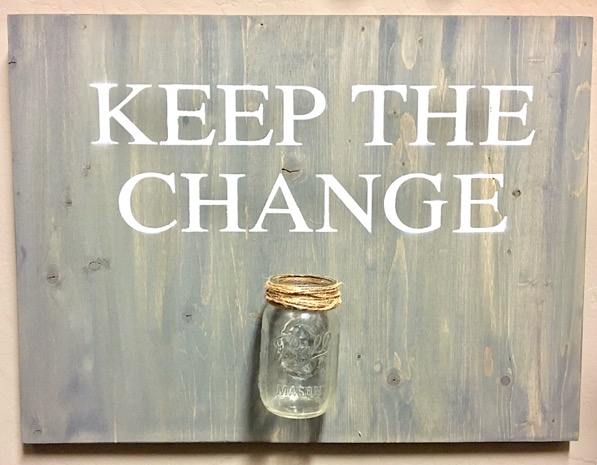
Keep the Change Mason Jar
1. Cut a piece of plywood down to your preferred size.
2. Stain or paint your plywood.
3. Once it is completely dry, stencil with paint or use letter stickers to write out: “Keep the Change”
4. Wrap the rim of your lid with twine.
5. Affix your mason jar to your piece of wood using a hose clamp (found in the plumbing section of hardware stores)

DIY Laundry Room Signs
1. Cut a piece of plywood down to your preferred size.
2. Sand wood, then paint with primer.
3. Once primer has dried, paint with black chalkboard paint. (2 – 3 coats may be necessary to fully cover, just allow to dry completely between coats(
4. Then, using a white chalkboard pen, write out a fun saying or list, like the example above. Have fun customizing it to your personal preference.

DIY Laundry Lost Socks Sign
1. Cut a piece of plywood down to your preferred size.
2. Stain or paint your plywood.
3. Once it is completely dry, stencil with paint or use letter stickers to write out: “Lost Socks Seeking Solemates” 🙂
4. Then use hot glue to affix clothespins to your sign.
5. Hang on your laundry room wall, and now you’ve got the perfect spot to hang those lost socks that come through your laundry loads!
Mudroom Storage Ideas
Searching for more Creative Storage Solutions? Or could your mud room use a little makeover? These easy Mudroom Storage Ideas will help you keep everything organized while maximizing your space!
Mud Rooms really are a prime spot in your home to pack in some extra storage space, and these smart mudroom ideas will help you keep your entryway tidy and organized!
So here are my top tips to reorganize or create a functional mudroom space.
What Do You Put in a Mudroom?
Mudrooms are typically located near a door… usually a back door or door leading out to the garage. So, they’re a great place to store things you’d need to grab on the way out of the house!
Here are some of my favorite things to store in the mudroom…
- Coats
- Hats
- Gloves
- Scarves
- Backpacks
- Purses or Bags
- Car Keys
- Shoes
- Boots
- Umbrellas
- Dog Leashes
- Pet Toys
Mudroom Must-Haves (10 Essentials)
So when you’re updating your mudroom, or just creating a mini entryway mudroom with a furniture piece, here are the essential things you’ll want to incorporate…
1. Small and Large Hooks at a Variety of Heights
2. Accessible Labeled Storage Spots – Lockers, Cubbies, Baskets, Bins
3. Wall Clock (to make sure you’re on schedule)
4. A Bench Seat (perfect for putting on or removing shoes)
5. Floor Mat (to wipe your wet or muddy feet)
6. Boot Tray (to store wet or muddy shoes and boots)
7. Additional Shelves (think vertically… shelving above can house additional baskets bins, or boxes… or hide additional belongings!)
8. Umbrella Holder (to store full-size umbrellas)
9. Durable Flooring (porcelain tile works great, and will stand up to the moisture and wear and tear of this high-traffic zone of your home)
10. Full-length Floor Mirror (so you can get one last peek at yourself and fix any flyaway hairs before you head out the door)
DIY Mudroom Wall and Shelving
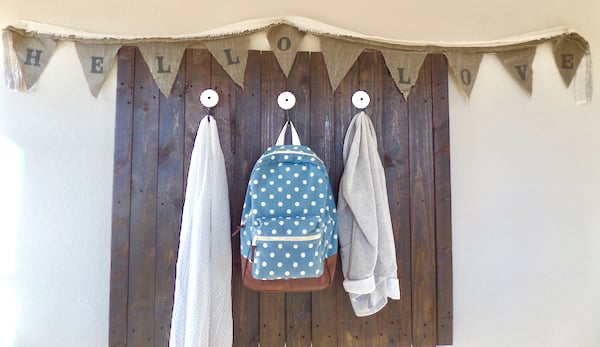
Don’t have a mudroom? Here’s a fun DIY tip… Peg Board is an affordable and seriously functional way to create your own mudroom near the back door or next to the door leading out to the garage!
Simply attach peg board to the walls, then add a variety of hooks at different levels for kids to hang coats, hats, scarves, backpacks, and more!
You’ll love your tidy organized spot, with everything ready-to-go right by the back door!
How to Create a Mudroom without an Entryway!
(Creative Mudroom Alternatives)
No room for a mudroom? No problem! Just get creative and look around for any usable space by your front or back door. Even if you don’t have enough room for a proper mudroom, you’ll be surprised at how efficiently you may be able to use that space!
1. Add Shelves and Hooks to Your Laundry Room. Is your laundry room near an entry point to your home? Consider using space in your laundry room for extra storage with shelving, and hooks for hats, coats, dog leashes, etc.
2. Place Boot Mats and Shoe Shelves in the Garage. Mud rooms are a great place to store dirty boots and shoes when you’re coming in from outside. So if you don’t have a proper mud room, try placing boot mats and shoe shelving just outside the door to the garage.
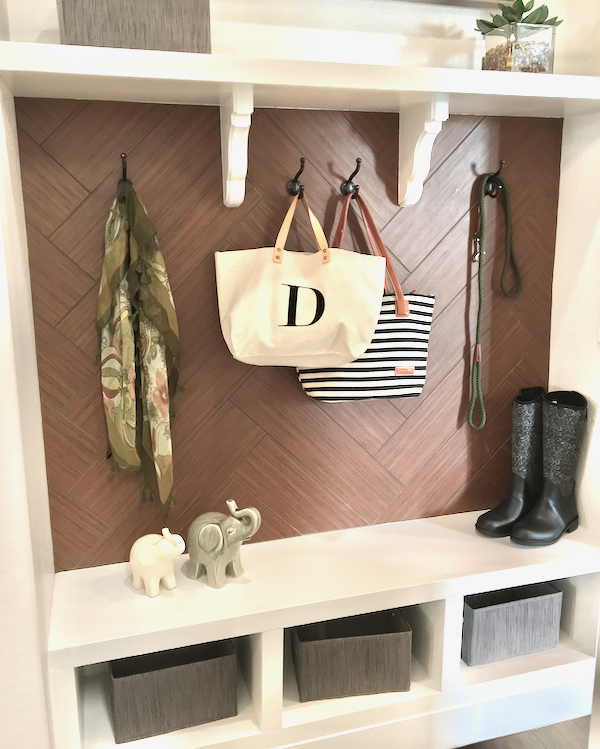
3. Hang Hooks in the Hallway. Consider hanging decorative hooks in the hall near the back door for your kids to store their backpacks…
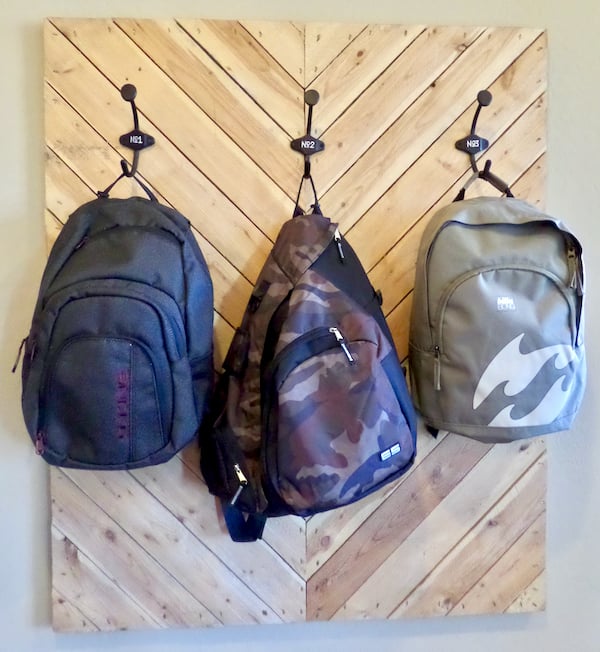
Or hang hooks near your entryway to store jackets, scarves, and bags…
More Budget Decor Ideas
Want even MORE Budget Decor Ideas?? Your frugal friends have shared some fabulous budget savvy decorating tips!
CC said: “The best advice my Mother ever gave me was to buy good wood pieces and inexpensive cloth items. If your wood should become scratched/dented/etc., it can be repaired. But should you rip fabric, the piece is pretty much a throw away.”
Kate said: “I’m an interior designer and actually just bought my first home too. I come across this question/dilemma a lot wig friends and clients and Here are some of the best advice I can give
*buy one high quality piece per room like a good sofa that will last 10 years (rather than buying a new one every 3 years)…. Saves money in the long term
* go neutral with major pieces and add color with pillows, drapes and area rugs from target, etsy ad ikea.
So spend on the most importan piece in each room then be thrifty on everything else! DIY projects are always a cheap way to add personality!”
Amy said: “Pay for the things you know will last forever and you won’t ever grow tired of. For everything else, pay as little as possible. Try to make things yourself. Get creative, especially for projects that require custom sizes. Sometimes just wandering around Home Depot you will come across the perfect fit in a product you never knew existed.”
Amber said: “Thrift stores & Craigslist (the free section) Seriously. You really can find amazing things there. I have furnished my entire 3 bdrm apt with nice things from those places. Case in point: We finally we ready to move from a double sized bed to a queen, Some guy on craigslist had to move that night and needed someone to come take his bed; that night. So we drove up to Tahoe, IN THE SNOW and got a free 7 month old mattress and box spring, Then I had a friend who had a queen sized metal frame that I gave my old bed in to trade for, and I went to Savers and Goodwill and picked up 2 sets of queen sheets and a BRAND NEW comforter, and duvet cover for under $25 I am now I am on the look out for a headboard. It has taken me almost a year to get my pace how I want it, but slowly it is getting there. You dont have to buy all NEW furniture. Also ask relatives, friends, whenever someone has stuff they want to get rid of and I dont have it, I will take it used or not. I have some things that are going on my wedding registry because of this; my grandma gave me a temperamental toaster, and I would like one that likes to toast when I tell it to, etc. But mostly I get by with what I have and when I see something I can get for cheap I do.”

Jasmine said: “I love the salvation army. I suggest you go when to store opens to find the best deals on furniture. I found 2 nightstands that was real wood and beautiful for cheap. Computer desk in excellent condition. The only thing I would buy new are mattresses and appliances. For everything else I would go to salvation army or craigslist. I wish you the best and have fun decorating.”
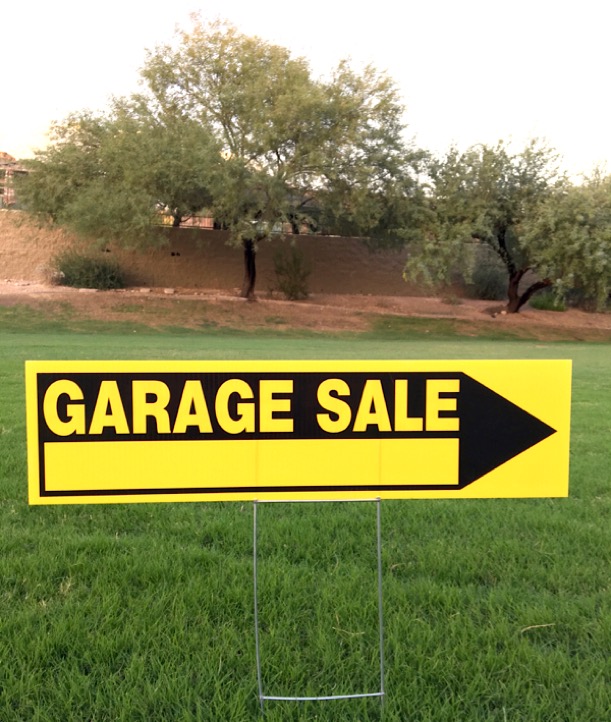
Heather said: “I agree with many of the other posts. Our first home consisted of many family heirlooms and garage sale items. I also have used Savers and Goodwill to see if I can find decorating pieces. Another idea is that sometimes you can get items on clearance, new furniture pieces, at scratch and dent sales in many furniture stores. I also agree with idea of painting to make your new home feel warm and inviting. A little paint is the first way to give it a clean, new feel and it is budget friendly. I also use Craigslist and now I am very excited to try freecycle. Thanks for sharing the link.”
Joy said: “Thrifty stores and garage sales are great places to find inexpensive furniture and things for your home. Another great place is to check craigslist and your local newspaper for free or under $100 items. Watch curb sides for “free items” as well. Think outside of the box…. can it be repainted, slip covered or used for another purpose. I’ve done this a lot over the years.”
Annie said: “I found a floor model curtain on clearance. I cut it in half, making two curtains from the one, then stitched it up. Now I have expensive looking lined curtains for a fraction of the cost. I paid about $12.00 total!”
Kasey said: “If your windows turn out to be odd sizes, you can use inexpensive sheets from Walmart to make attractive curtains.”

Peg said: “Always ask your friends and family for unwanted items. I am having a second ‘Recycle Party’- friends and family bring their unwanted housewares and we swap. Last one was such a success, I decided to do another one.”
Pam said: “Freecycle! One member in my area was trying to landscape her very bare yard from Freecycle.”
April said: “I made curtain rods for my whole house (i have an 1800 sq. ft. house with lots of windows) out of 1/2 inch metal conduit. it was $2.10 for 10 ft. they will cut if for you for free at home depot and lowes. i ended up buying 5 pieces of conduit for the whole house. i also bought packages of wooden rod brackets for about $2 each and a 2 pack of wooden finials for about $2 each also. i then bought spray paint and a clear prptective coat for all the rods. i just spray painted everything the same and it looks great! i will never go back to buying the traditional stuff again! i also used clearance tablecloths from target ($4 for a 60×84 piece of fabric – they ahve some really pretty stuff) for curtain panels and then just used some coordinating fabric at the bottom to lengthen them. i attached them with no-sew hem tape. the most expensive thing for this whole-house project was the spray paint. be creative and think outside the box. they are NO RULES when it comes to decorating. you need to like the way your house looks and works for you!”
Demaree said: “We made a faux headboard with wallpaper and crown molding. I chose a simple pattern with vertical stripes for the “headboard” and we mounted it right on the wall (about 4-1/2 feet high and just beyond the width of the mattress frame). We painted the rest of the walls a complimentary color and framed in the wallpaper with crown molding. Very cheap and it looks great!”
Amy said: “If you don’t care whether things are new or not, check out garage sales or get things from family when they’re upgrading. My fiance and I registered for a really nice $300 kitchen cart, and ended up getting a similar one for free from my sister when she and her husband were making room for their 2nd baby.
We also get things one at a time…doesn’t make it seem as expensive.
Set aside a savings account now that you put a certain amount of money in every month and designate it for something in particular (for example, the new couch or kitchen table you’re wanting.) When you have enough money, you can buy it and it doesn’t feel like you’re out $1000 or whatever because you had been saving the money just for that.
Target often has coupons in the newspaper for a free $10 giftcard with a new prescription. I have a lot of medical conditions and fill a lot of prescriptions. My doctor is willing to write me a new prescription every month (rather than give me refills) so I can use the coupons. We save them up for “big” purchases rather than getting $10 off here, $10 off there, etc. We also watch the clearance purchases: we registered for a $120 bread machine and found it on clearance at Target for $40.
Finally, watch for really good deals and take advantage of coupons, price matches, etc. We also registered for a $550 Dyson animal vacume. One week it was on sale at Sears. Target price matches other print ads, so we took it there. I also fill prescriptions at Target, and for every 5 prescriptions you pay for on your Target credit card, you get a 5% off coupon to use. You also get 5% off every time you use your Target card. Finally, we had $210 saved up in $10 gift card (yes, 21 giftcards!!!) that we applied to the vacume. We ended up getting the $550 vacume for $251 (and we also got a bag of cat food!) It takes time and you have to really watch the ads, but it saves a lot of money!!”
Diana said: “I once heard keep your motif the same throughout your house. That way the lamp,curtains,pillows ect. in the den can also be moved to the livingroom and either one of the bedrooms! Have Fun! And Keep it Simple!”
Cathy said: “In our area, we have Goodwill Outlet stores which offer decent furniture ( or repairable/paintable) for a few dollars per piece. Also, the Salvation Army runs specials on furniture (half off every other weekend in our area). Once you have the essentials, I am a devout garage saler.“
Carol said: “Habitat for Humanity also has cool stores called Re-stores in most major cities. Pieces are donated to Habitat and then sold at really low prices and vary at different stores. Some are heavy on construction type materials and some go as small as dish sets, but almost all carry really interesting furniture. I grab a couple nice pieces and then fill in with more simple pieces from IKEA, etc. Plus this goes to a good cause then.”
Clair said: “Check out the Gently Used/Recycle stores in your area. Habitat for Humanity also has ReSale stores with items in excellent condition very reasonably priced. In our area the City has a 2 Good 2 Recycle website where great stuff is listed at no or very little cost. In some cities, the local Home Building Association may have a Surplus Sale where you can get items from contractors and local members for Cheap!”
Sheri said: “Look in the paper and online for estate auctions. Often you will find sturdy furniture that is made of real wood (instead of particle board and MDF) ffor a fraction of what you would pay new.”
Cate said: “Don’t forget Auctions & Estate Sales, super cheap…[My mom’s furniture was appraised for auction value for estate purposes.. and I’m telling you – it’s undervalued, but they have to consider the price range for auction value] but, I’m right up there with thrift stores, ReStore Habitate; Goodwill, Salvation Army — but also be sure to look at the quality of furniture construction! Some antiques are priced less than new furniture & will last many times longer due to quality of construction.”
Lori said: “Stop at the thrift shops in your area, habitat for humanity, and other local re-sale shops. I bought lots of furniture, nick nacks, pictures, dishes when I first bought my new home…as for couches, loveseats, etc., I bought them second ad online, or at the thrift shop and got some slipcovers, inexpensive pillows, etc….great deals and it will make your house a home”
Jackie said: “I learned in a decorating program that you can make a room look taller by hanging your curtains just below the ceiling. After 22 years in my home, I finally hung new curtains the full length of my wall and it does make the room look taller!”
Anna said: “Look at Goodwill or Salvation army…. But not the normal ones. Look for those close to military bases. The boys and ladies in Blue and green move allot. I had a friend that got a 5 piece living room set in leather for 500. Military folks would rather give it away than pay storage when going over seas.”
Andrea said: “Having 5 kids keeps me on a very tight budget. One thing I did when my baby girl (who is now 7) was moving into the room with her sister, I took her bedding (comforter and the bumper thingy that goes around the crib) and had my friend make them into throw pillows for their beds… So I only had to spend a couple of dollars on needle, thread and batting for my friend to make them and they came out great. I also took the bed skirt (crib skirt or whatever) and turned into valances for the kids windows in their room.”
Darla said: “Repurpose! When hitting garage sales or thrift stores, don’t just look at what something is, look at what it has to potential to be. Taking something old and giving it a coat of high gloss black paint will make old and dreary look new and modern. This includes furniture, frames, mirrors and lighting fixtures like chandeliers. Be sure to use good painters tape to tape off areas that don’t need painting.
If you get a piece of furniture that needs new fabric, rip all the seams and use the pieces for patterns to cut out and resew new covers.
For art work, break out your digital camera and create your own. Take it to your local wal mart and have the images blown up to a good art size. Find a frame with a mat and repaint it (even the mat) and size the photograph to fit. This is cheep and personal art.”
CC said: “I’m the director of the St. Vincent de Paul food bank where I live. Our food bank and social services are largely dependent on sales from our Thrift Store. We get amazing items from antique dishes and decorative collections, furniture, silk flowers and appliances. Familiarize yourself with your local 2nd hand stores if you haven’t already, and remember, if it’s affiliated with a food bank or other social service in the community, you are also benefitting the poor.”
Tracey said: “New matching towels, even from Target and Kohl’s, in the bathrooms can make you feel like a million bucks and looks so nice and put together.”
Christine said: “One thing that wasn’t mentioned that on occasion worked for me when I was moving and was tight on funds is searching high end neighborhoods when it’s the curbside trash day for larger items. A lot of times (at least where I live – an affluent neighborhood), the stuff is barely used and someone is getting rid of it because they’re redecorating. Typically these items will be of better quality as well. For upholstered items that are structurally sound and have good “‘bones” and padding, I will take a shampoo-er to it. If I don’t like the color or pattern, but do like the shape, I will purchase a nice quality damask patterned slipcover in a color like cream. This is a small investment for a high dollar item and helps me have the patience to save for the item I really, really want later on. Oh, and don’t forget to check neighborhoods that have a high turnover in residents, areas such as colleges and apartments.”
Chrissy said: “Our local Dollar Tree has a great selection of glass candleholders/dishes and decorative stones (flat colored glass marbles and various natural colored stones). These will go for at least $5 a bag elsewhere–I’ve bought a few different bags and switch them out each season or two.”
Michelle said: “Shop thrift stores, consignment stores and garage sales! There are many Facebook groups that have started that are online type garage sales. Look for one in your area! Furniture can be repainted to fit your style!”
Jan said: “Once you decide on what style you want, make a list and hit thrift stores, yard sales and flea markets. You can find amazing bargains on all kinds of things. Have fun!!”
Sabrina said: “Also, always check out the Target clearance on the end caps! I’ve gotten so many good deals at Target!”

Lisa said: “Get to know the sales cycles at your local big box, and save up for clearance. I have gotten AWESOME deals on lighting and plumbing fixtures!”
Rachel said: “Better Homes and Gardens now offers a Color Finder tool which lets users upload photos and try paint colors in their own rooms!”
Lori said: “Until we could afford real art work, I framed scrapbook paper and hung it on the walls in several rooms. I look back at those pictures now and almost wish I still had that on the wall. Very pretty and very inexpensive. I got a lot of compliments.”
Donna said: “I’m always taking outdoor pictures wherever we go. I print and frame the ones I really like, and receive many compliments over them + they are always special. It’s nice when someone gets enjoyment out of the same things I do!”
Deborah said: “You can use boxes, stacked and covered with a cloth for end tables until you can get what you really want!”
Lorie said: “I love browsing Ross and DD’s Discount (a sister store of Ross). If you take your time, you can really find some beautiful, unique & stylish accessories for your home. I have furnished my new home with a lot of iron decor, metal vases/pots,etc. Large pictures & clocks, even dishes can be a great find. If I didn’t share my shopping secrets with my friends who have seen my home, they would never know most was purchased at discount stores. Look things over carefully to make sure if damaged, its slight & out of sight…. Happy Shopping!”
Kimberli said: “I’m doing this right now myself. I have found that sometimes you HAVE to spend some money. My mattress set cost me 600 dollars. But, I don’t have a bed frame right now and this works for me till I can find a good deal. Sometimes you can get something that is supposed to be for something else and use it. My nightstand it supposed to be a living room end table. My kitchen table and chairs I bought for 48 dollars at Walmart… it’s supposed to be an outdoor furniture set. But nobody knows this until I tell them.
Right now I’m on the lookout for a hideabed couch so my daughter can use the living room as her bedroom. I will also be getting a few plastic dressers for myself and her.
Also, keep in mind that a bad economy can be used in our favor. I bought my TV for 200 dollars at a going out of business sale! Just set a little money aside and wait it out, patience is the game here and having an eye for what really pleases you. Don’t choose something ugly just because it’s cheap. Unless you know you can make it over for cheap too. Like if you don’t need a hideabed couch and you find a really tacky coach you could get that and cover it yourself with a beautiful sheet. But, make sure you know how to cover it so that it looks intentional or else you just made a bad situation worse.”
Wendy said: “Buy Postcards or Bigger size Pictures, look for interesting picture frames at Garage Sales (even if they need to be painted).
You can find Michaels, Hobby Lobby and other Craft Stores that will have 50% off Frames (GO ASAP since they don’t last).
Splurge on the Matting for the picture. They also have Poster size pictures at the Craft Stores. My first set of pictures were 5×7 Impressionistic paintings that I had framed in 8×10 frames and the pre-cut matting ( I saved a bunch and got sooooooo many compliments!!.
Also, Paint is Cheap, Paint your walls, furniture from garage sales. As Nate Burkus says “You want your home to look as if you acquired your things over a period of time”
Also, If you don’t ABSOLUTELY LOVE something, Don’t buy it, you will regret it. Good Luck”
Marian said: “Forget EVERYTHING and go buy paint. That is the easiest, cheapest way to add character to your home, not stuff. Walmart’s Kilz satin paint is top rated by consumer reports. When you have selected your colors and painted, everything else is icing on the cake. That’s when you start shopping at yard sales, antique stores, hobby lobby, salvation army, and so on.”
Laura said: “My biggest piece of advice – be willing to do it a little at a time over a period of time with an idea of your end goal. If you want to do it all at once, you probably will spend more money.”
Holiday Home Decor Tips on a Budget
Christmas Decorating Ideas
It’s never too early to start thinking about Christmas… or decorating for Christmas, right? Let me help you turn your home into a cozy Christmas Cottage and gorgeous Winter Wonderland with these inexpensive and frugal Christmas Decorating Ideas!
Organized Homes
Home Organizing Tips and Tricks For Every Room
Nothing beats coming home to an organized home! Put these Home Organizing Tips and Tricks to use and you’ll love the results!
Save $$ Around the House
Store Deals + Shopping Hacks That Will Save You So Much Money
Frugal Girls LOVE great deals! Before you shop for Home Decor, check out these Insider Tips + Shopping Hacks that will save you so much money at your favorite decor and home improvement stores!!
More Home Decor Tips and Tricks
11 Home Staging Tips! (How To Sell Your Home Faster)
I’ve got some proven Home Staging Tips to share with you, that are going to make selling your home so much easier!
10 First Time Home Buyer Tips (What to Know Before You Buy)
These simple tips and tricks are designed to put you at ease and help you with all of those little details when buying a house for the first time.

So have you tried any of these Budget Home Decor Tips?
Leave a comment and share…


Nice